MCP Access
The Access page is the starting point for App MCP. Before you can use tools or prompts from your IDE, you must generate an API token and install the MCP server connection.
Select MCP > Access in the left sidebar. The page has two tabs: My Tokens and Users. The Users tab is only visible to administrators.
My Tokens tab
The My Tokens tab shows your personal token status and lets you generate or revoke your token.
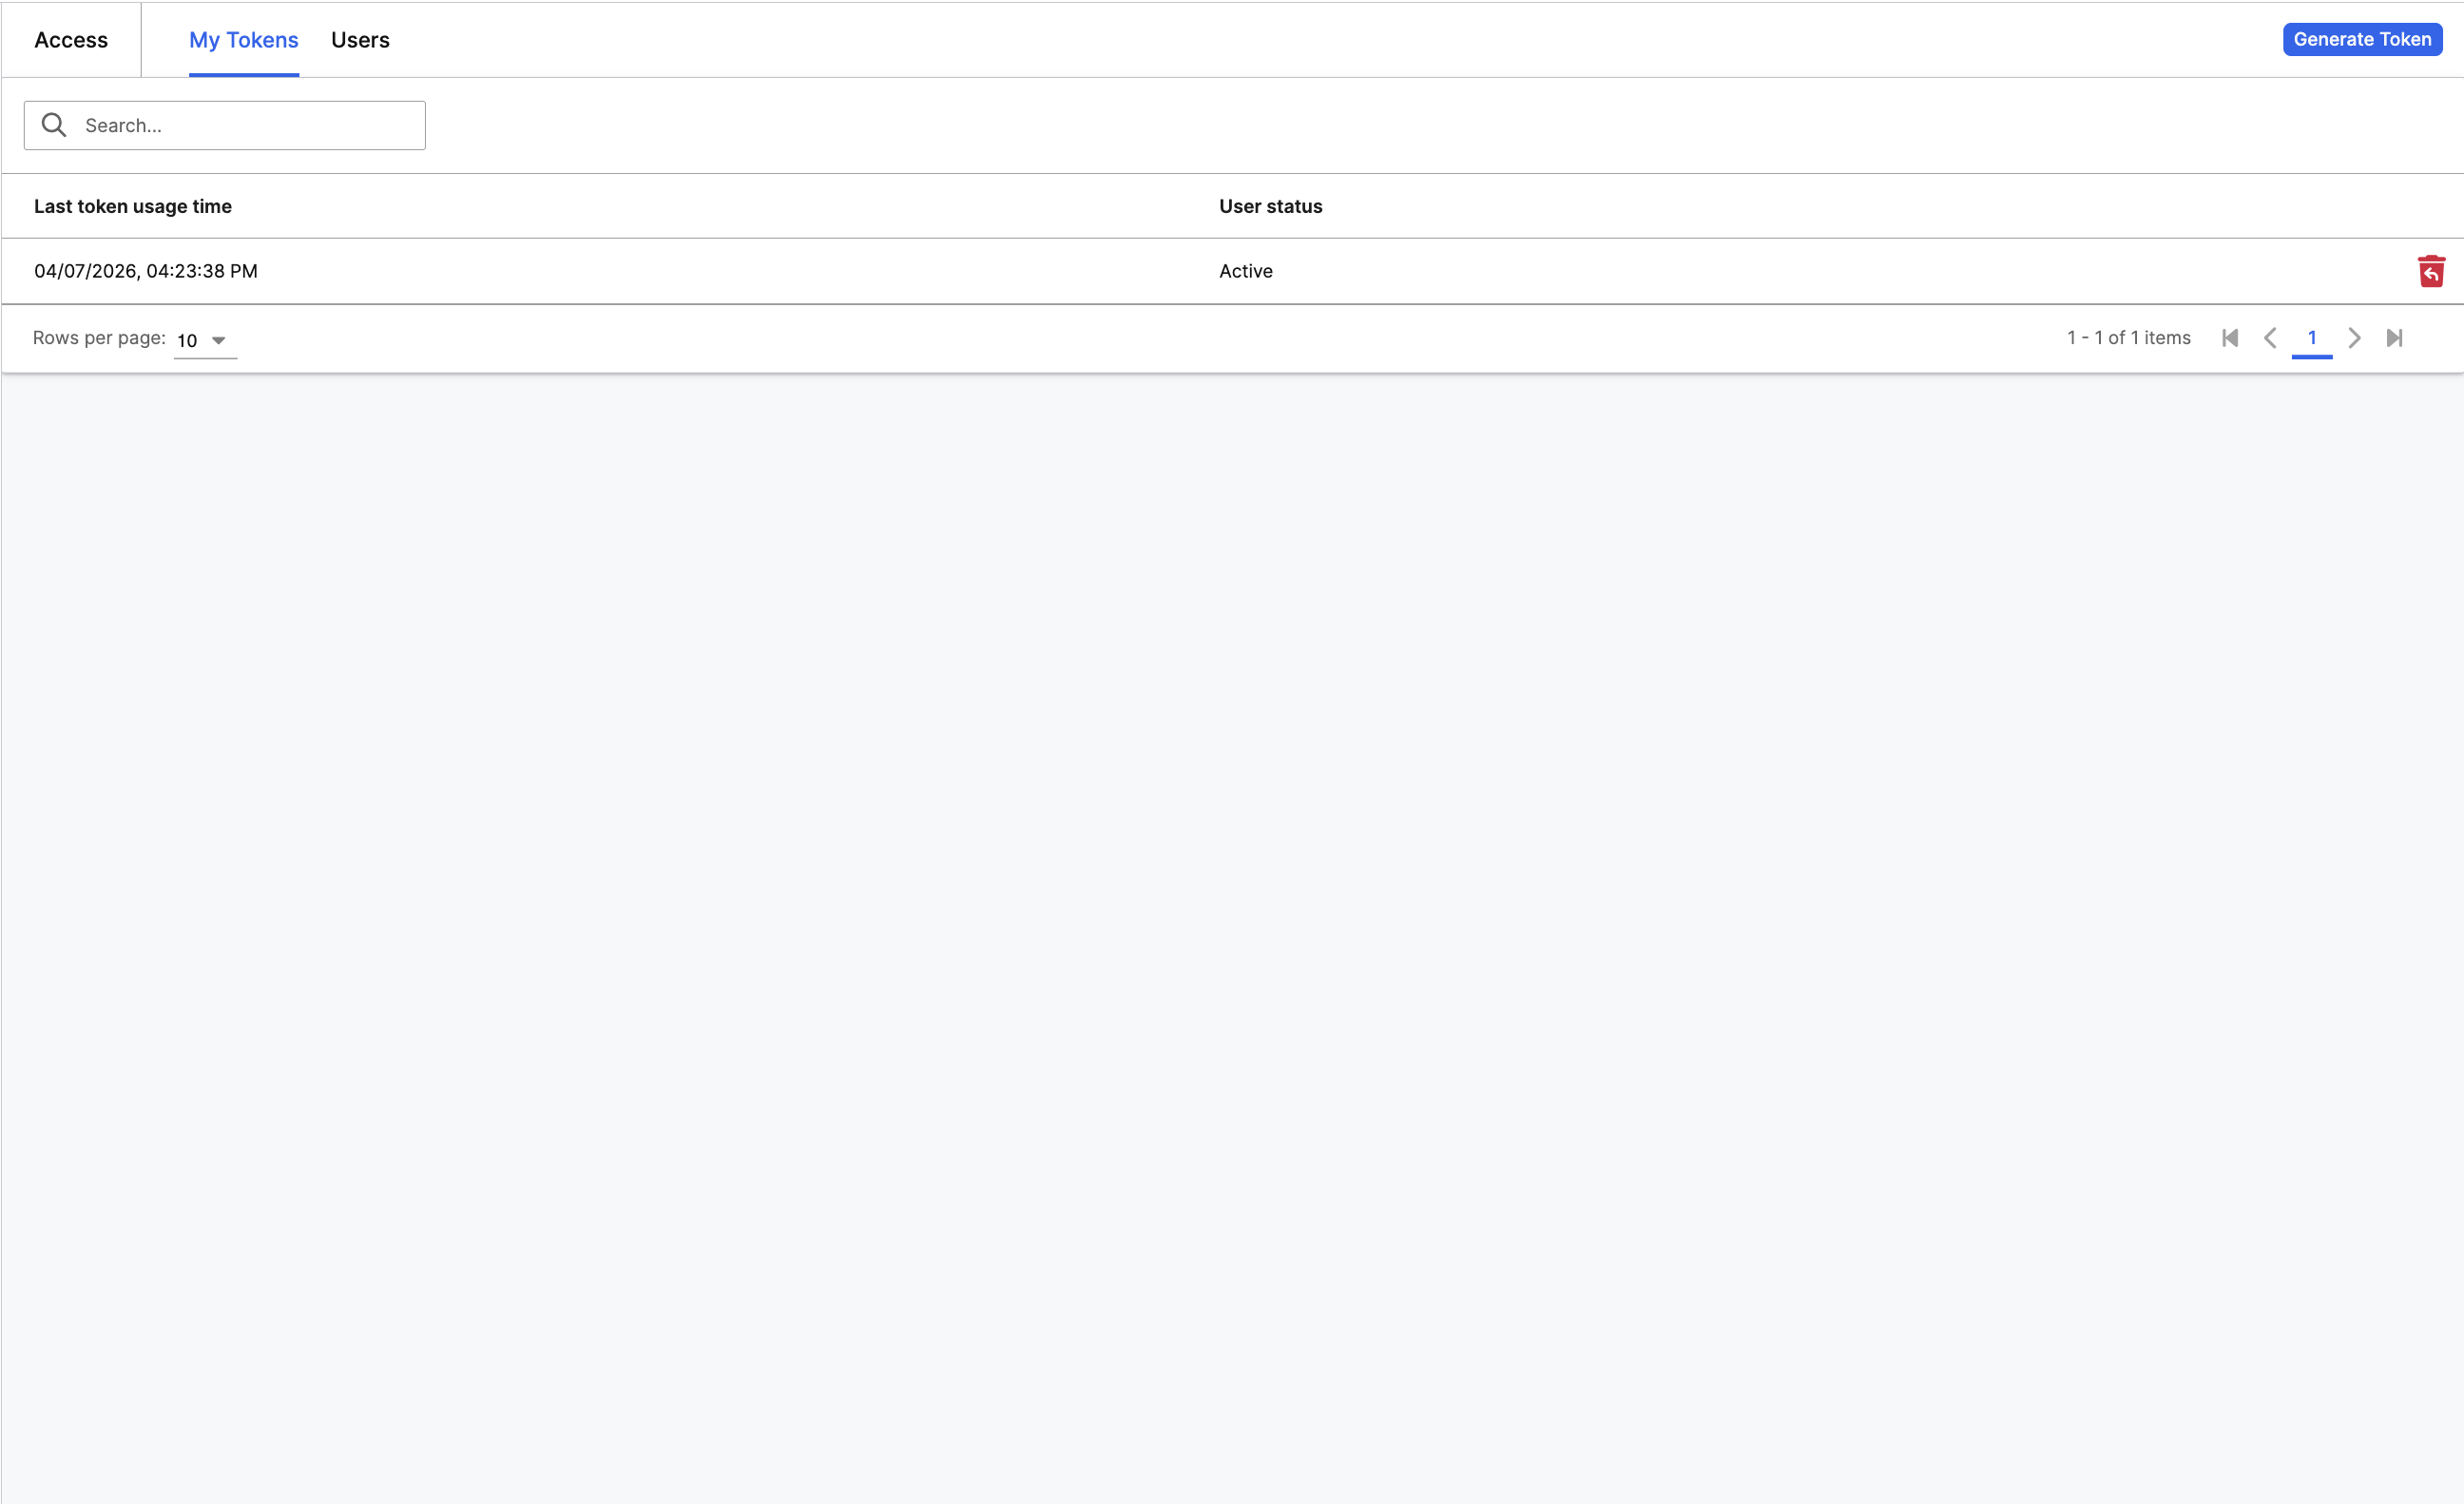
Your token row shows whether you have an active token and when it was last used. If you have never generated a token, your status shows as Inactive.
Generate a token
To connect a coding assistant to your App MCP server:
Select Generate Token
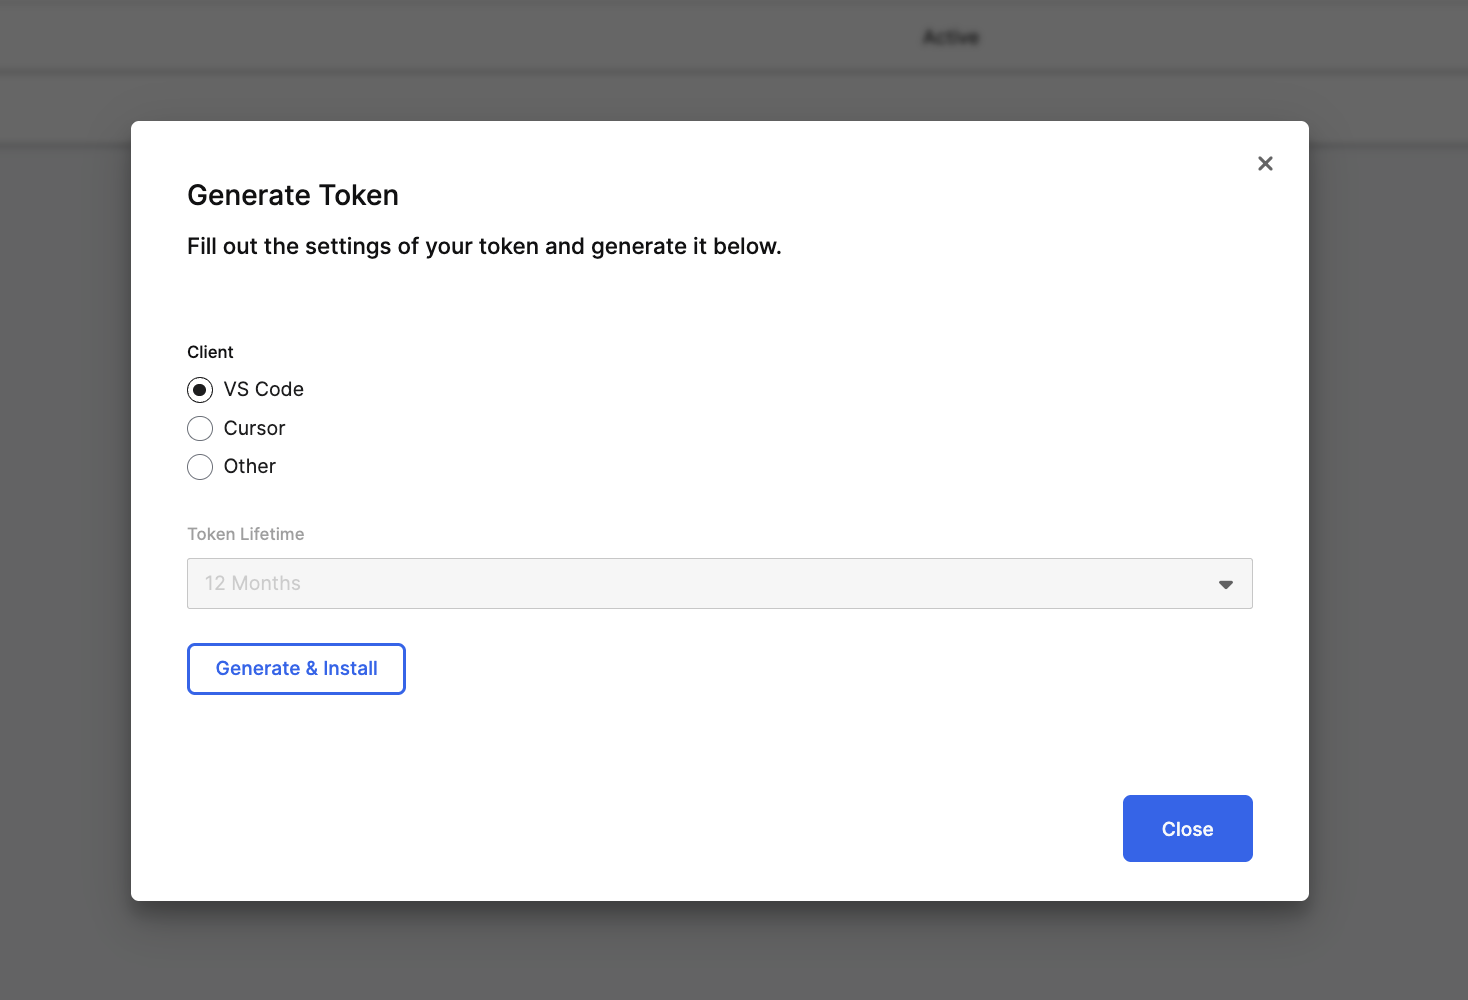
Choose your IDE client: VS Code, Cursor, or Other. Selecting VS Code or Cursor enables Generate & Install, which creates the token and opens the IDE installer automatically. Selecting Other generates the token only — you must copy the server URL and token and add them to your IDE's MCP configuration file manually.
The token lifetime is fixed at 12 Months.
For VS Code or Cursor, select Generate & Install to configure your IDE automatically. For Other, select Generate Token, then copy the displayed server URL and token into your IDE's MCP configuration.
When you select Generate & Install, the browser opens a deep link that passes the server URL and token directly to your IDE. The IDE registers the MCP server connection automatically.
Generate Token is disabled when you turn off the MCP server. Enable the server from the MCP > Tools page header toggle before generating tokens.
Verify the connection
After installing, confirm your IDE configuration includes the MCP server.
VS Code: Open mcp.json in your project root. You should see an entry like:
{
  "servers": {
    "YourServerName": {
      "url": "https://<cluster>/<env>/<app>/mcp/server",
      "headers": {
        "Authorization": "C3Bearer <token>"
      }
    }
  }
}Cursor: Open Settings > MCP to see the registered server.
If the entry is missing, you can add it manually. Select Other as the client when generating a token, then copy the server URL and token into your IDE's MCP configuration file.
Revoke your token
- In the My Tokens tab, select Revoke Token from the row actions.
- Confirm the revocation in the modal.
- Your status updates to Inactive and any connected IDE loses access immediately.
Users tab
The Users tab is available to administrators. It shows the token status for all users who have generated a token.
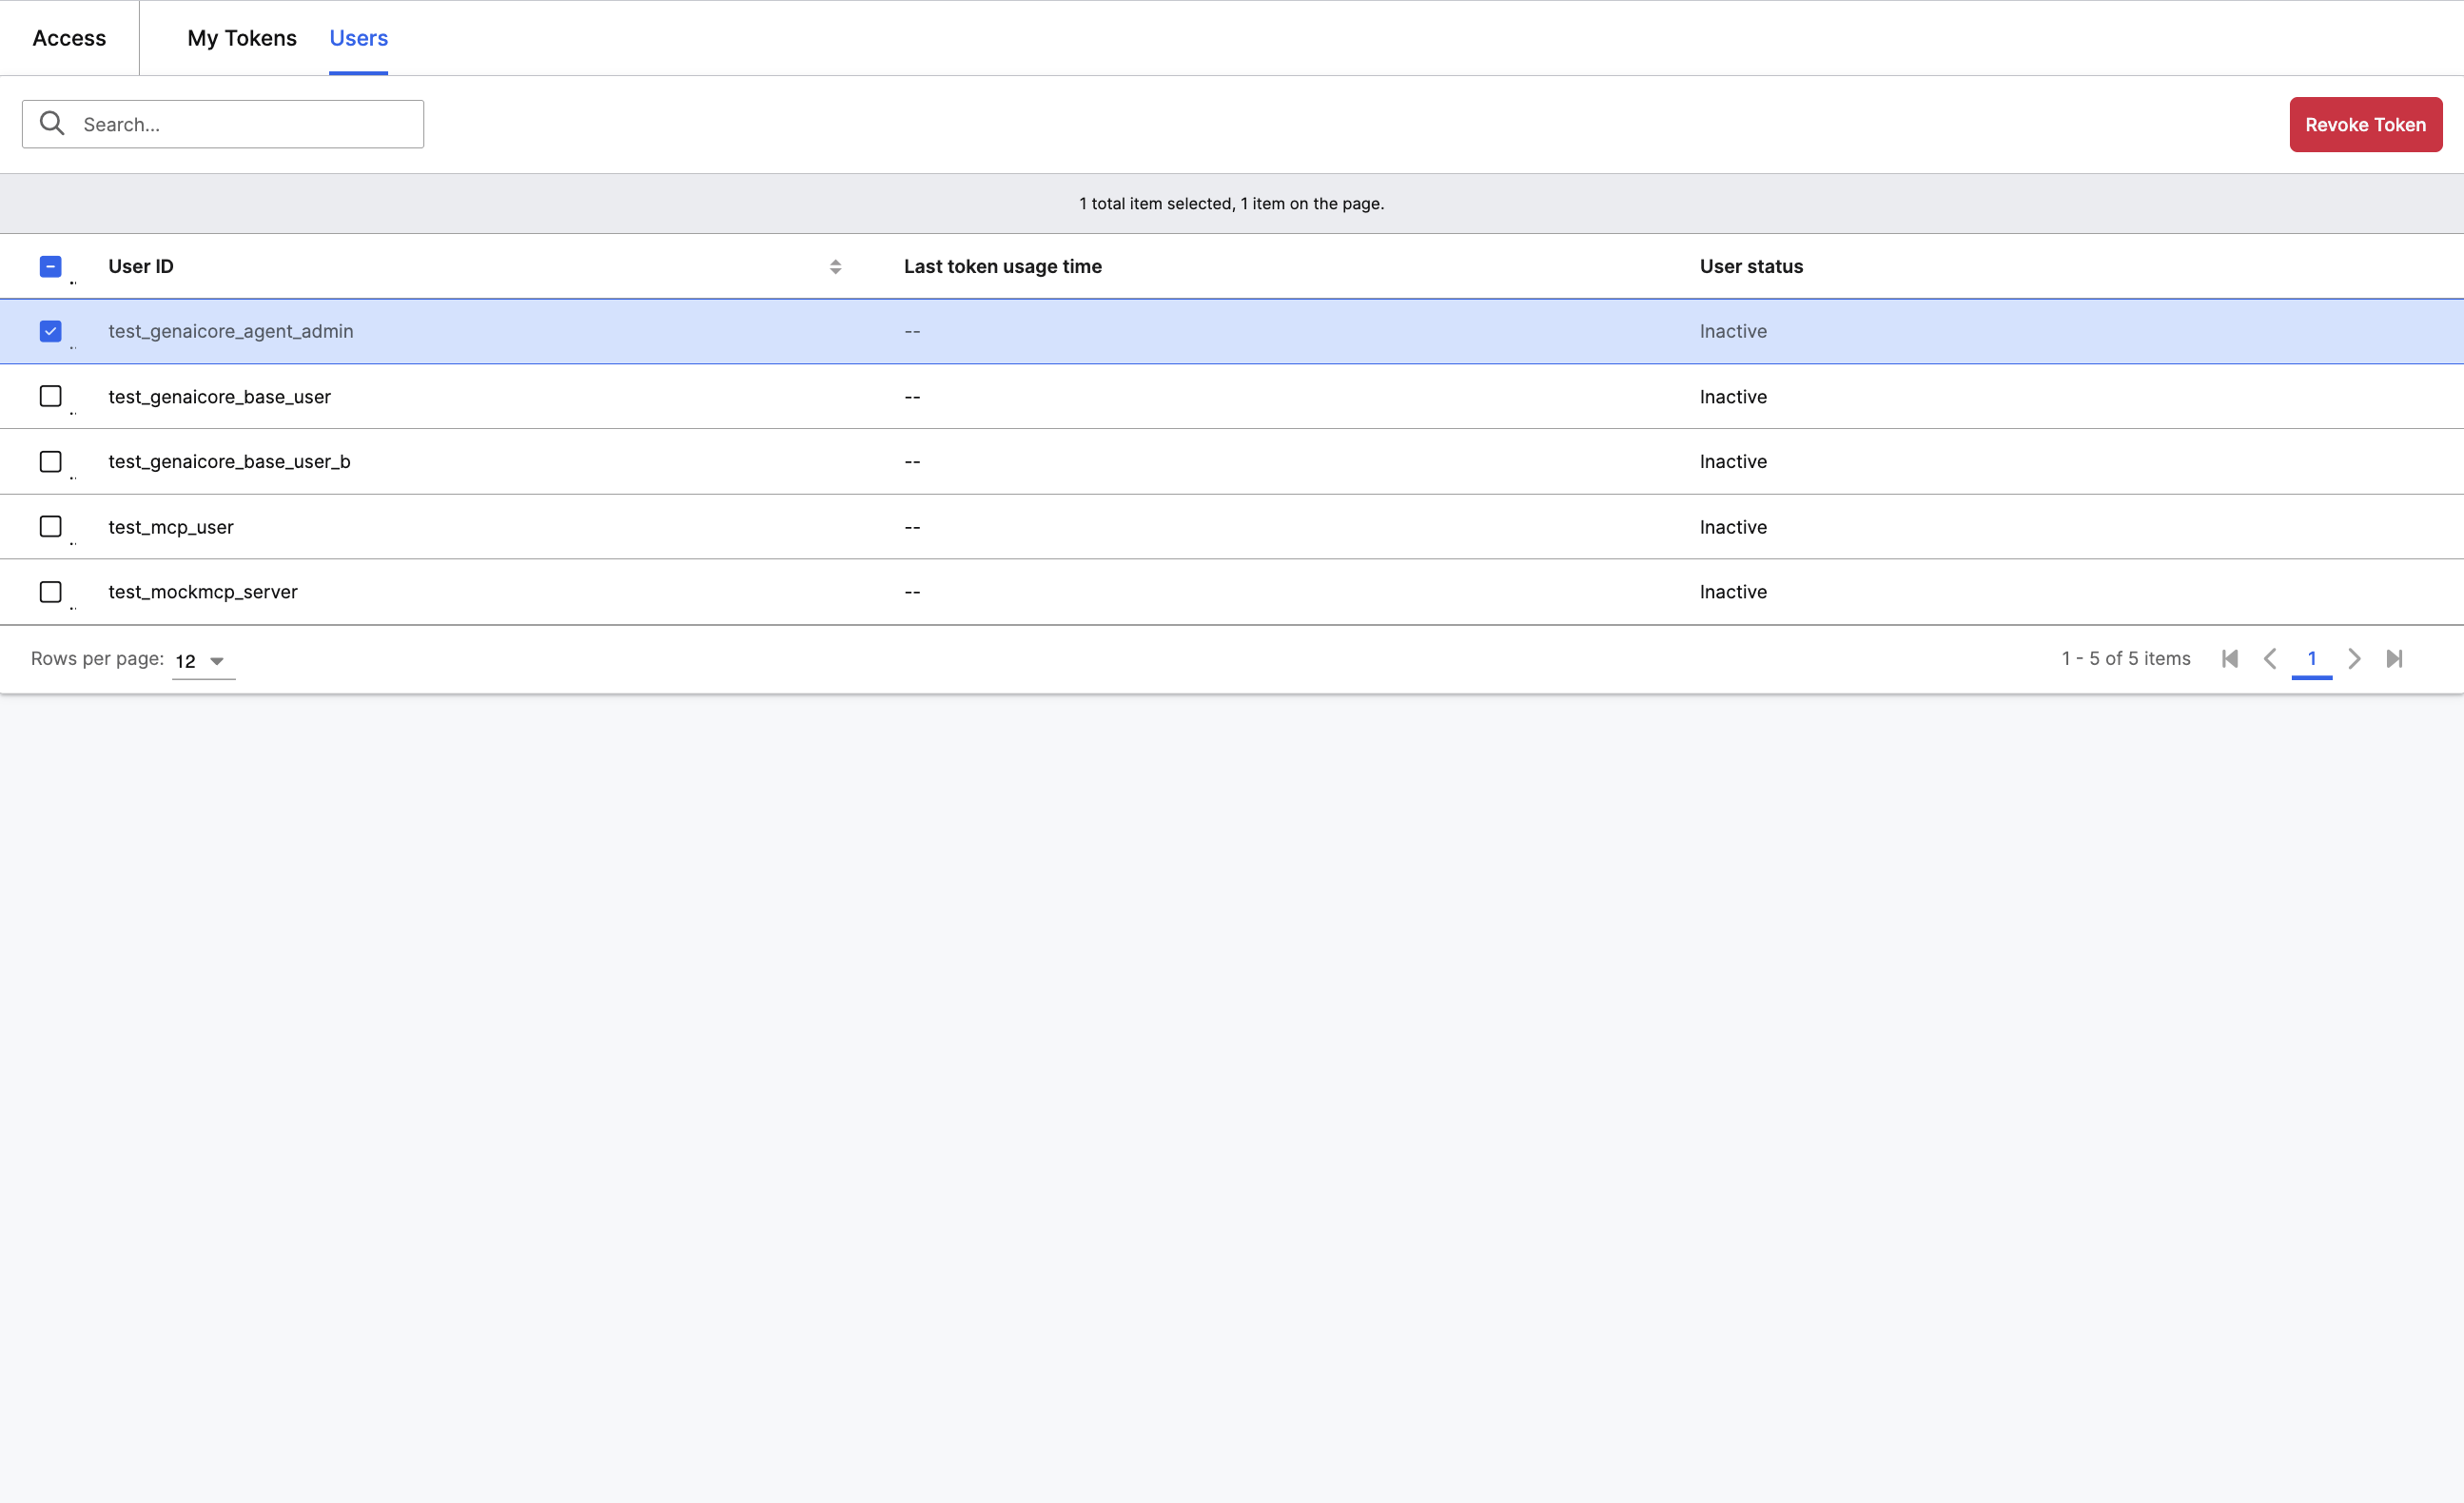
From this tab, administrators can:
- View each user's token status and last usage time
- Revoke a single user's token from the row actions
- Select multiple users and revoke their tokens in bulk
Revoking a user's token immediately terminates their active MCP session. They must generate a new token to reconnect.
Best practices
- Treat tokens like passwords. Do not share tokens across users or store them in version control.
- Review stale tokens. Periodically check the Users tab for tokens that have not been used in 30+ days. These may be safe to revoke.
- Revoke promptly. If a developer leaves a project or your organization decommissions an IDE, revoke the token immediately.
- Plan for expiry. All tokens expire after 12 months. Generate a new token and update your IDE configuration before the current one expires.