Set Up C3 Code
To build your own application, your quota needs space for one application and one workspace. To work on an application a colleague built, ask that colleague to add you. Nothing else is required first.
Two further connections complete your setup:
- Connect GitHub to hold your code outside C3 Code, where colleagues can review your changes and a scheduled deployment can build from a branch.
- Register an MCP server to give the agent live data from outside your workspace, through Model Context Protocol (MCP). It reads records from a system your team runs, or looks up current information from an outside service, while it builds.
Get the access you need
Your quota sets how many applications, workspaces, and deployments you can have at once, and how many tokens you can use each month. Tokens count the text going to the agent and the text coming back.
Building your own application: you need room for one application and one workspace. The My Usage and Cost page shows both counts against your limits.
Joining a colleague's application: ask your colleague to add you as a collaborator. C3 Code has no request form for joining an application, so the person who owns the application adds you directly. Being added also lets you create workspaces, and you still need room for a workspace of your own.
For requesting more quota from an administrator, see Request Access and Resources.
Connect GitHub to store your code
Your code stays inside the workspace until you connect a GitHub account and link a repository.
A connected repository provides three capabilities:
- A copy of your code outside C3 Code.
- Review by colleagues outside your workspace.
- A deployment that rebuilds from a branch on a schedule.
A connected repository also lets you add a second workspace to an application.
Connect whenever you are ready. C3 Code copies the application you have already built into the repository, so a repository added later includes all of your earlier work.
For connecting your account and linking a repository, see Connect GitHub.
Add an MCP server
Register an MCP server when the agent needs something your workspace does not hold. With one registered, the agent reads records from a system your team runs, or looks up current information from an outside service, while it builds. It works from that live source, instead of from what you paste into a prompt.
Registering a server once makes that server available to every workspace you own.
For adding a server and checking the tools it gives the agent, see Connect MCPs.
Find your settings
Both connections are on one page. Open Settings from your profile menu.
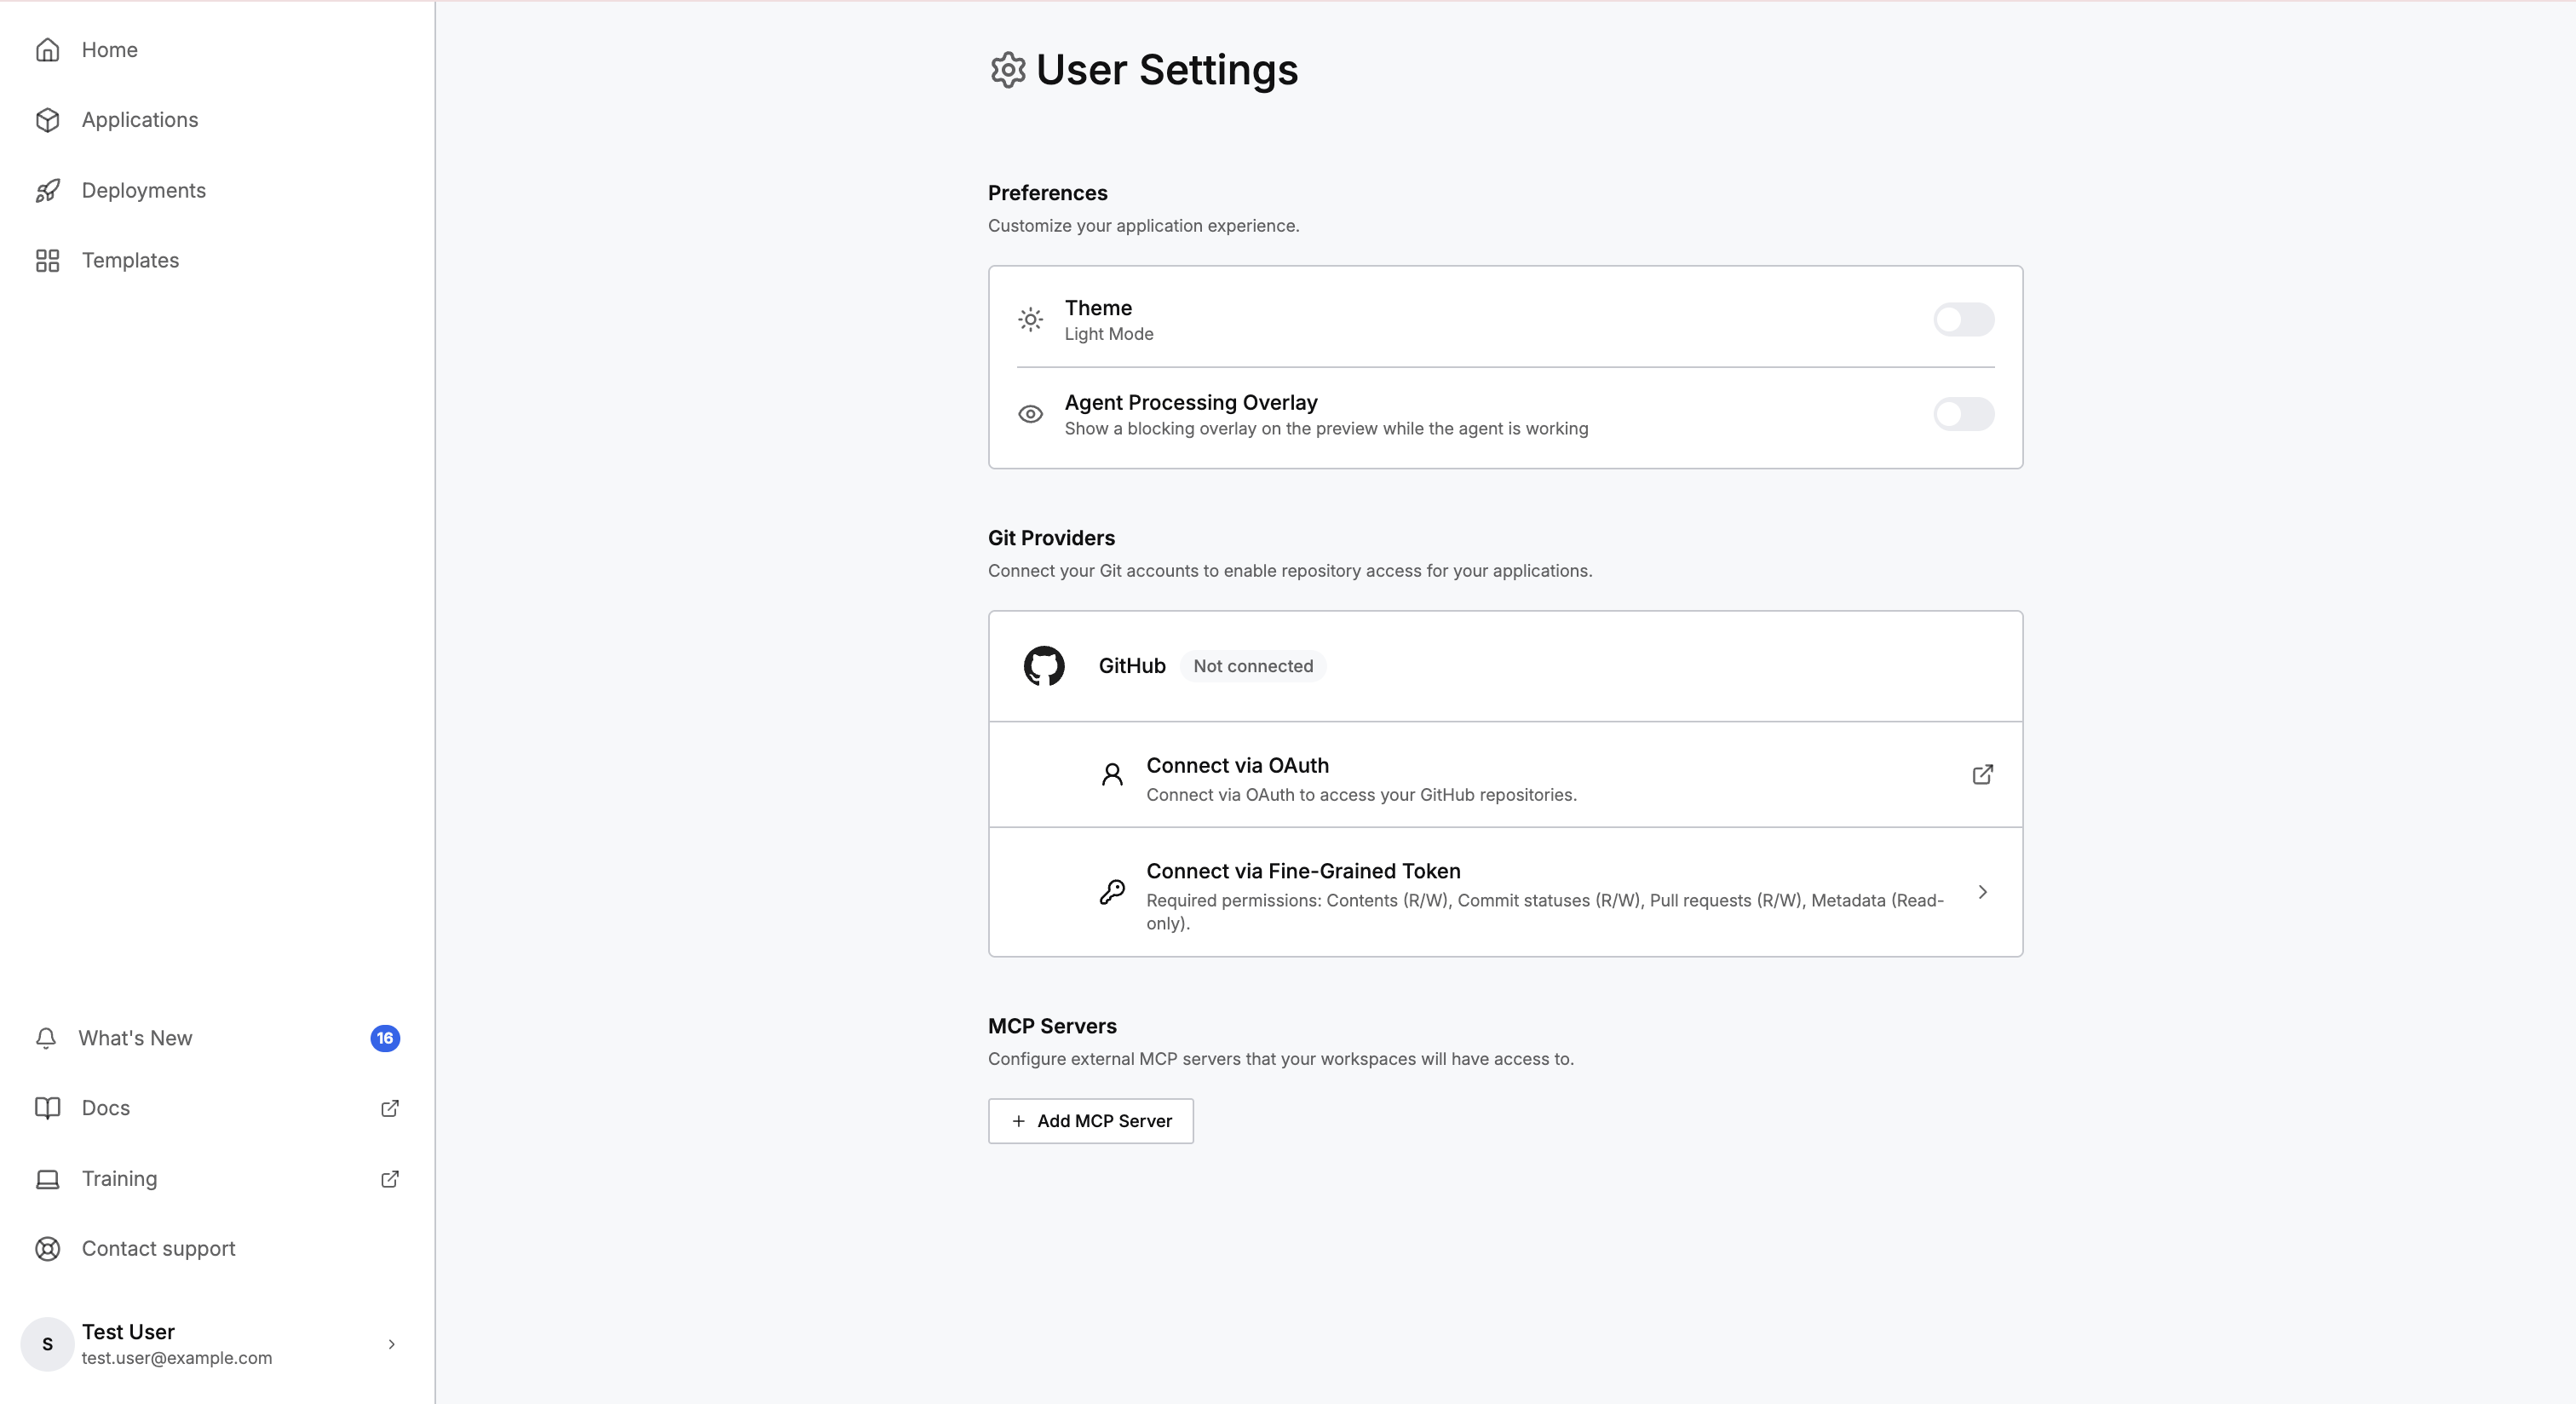
Preferences is on the same page. Preferences holds your theme, whether an overlay covers the preview while the agent works, and whether C3 Code sends detected errors to the agent to fix automatically. That overlay is off by default, so the preview stays usable while the agent builds.
These settings belong to your own account. Every colleague on an application connects a GitHub account of their own, and registers MCP servers of their own.
Check your setup before you build
Four checks confirm that you are ready:
- My Usage and Cost shows room under APPLICATIONS and WORKSPACES.
- Git Providers reports GitHub as connected, if you connected GitHub.
- Each MCP server you registered reports a connected status. Open the row for each server and count the tools listed. A connected status means the server answered. The tool list tells you what the agent can now do.
- After you have a workspace, select Configure in the workspace header and confirm the C3 AI Studio tools open. C3 AI Studio is the environment C3 AI provides for building and running applications, and those tools are how you connect your data and manage what runs.
For what each tool in Configure does, see Use Configuration Tools.
Where to go next
These pages cover each setup step and the first application: