Export and Import Agents
You built an agent in one C3 AI Agentix environment and want the same agent in another. The target might be a production environment you are promoting to, or a second cluster that needs the same setup. Export writes the agent and everything it depends on into a single portable file, and import recreates it in the target environment. You work from the Agents page: export a bundle from the source environment, import that bundle into the target, then provide the credentials the target needs.
Exporting and importing agents needs the Agentix.AgentAdmin role or higher. The Export and Import buttons appear on the Agents page only for administrators. See Roles and Permissions.
Export an agent
Export gathers the agents you select, together with everything they depend on, into one file you download. The Export agents dialog lets you pick which agents to include:
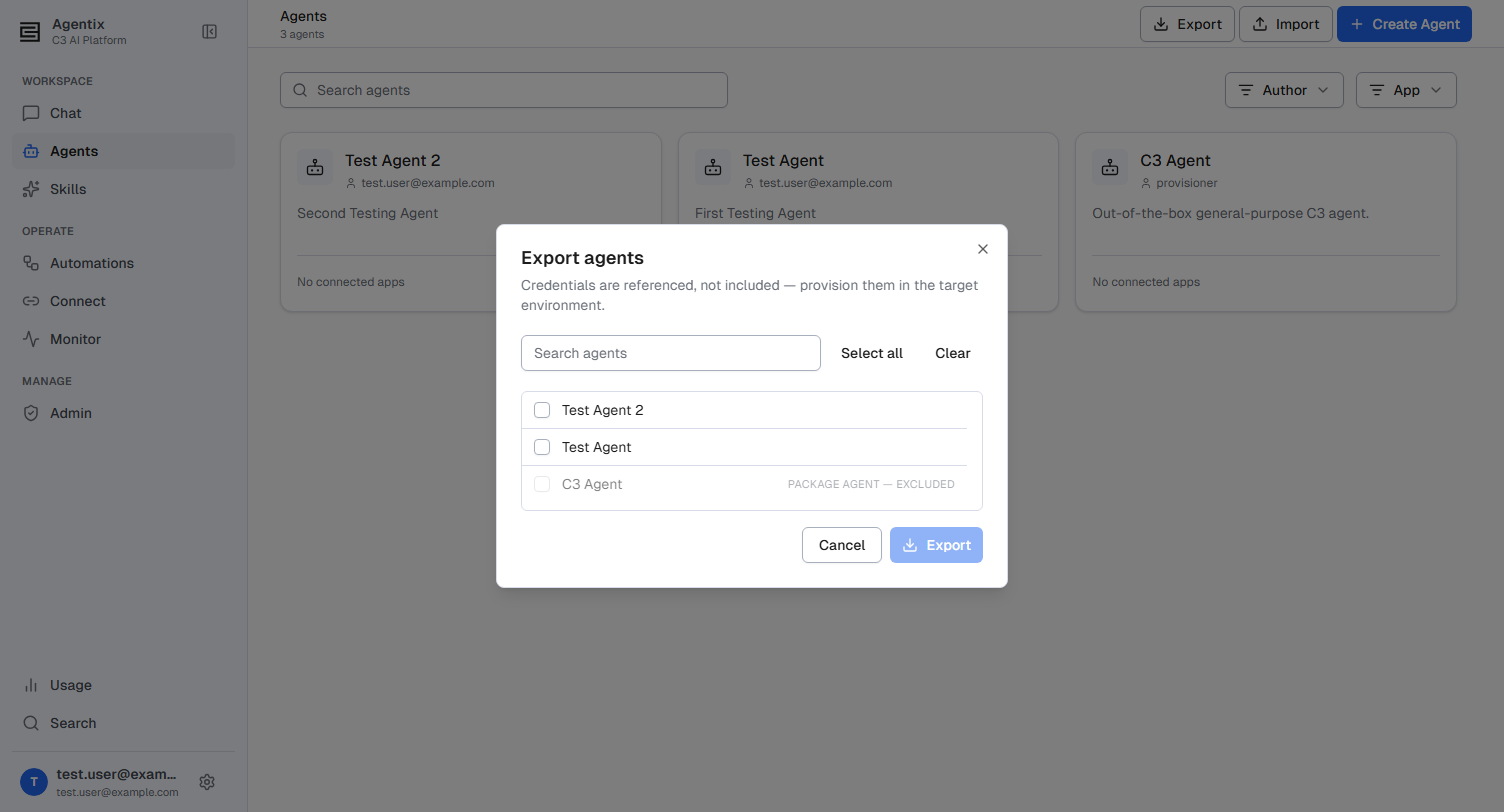
To export one or more agents:
- Open Agents from the navigation.
- Select Export. The Export agents dialog opens.
- Select each agent to include. The built-in C3 Agent and other package agents stay disabled and marked Package agent — excluded, because the target environment already provides them.
- Select Export. C3 AI Agentix downloads a file named
agent-config.yaml.
The bundle records which credentials each connection needs, not the secret values themselves, so you provide those in the target environment after import.
What the bundle contains
The agent-config.yaml file you downloaded is the bundle: one file that describes the exported agents and their dependencies. It carries five kinds of content:
- Agents: each agent's name, description, instructions, model settings, and its references to the skills, connections, and automations it uses.
- Skills: the global skills an agent uses. A skill is a reusable set of instructions an agent runs for a repeatable task. A skill that ships with C3 AI Agentix travels as a reference by name instead of a full copy.
- MCP connections: the non-secret configuration of each connection an agent uses. An MCP connection links an agent to an external system, such as a database or a REST API.
- Automations: each scheduled job that runs an exported agent on a timer.
- Plugins: the plugins an agent references.
The bundle never holds secret values. Passwords, tokens, and keys stay in the environment that owns them, and the bundle keeps only a reference to each one. You provide the matching credentials in the target environment after you import.
Import an agent
Import reads a bundle and shows you what it will change.
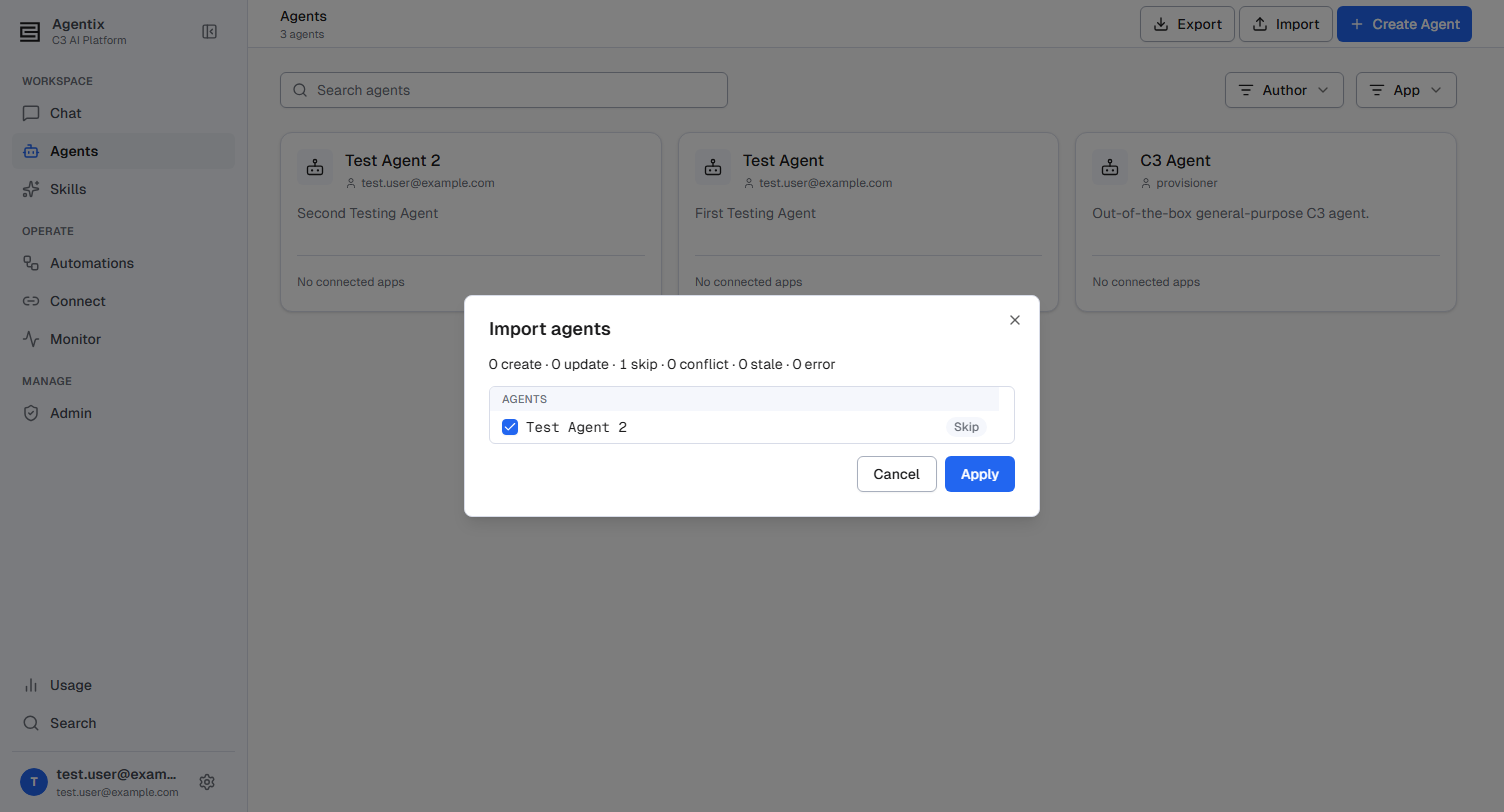
To import a bundle into the target environment:
- Open Agents and select Import.
- Drag the
agent-config.yamlfile onto the drop area, or select the drop area to choose the file. C3 AI Agentix reads the bundle and shows the preview. - Select Apply, then confirm. C3 AI Agentix creates and updates the included items in the target environment.
Each preview row carries one verdict that tells you what import does with that item:
- Create: the item is new to this environment, and import adds it.
- Update: an item with the same name already exists, and import replaces it with the bundle's version.
- Skip: the item already matches the bundle, so import leaves it unchanged.
- Conflict or Stale: the item in this environment changed after the export. Import holds it back until you choose to overwrite it.
- Error: the row needs something the target does not have yet, such as an automation whose agent is absent. Import lists the missing dependency and holds the bundle until you add it.
Import updates each existing item in place, so applying the same bundle again is safe and creates no duplicates.
Provide credentials after import
An imported connection arrives with its configuration but no password or token, because the bundle carries none. In the target environment, add the credential each imported connection needs, so its agent can reach the external system. See Connect Secrets.