Create and Schedule an Automation
You create an automation by talking to the agent. Give the automation a name, and a chat collects the rest: which agent runs it, its trigger, the apps it connects to, and what to do on each run. Agentix creates it once every required field is set. For what an automation is made of and how a run behaves, see Automations Overview.
Before you start
Settle these two first:
- Have your app ID ready. If the automation should reach a C3 application beyond the Agentix host app, know its ID in
cluster-env-appformat (for exampleplat-myenv-myapp). Agentix asks for an app ID if you have not connected one in this chat. - Write the task instruction for an unattended reader. It is the agent's first message on every run, with no one present to clarify — be as concrete as you would be in a written handover.
Start a new automation
You can start an automation two ways: from the Automations page, or from a chat you are already having. To start one from a chat, ask the agent to turn the conversation into a job. To start one from the Automations page:
Open Automations.
Select New schedule.
In the Create a new job dialog, enter a Job name. (You can rename it later.)
Select Start with Agentix.
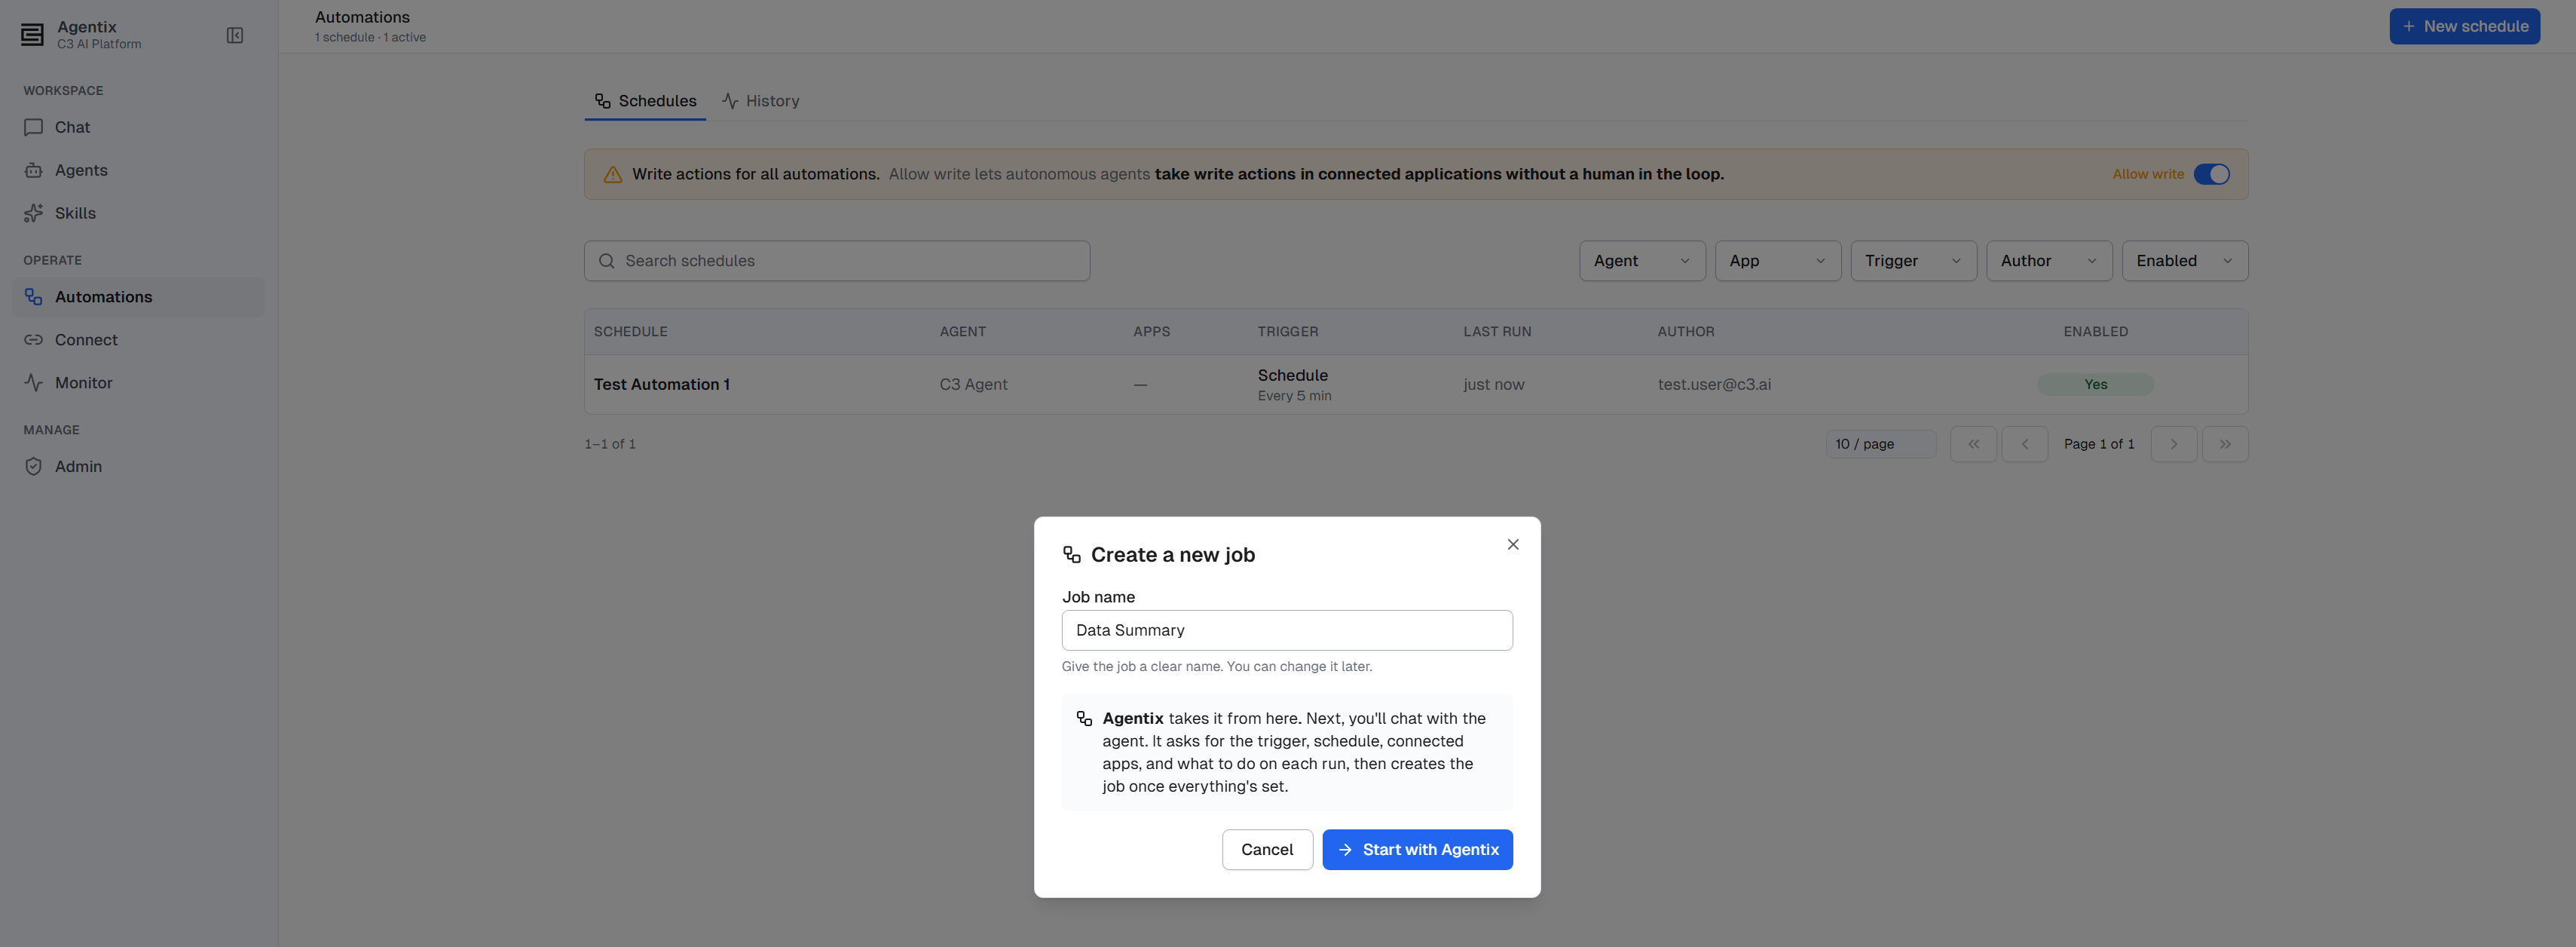
A chat opens where the agent collects everything else and creates the job once every required field is set.
From a chat, ask the agent to "turn this into a job" or "do this every morning." It derives the task and target apps from the conversation it started from.
Set up the automation in chat
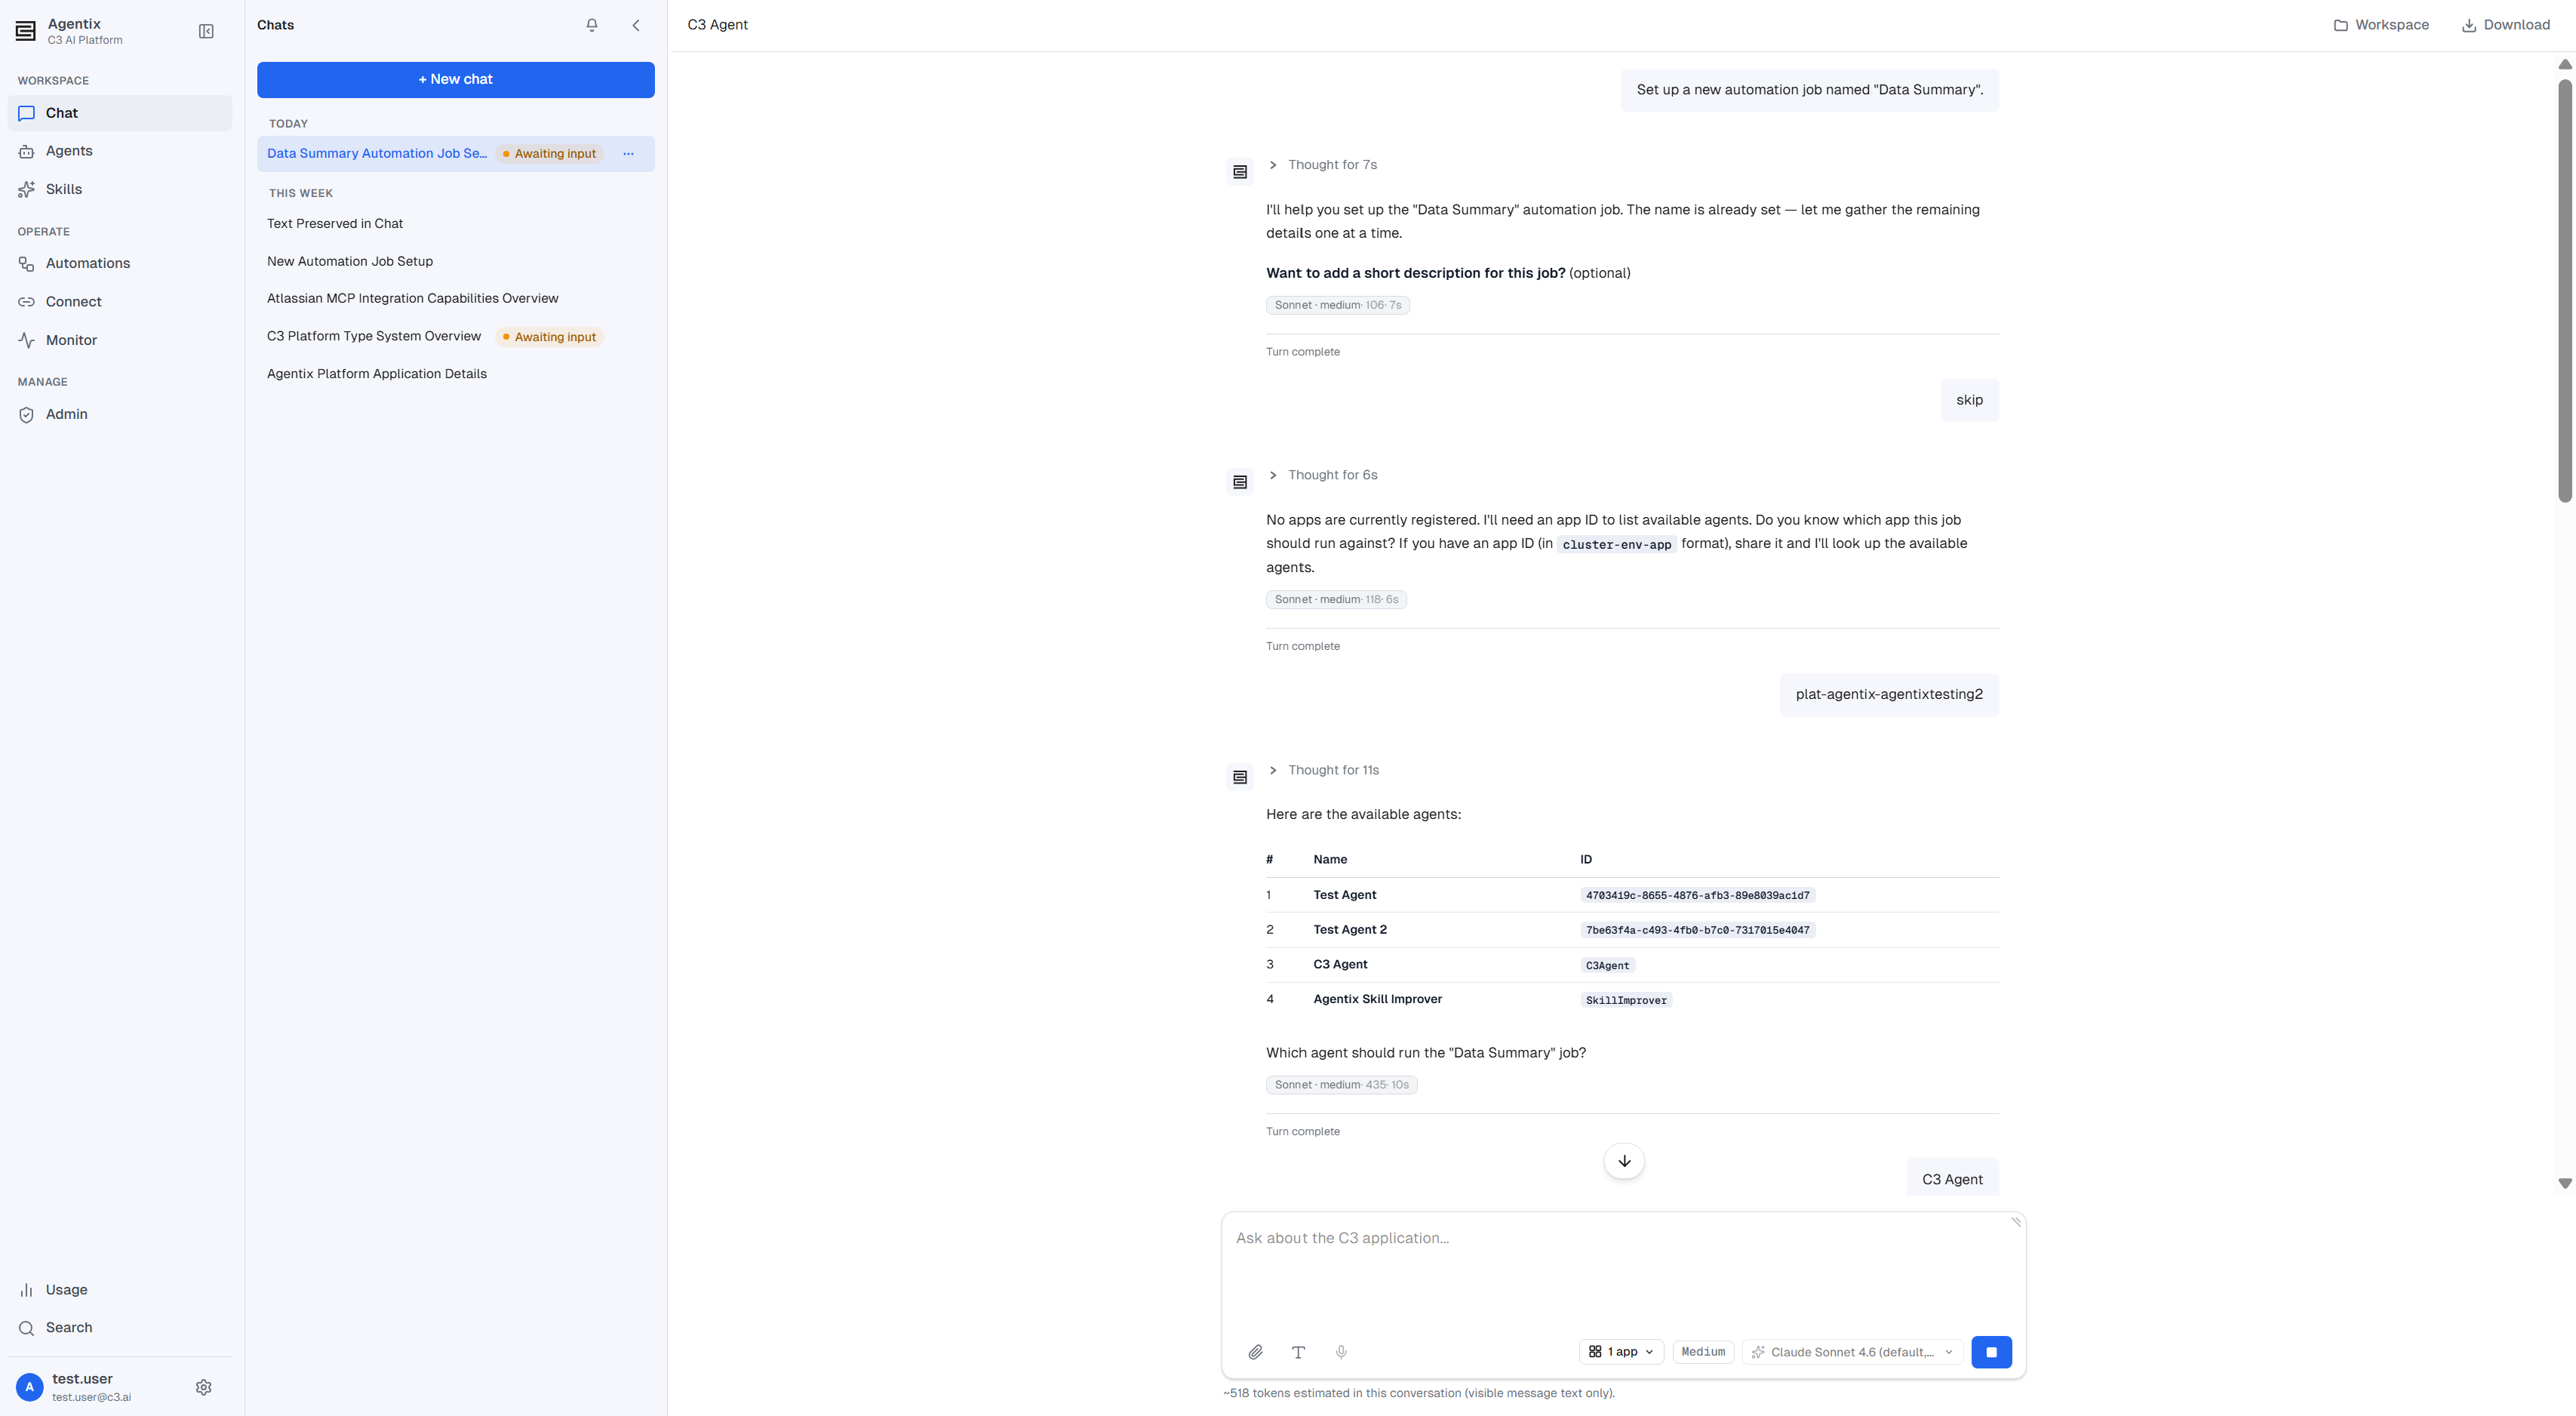
Agentix asks for each field in turn:
- Description (optional) — say "skip" to leave it blank.
- Target apps, if none is connected yet in your chat. Agentix needs at least one app ID (
cluster-env-appformat) before it can look up the agents available to run the job. - Which agent should run it — Agentix lists the agent definitions available to you by name and ID.
- Trigger — a schedule runs on a repeating cadence; manual runs only when you select Run now. You can change this later from the schedule's detail page:
- For a schedule, describe the cadence in your own words — for example, "every day at 8am" or "every 5 minutes". Agentix translates it to a cron expression and reads the expression back to you before it continues.
- For manual, there is no cadence to set — the job only runs when you select Run now.
- Task instruction — what the agent should do on each run. Be concrete: it runs unattended, so the more specific the instruction, the more useful the result.
- Target apps — confirm or change the apps carried over from step 2. Agentix asks again because the agent you picked may have its own default apps.
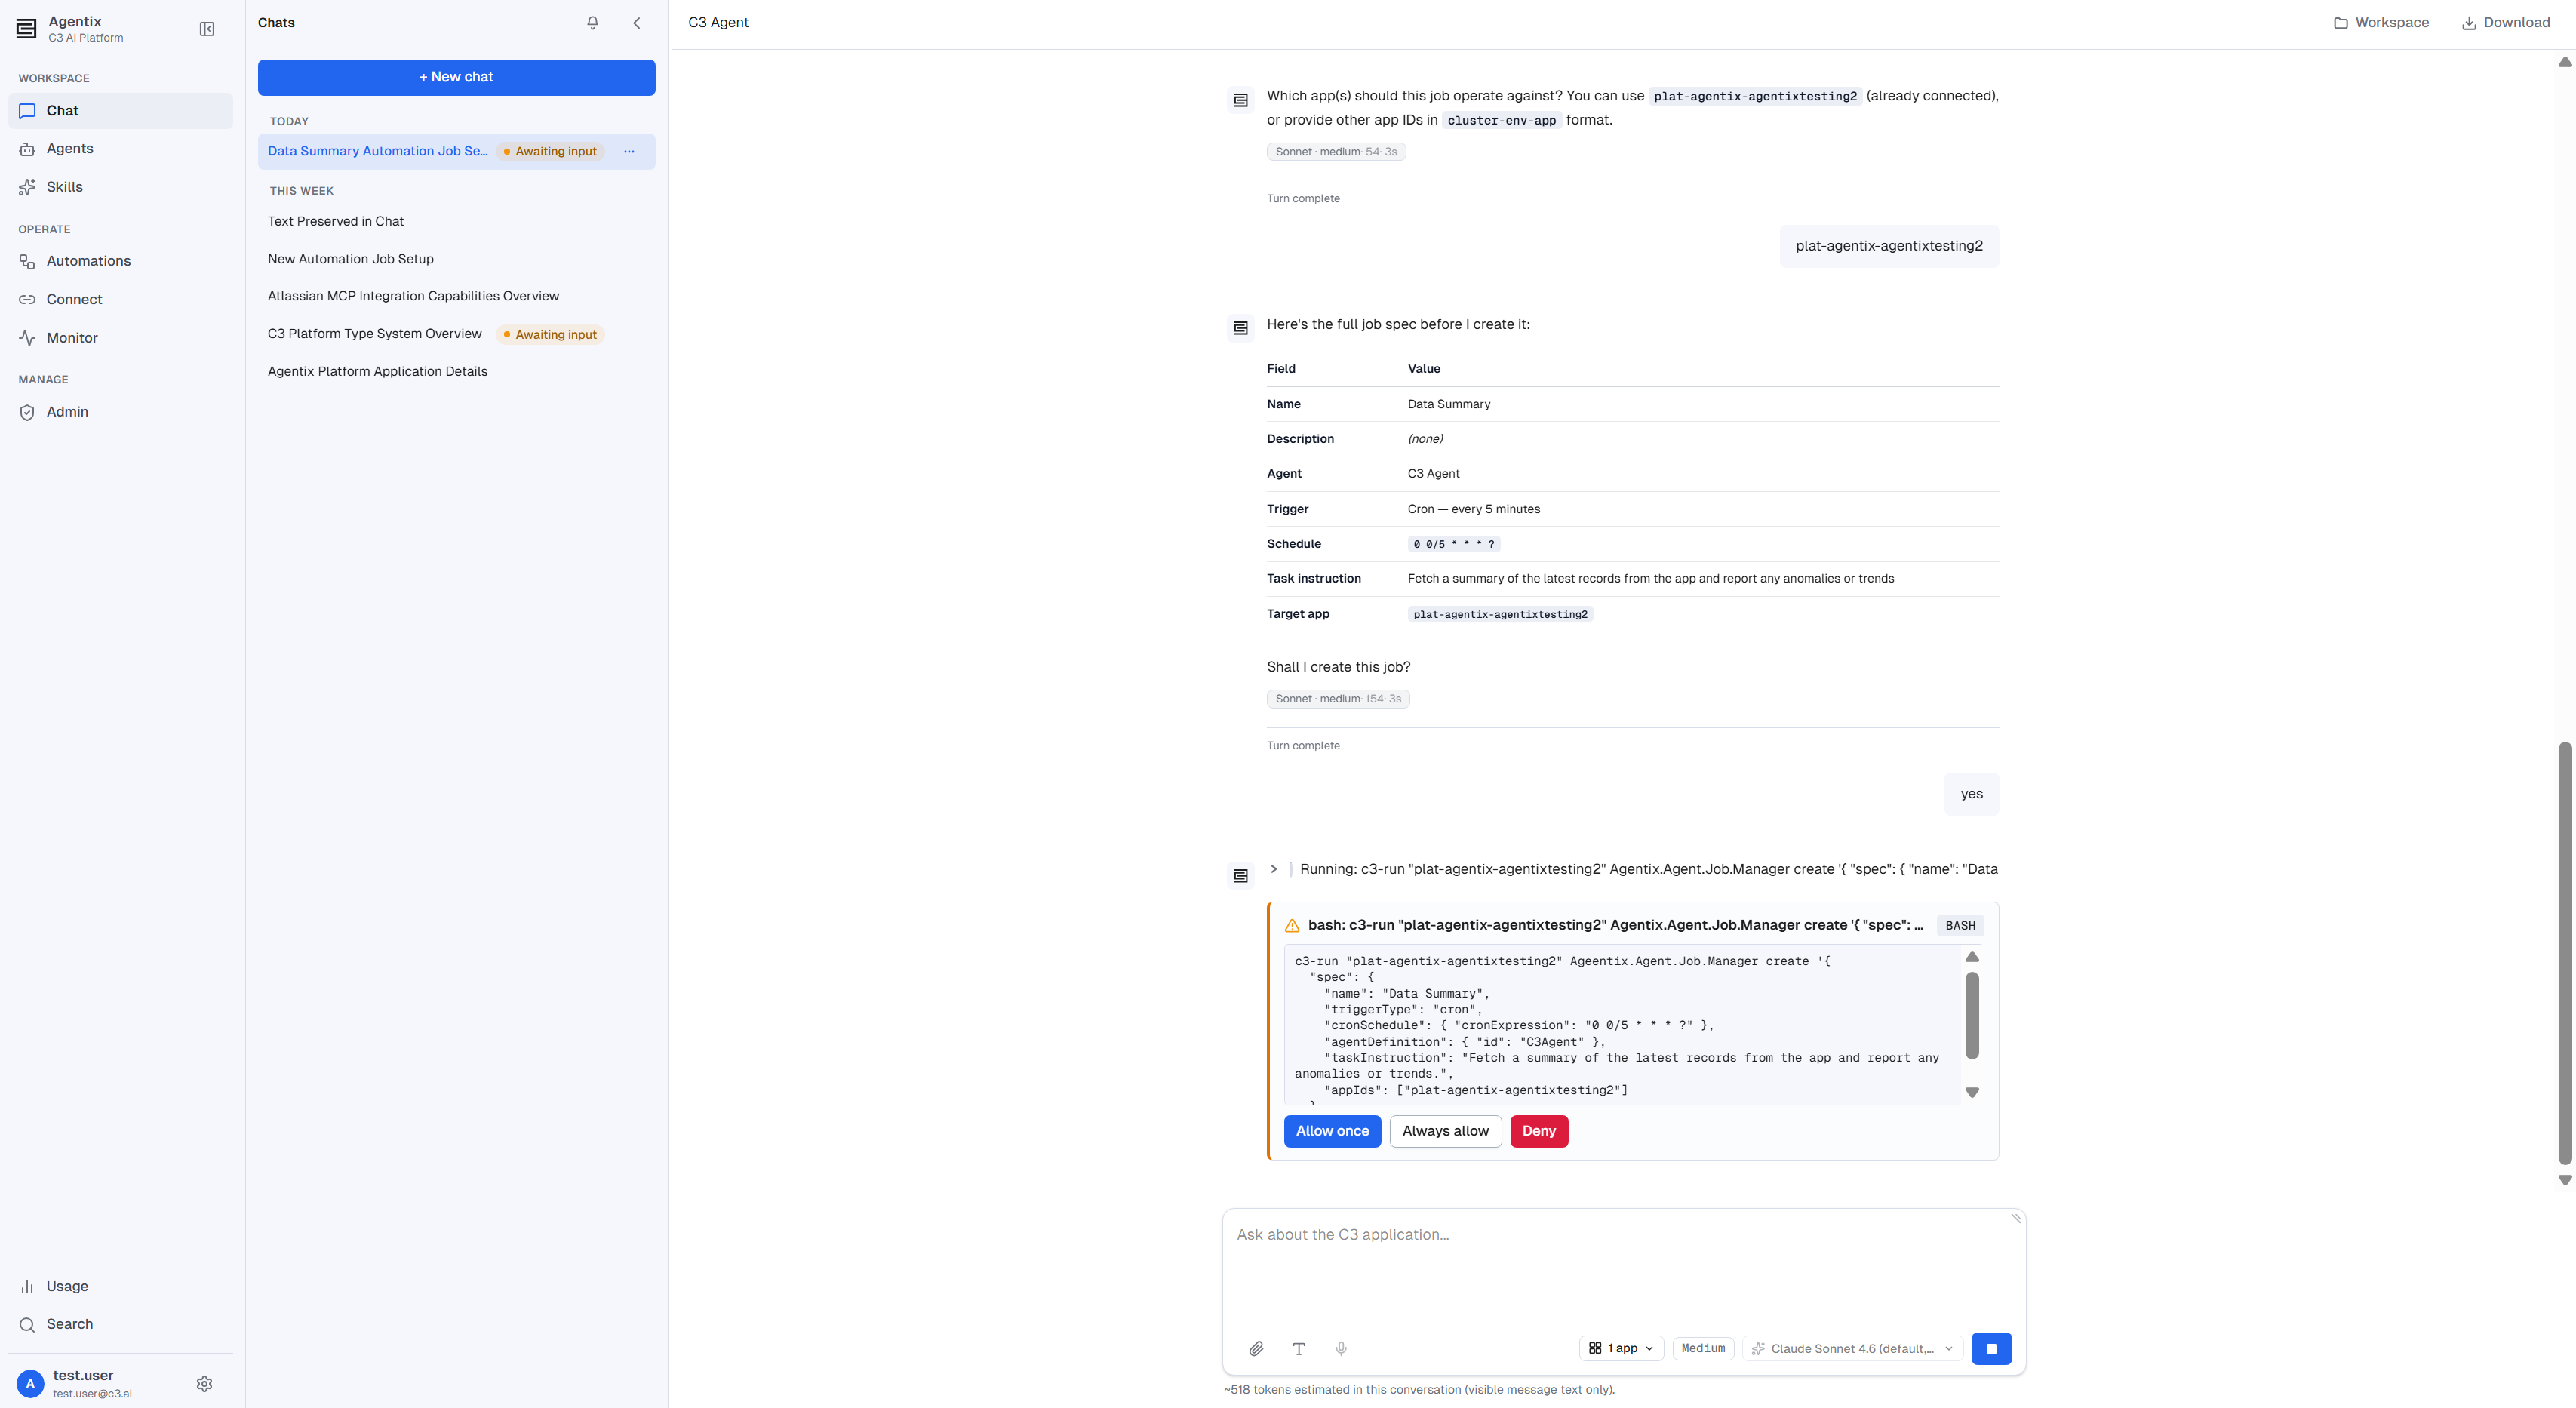
Agentix shows the complete spec (name, description, agent, trigger, task instruction, and target app) and asks you to approve it. The prompt is the same one you see for any write in chat: Allow once, Always allow, or Deny. Agentix creates the job only after you approve it.
Once created, Agentix confirms with a short summary, and the automation appears under Automations → Schedules.
Manage an automation
Open Automations → Schedules and select a schedule by name to reach its detail page. The detail page has three controls:
- Enabled: toggle a schedule off to pause it without deleting it; a disabled schedule is skipped when its trigger would otherwise fire. Toggle it back on to resume.
- Run now: start a run immediately, on any schedule or manual automation, without waiting for its trigger.
- Edit: opens the automation's configuration for editing. The Schedule name, Instructions (with a rich-text editor), the Agent it runs as, Timeout, and Retention all become editable, and you can add a Connected app from this cluster or another one. Select Save to apply your changes or Cancel to discard them.
Nothing is saved until you select Save, and a saved change applies from the next run. An app on another cluster needs a service-account token that an administrator provisions; automations cannot use per-user sign-in. See Connect Apps on Other Clusters.
When you are not editing, the detail page also shows the Trigger type and cadence, the Instructions text, and a table of Recent runs. A sidebar lists the Agent (linked to its own detail page), Model, Timeout, Retention, Access, and Connected apps.
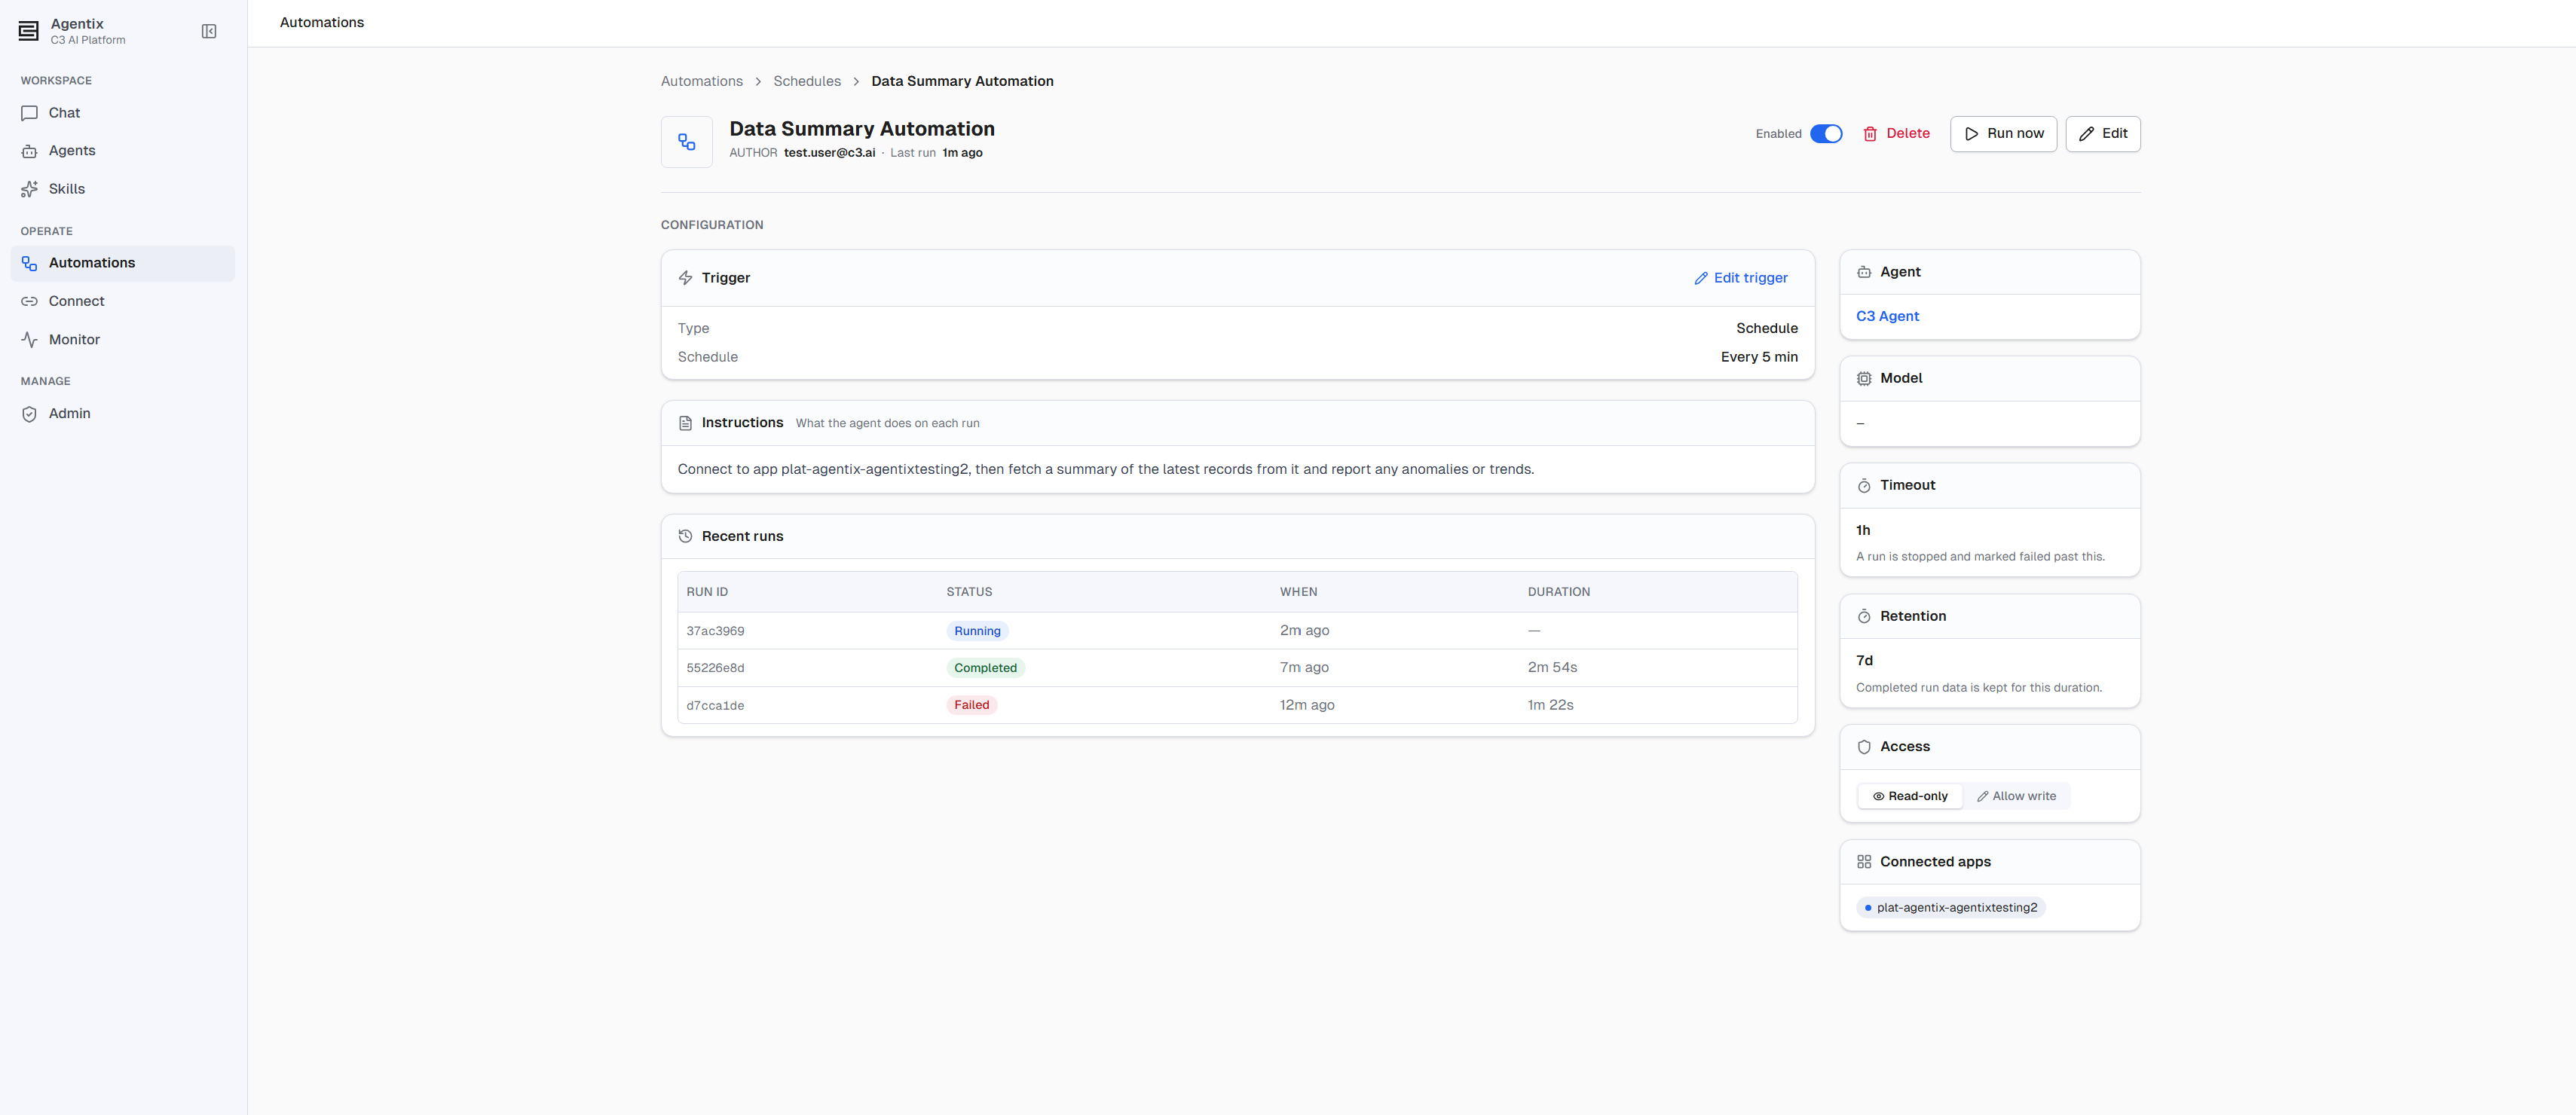
Access reads Read-only by default. If an administrator has turned on write access for this schedule, it reads Allow write instead. Both keys are admin-only: the app-wide Allow write switch on the Schedules tab, and this schedule's own write grant. See What an automation can change for how the two switches interact.
Edit the trigger
The trigger has its own editor, separate from Edit. Select Edit trigger on the schedule's detail page to open it:
- Type: switch between Schedule (a cadence) and Manual (on demand only).
- Repeat on: for a schedule, pick the days of the week it should run.
- At time: enter one or more times of day in UTC. Agentix shows your local-time equivalent. Select Add time for more than one run a day.
- Cron expression: the raw cron expression behind the cadence, with a readout of what it means. Edit it directly for a cadence the day and time pickers cannot express. Agentix rejects an expression it cannot parse.
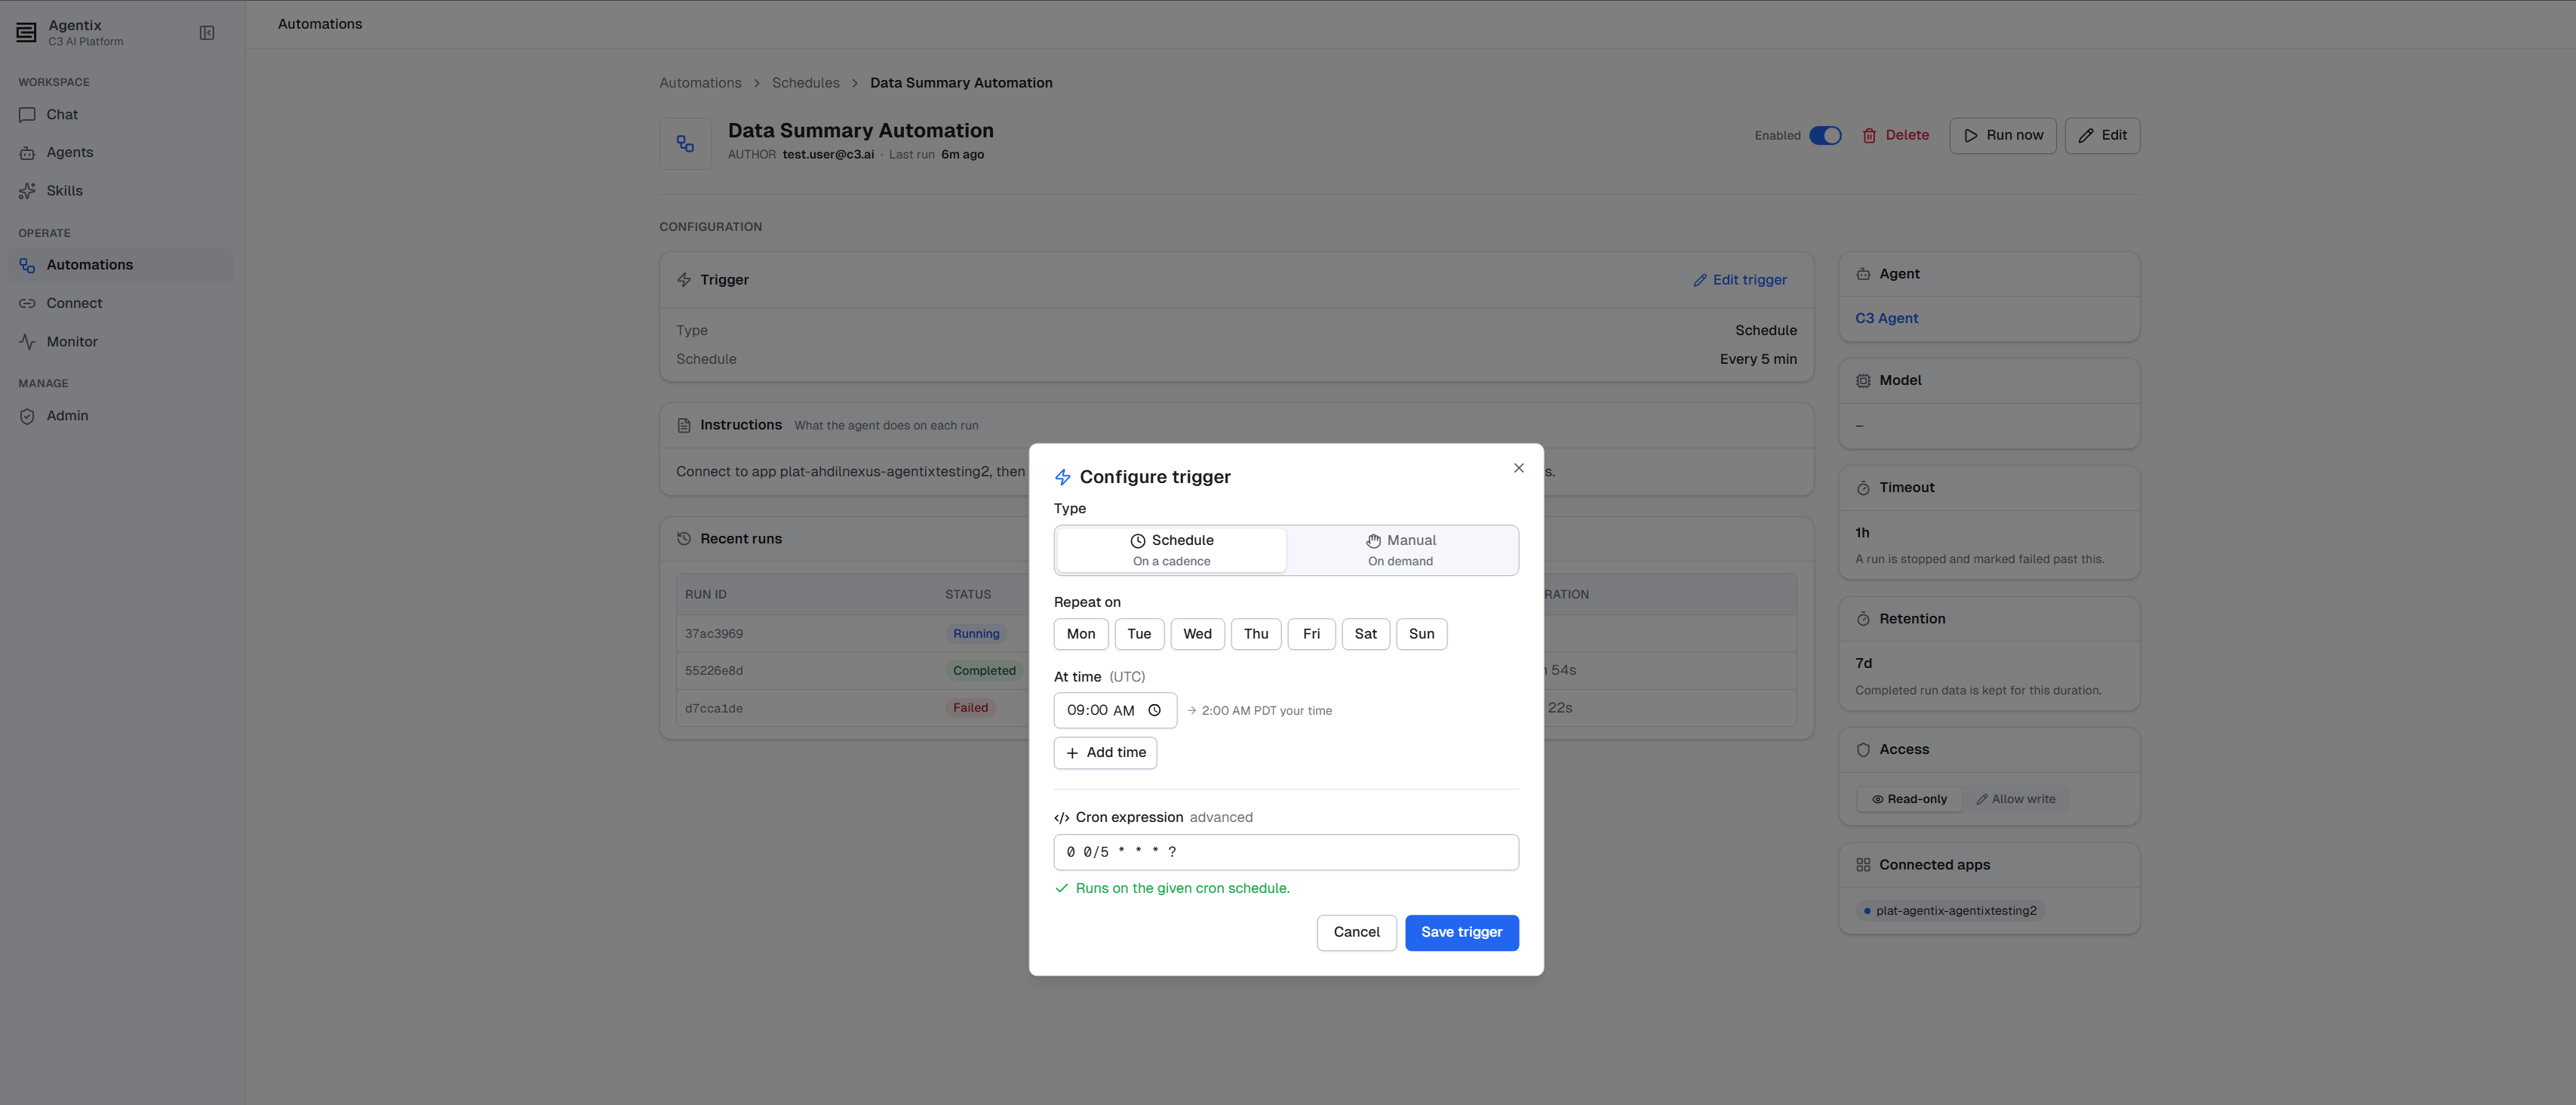
Select Save trigger to apply the change, or Cancel to leave the existing trigger untouched.
Review runs and history
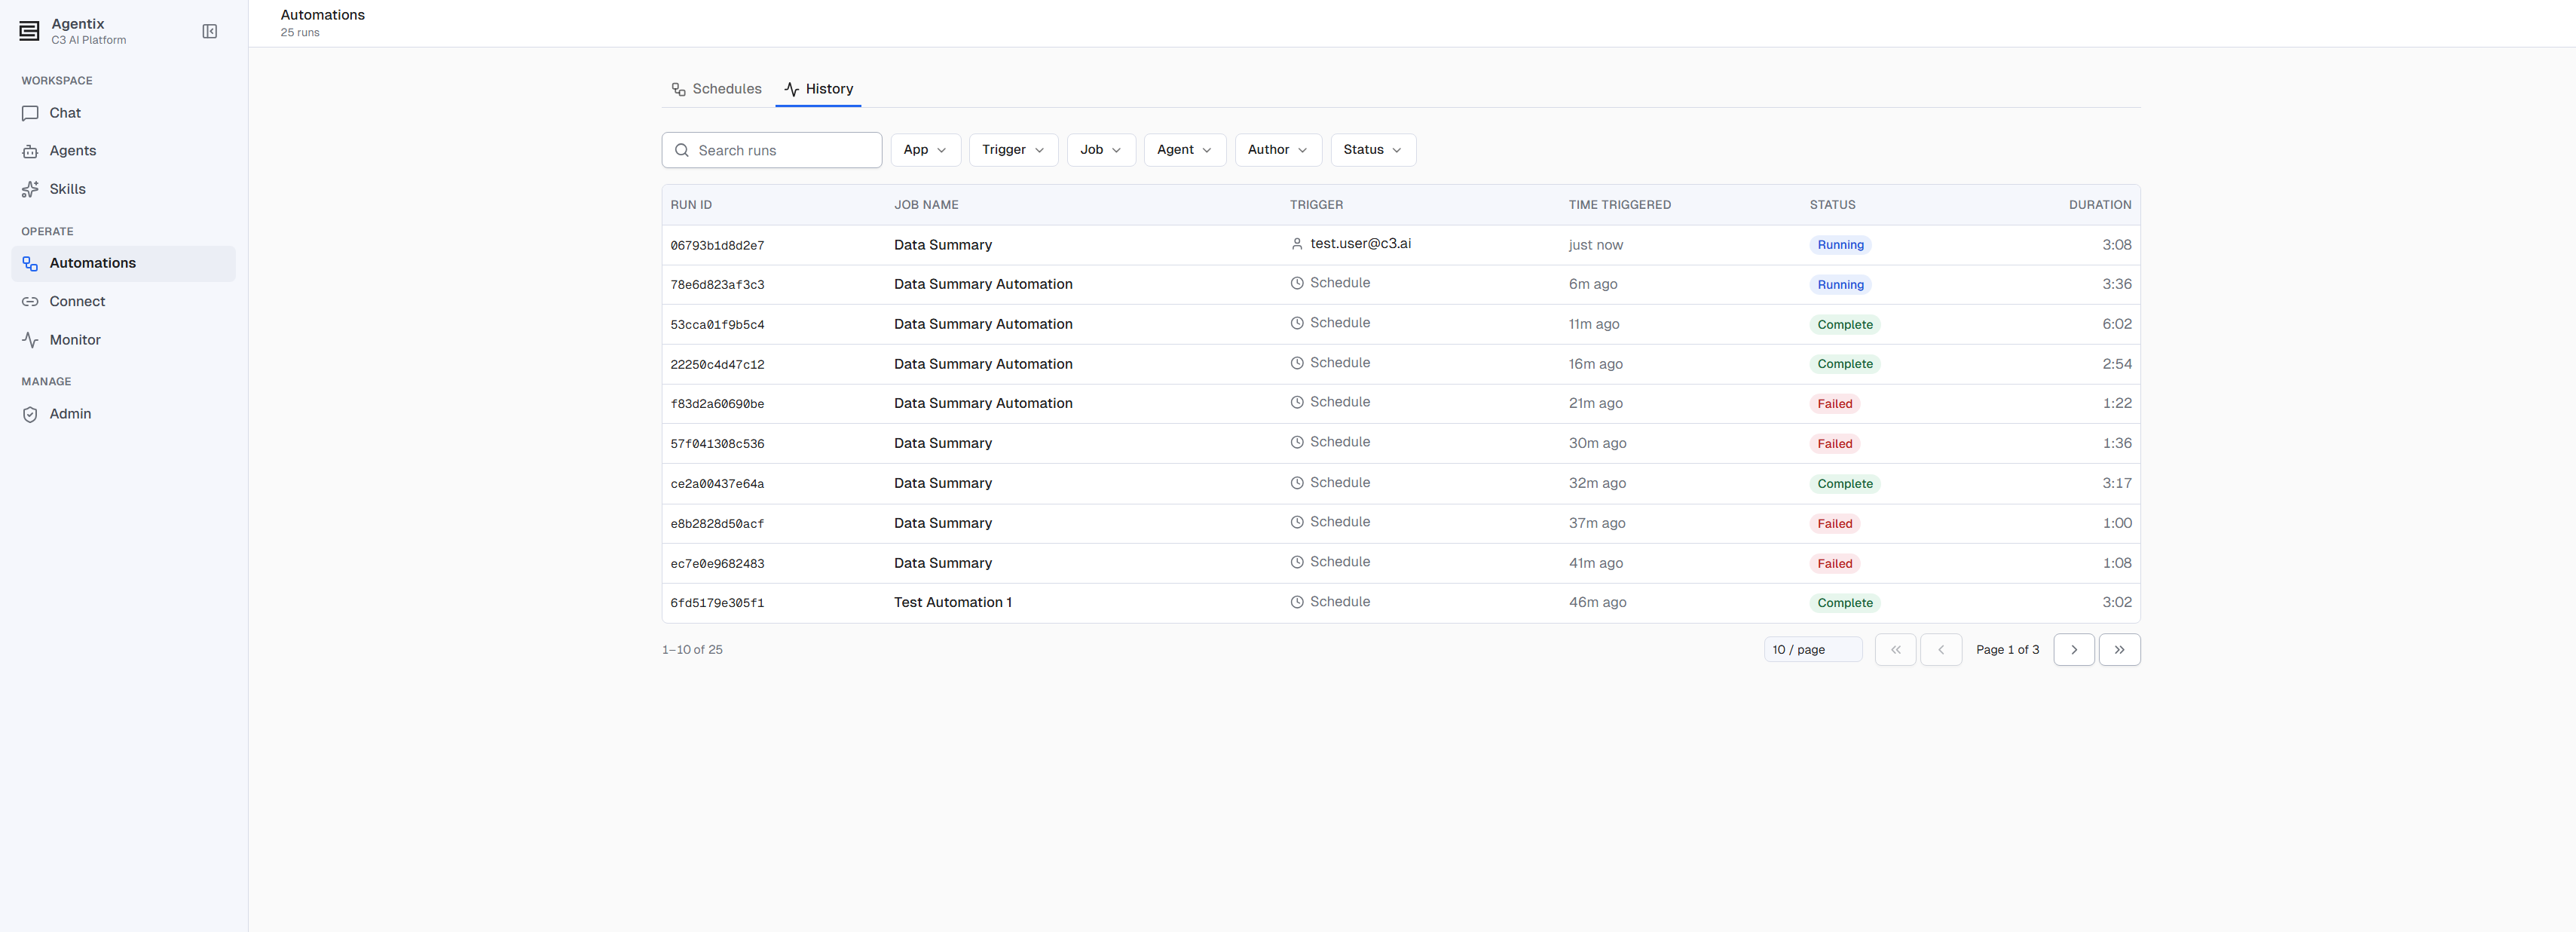
Every run appears in the schedule's Recent runs table, whether the trigger started it or you selected Run now. The History tab lists every run across every automation you can see, with search and filters by App, Trigger, Job, Agent, Author, and Status.
A run moves through Pending, Running, and Completing, then finishes as Complete, Failed, or Timed out. For a scheduled run, Trigger reads Schedule; for a manual run, it names the user who selected Run now.
Open a run to see everything it produced:
- Usage & cost: input, output, and total tokens, and the run's cost.
- Properties: status, run ID, trigger, who or what triggered it, when it was triggered and completed, duration, agent, and model.
- Summary: the agent's own account of what it did, or the error if the run failed.
- Artifacts: the files the run produced, with an inline preview and Open and Download for each file, or Download all.
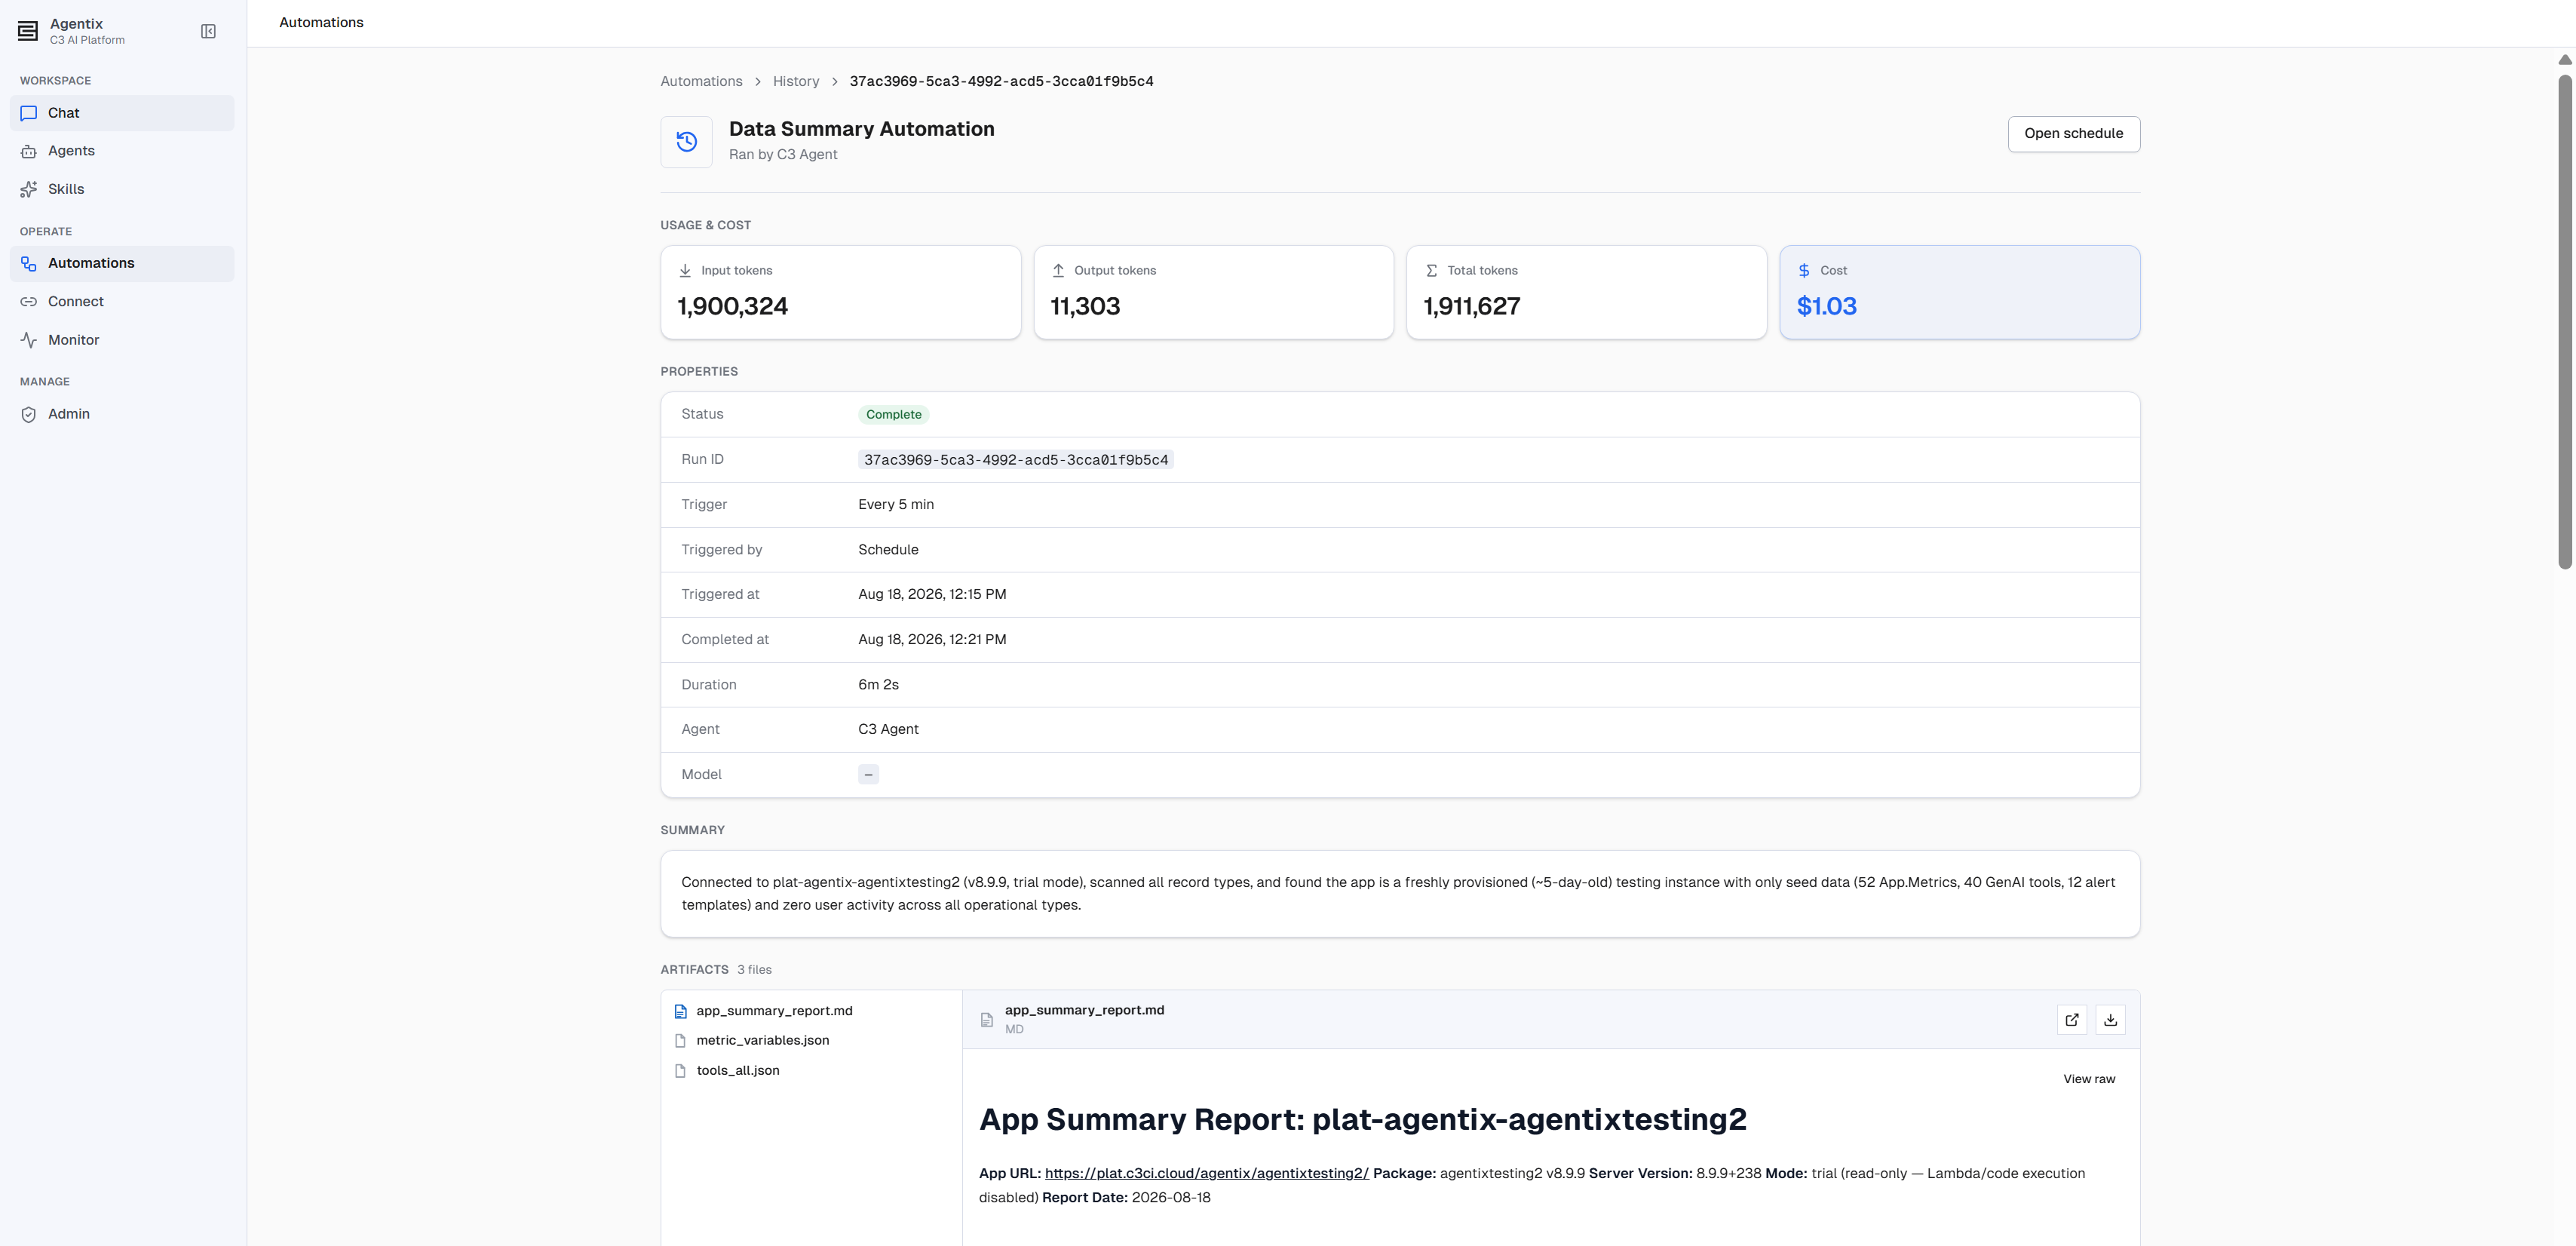
Select Open schedule on a run's page to return to the automation that produced it.
Delete an automation
On the schedule's detail page, select Delete. A confirmation dialog appears — select Delete again to confirm. Deleting is permanent and removes the schedule and its run history; to pause a schedule without losing it, turn off Enabled instead.
Permissions
Any Agentix.User can create, run, edit, and delete their own automations. Seeing and managing every user's automations, and turning on write access (the app-wide switch and a schedule's own grant), are administrator-only. See Roles and Permissions.
See also
- Automations Overview — What an automation is made of, how a run behaves, and the read-only-by-default write model.
- Quick Start — Approval prompts, and where a run's own conversation lives.
- Connections — Secrets and apps your automations can reach.
- Roles and Permissions — Who can manage schedules and grant write access.
- Monitor Usage and Cost — Usage across the agents your automations run.
- C3 AI Agentix Overview — How automations fit alongside agents, skills, and chat.