Run and Mine a Workflow
You have a C3 Intelligence conversation that produced results you trust, and you want the same analysis on next month's data. Mine Workflow turns that conversation into an intelligent workflow: a saved, step-by-step version that a later run repeats with new files and new settings. The Workflow Builder, the agent that drafts the workflow, works from a saved copy of your conversation. A test sandbox, a fresh isolated workspace, then checks that the workflow reproduces your results before you keep it.
The example mines the Smart Factory conversation, which ranked problem machines, predicted breakdowns, planned two weeks of maintenance, and wrote a report for a manager. You complete eight steps:
- Save the conversation and start mining.
- Review the first draft of the workflow.
- Answer the builder's questions.
- Make the workflow reusable for new data.
- Approve the plan so the builder writes the workflow's documentation.
- Consolidate and test the workflow in a test sandbox, replying at its checkpoints.
- Archive the workflow and check it on the Intelligent Workflows page.
- Deploy the workflow to run it.
Set aside a few hours. Most of that time goes to the test sandbox, which pauses at checkpoints until you reply.
Before you start
Mining works from a conversation whose agents have finished replying. Mine Workflow stays unavailable until the conversation has started, while an agent is still replying, and while a Workflow Builder session is already open.
The example uses the Smart Factory conversation after its last request, the manager report on Generate Code. Any conversation works the same way.
Plan to finish in one sitting. A conversation stops on its own after about three hours without chat activity, and that idle stop deletes the sandboxes of its agents, the builder included. The test sandbox also shuts down after a period of inactivity. An archived workflow stays on the Intelligent Workflows page after both stop, so archive the workflow as soon as its test passes. To learn how saving, stopping, and reviving work, see Conversation Features.
Your run words its questions and step names in its own way. Most steps end with what to look for, so you can check your own result.
Save the conversation and start mining
The builder mines a saved copy of the conversation, so mining starts by saving it. The saved copy is also a snapshot you can revive later. To save the conversation and open the builder:
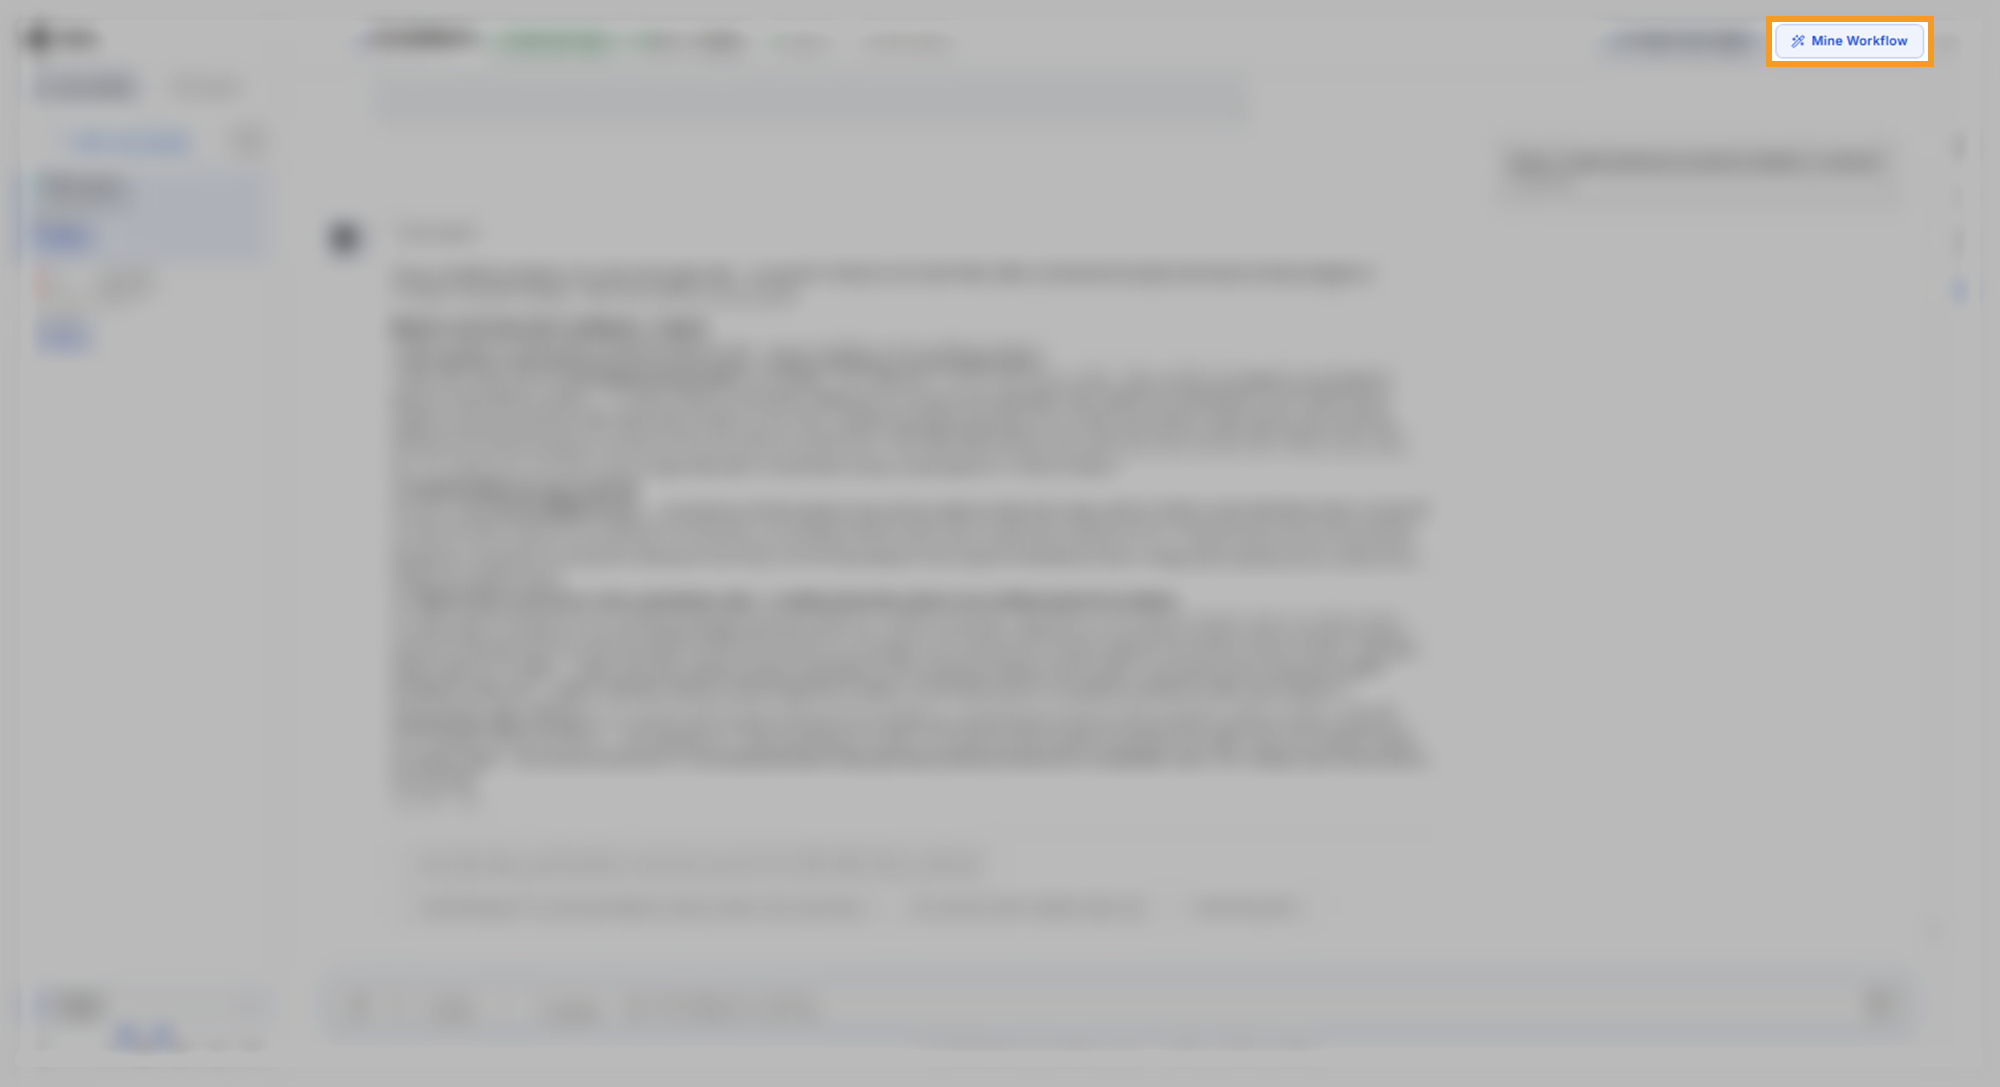
Select Mine Workflow in the header, next to Teach Your Agent.
In the Save conversation dialog, replace the suggested Title with a name that says what the conversation did:
TextSmart Factory: problem machines, breakdown prediction, and maintenance planIn Description (optional), summarize the work so you can find the snapshot later:
TextReviewed seven factory data files, ranked the machines that cause the most trouble, predicted which machines may break down in the next 48 hours, planned two weeks of preventive maintenance at the lowest cost, and combined the results into one report for a manager.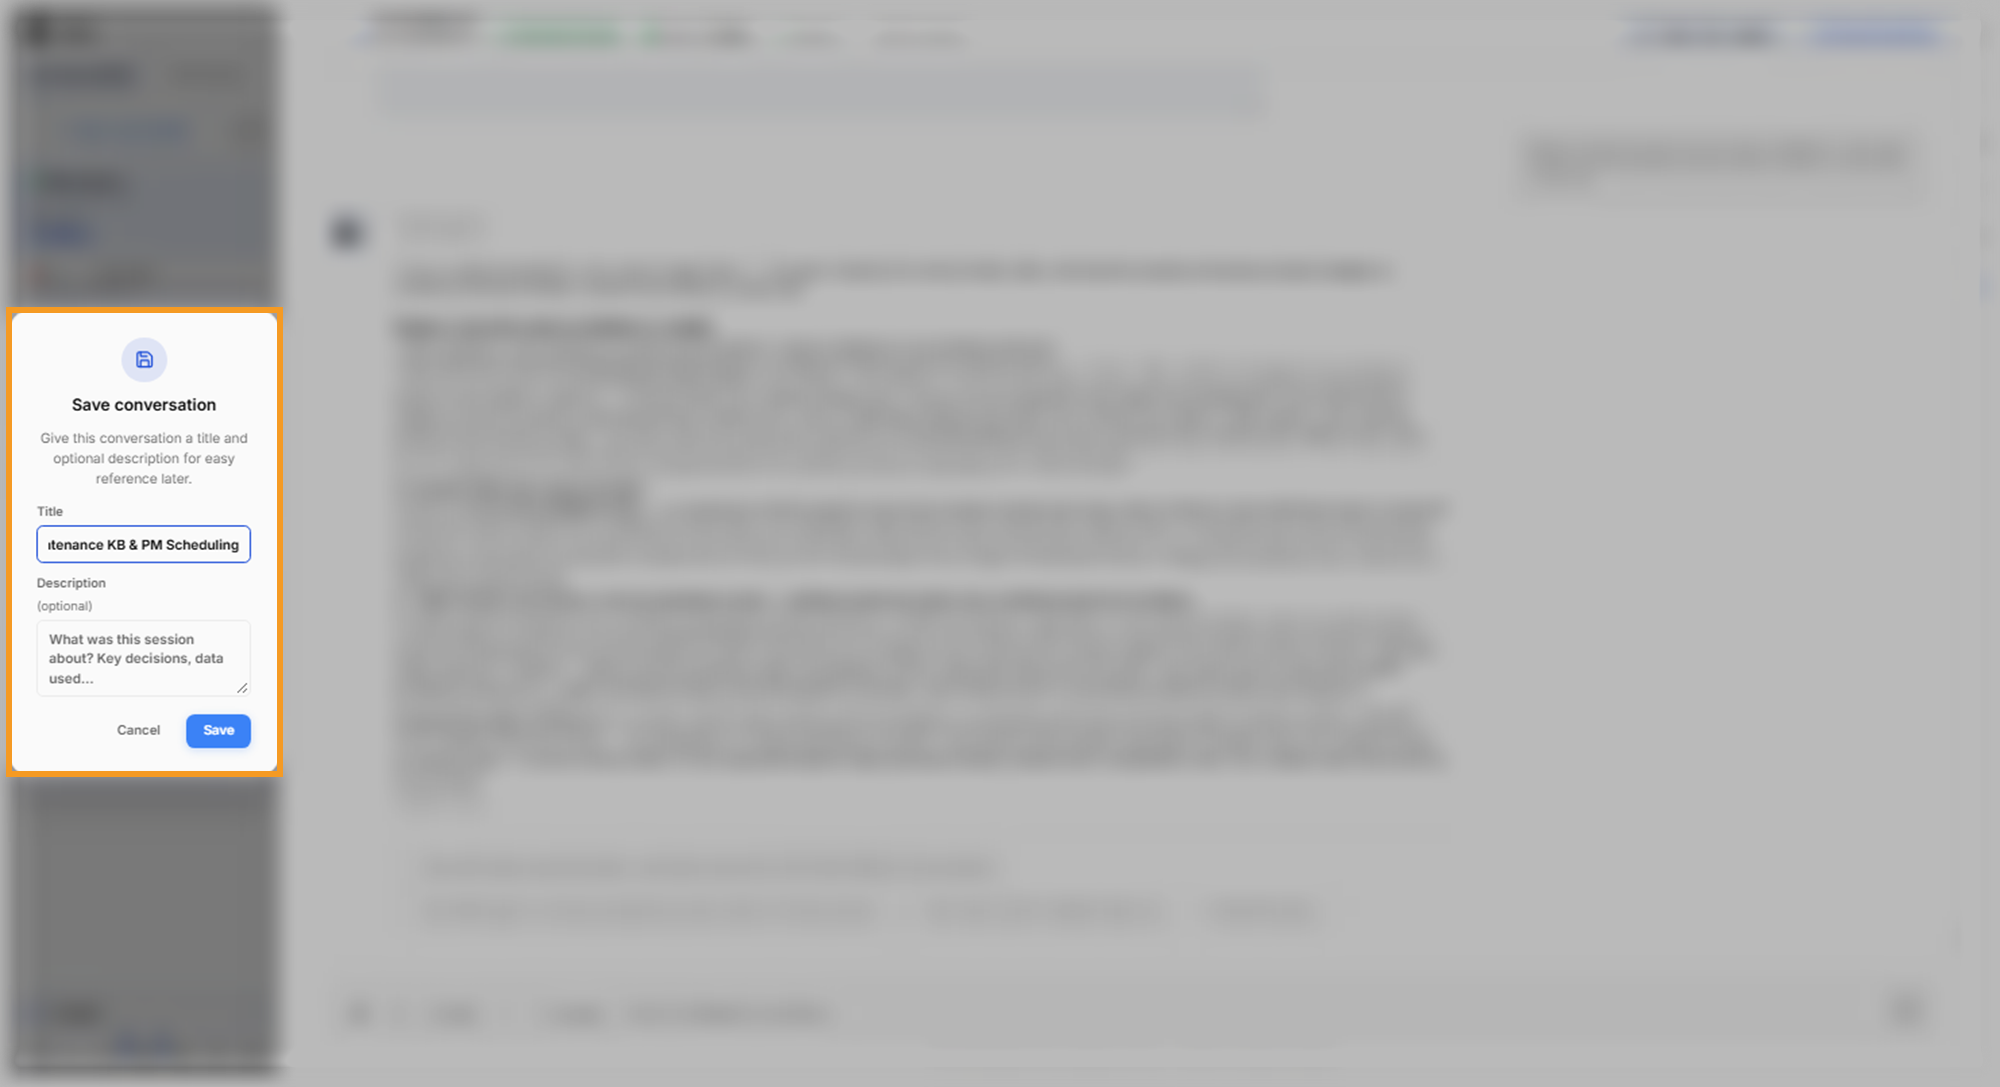
Select Save. C3 Intelligence collects each agent's history and files.
When the dialog reads Saved, check the list of agents, then select Done.
A long conversation takes longer to save. While the save runs, the Workflow builder panel opens and starts drafting. You chat with the builder in that panel:
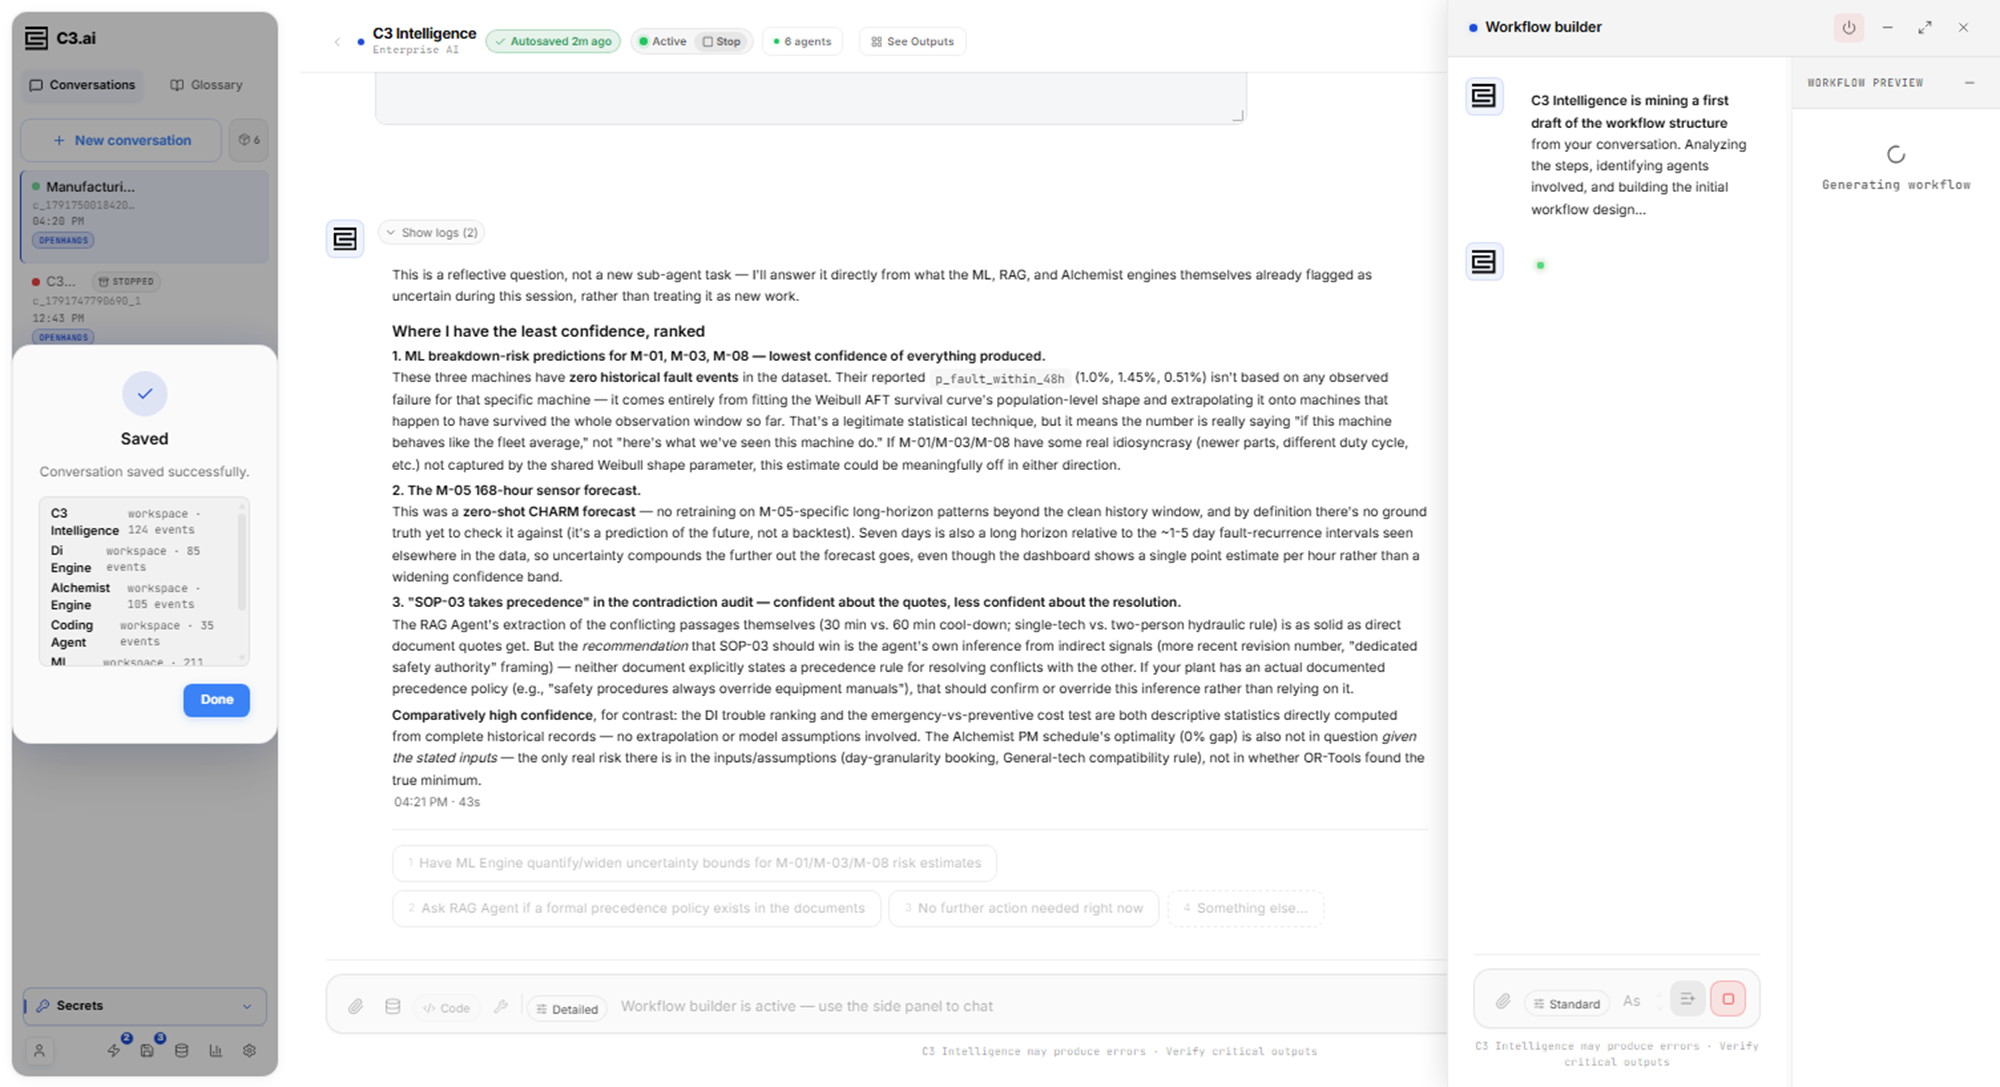
What to look for: the saved list names every agent the conversation used, each with a number of events. The example listed all six agents, starting with C3 Intelligence. An agent missing from the list can be missing from the workflow too.
Review the first draft
The builder reads the saved conversation and replies with a first draft within a few minutes. The draft lists three parts:
- Trigger: the data a run starts with, in the example seven data files and three PDFs.
- Process stages: one row per task, with the agent, or engine, that runs it and what it does.
- Output: what the workflow produces, here one HTML report for a manager.
The WORKFLOW PREVIEW pane draws the same steps as a diagram:
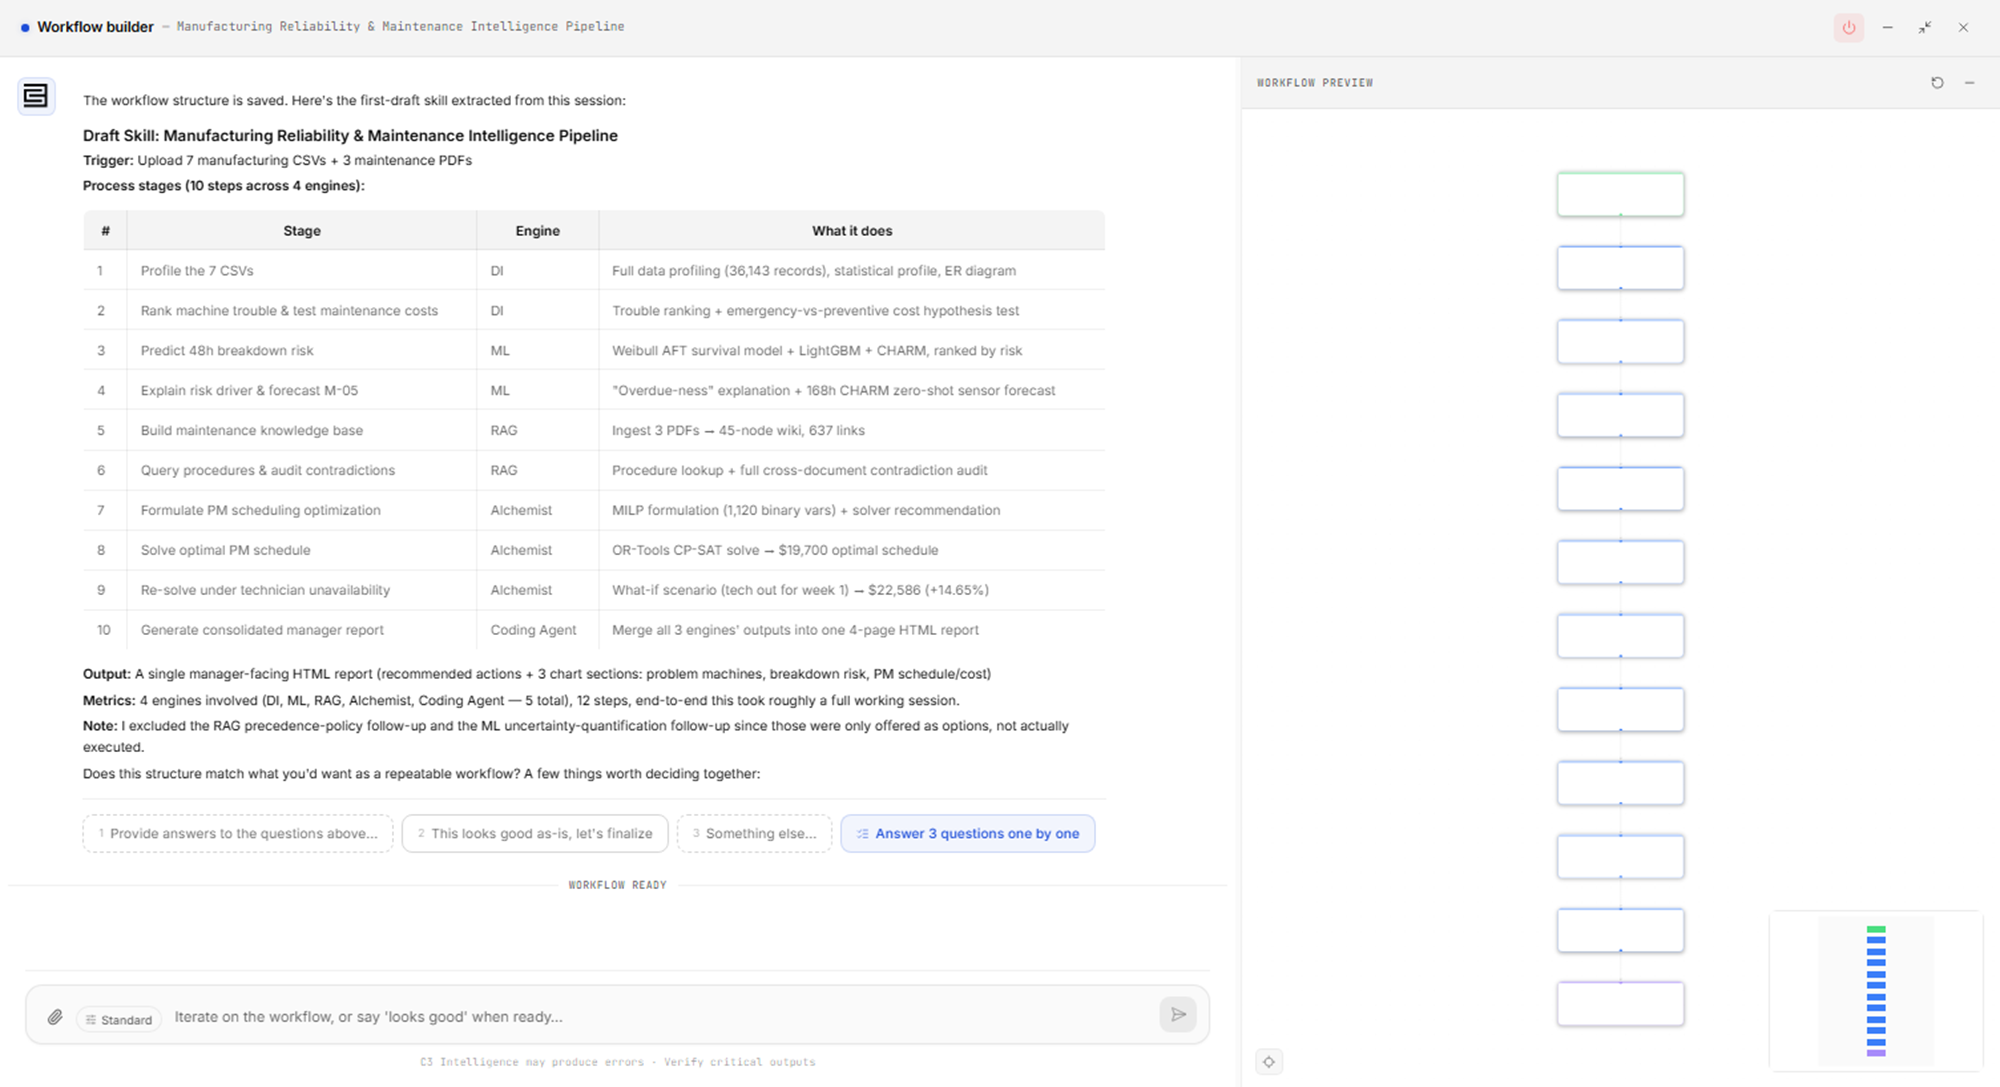
What to look for: every agent you used appears in the stages. The draft's Note line lists the work it left out. That list names only work you did not run, such as follow-up options you never selected. The draft still quotes your run's results, such as the $19,700 schedule cost. A later step replaces them.
Answer the builder's questions
The draft ends with decisions for you to make about the workflow's shape. Select Answer 3 questions one by one to answer them in a guided form; the number in the label matches your draft's questions. When the draft leaves no choice open, the builder asks no questions and moves straight to the documentation plan. Each question shows the builder's suggestion as PROPOSED:
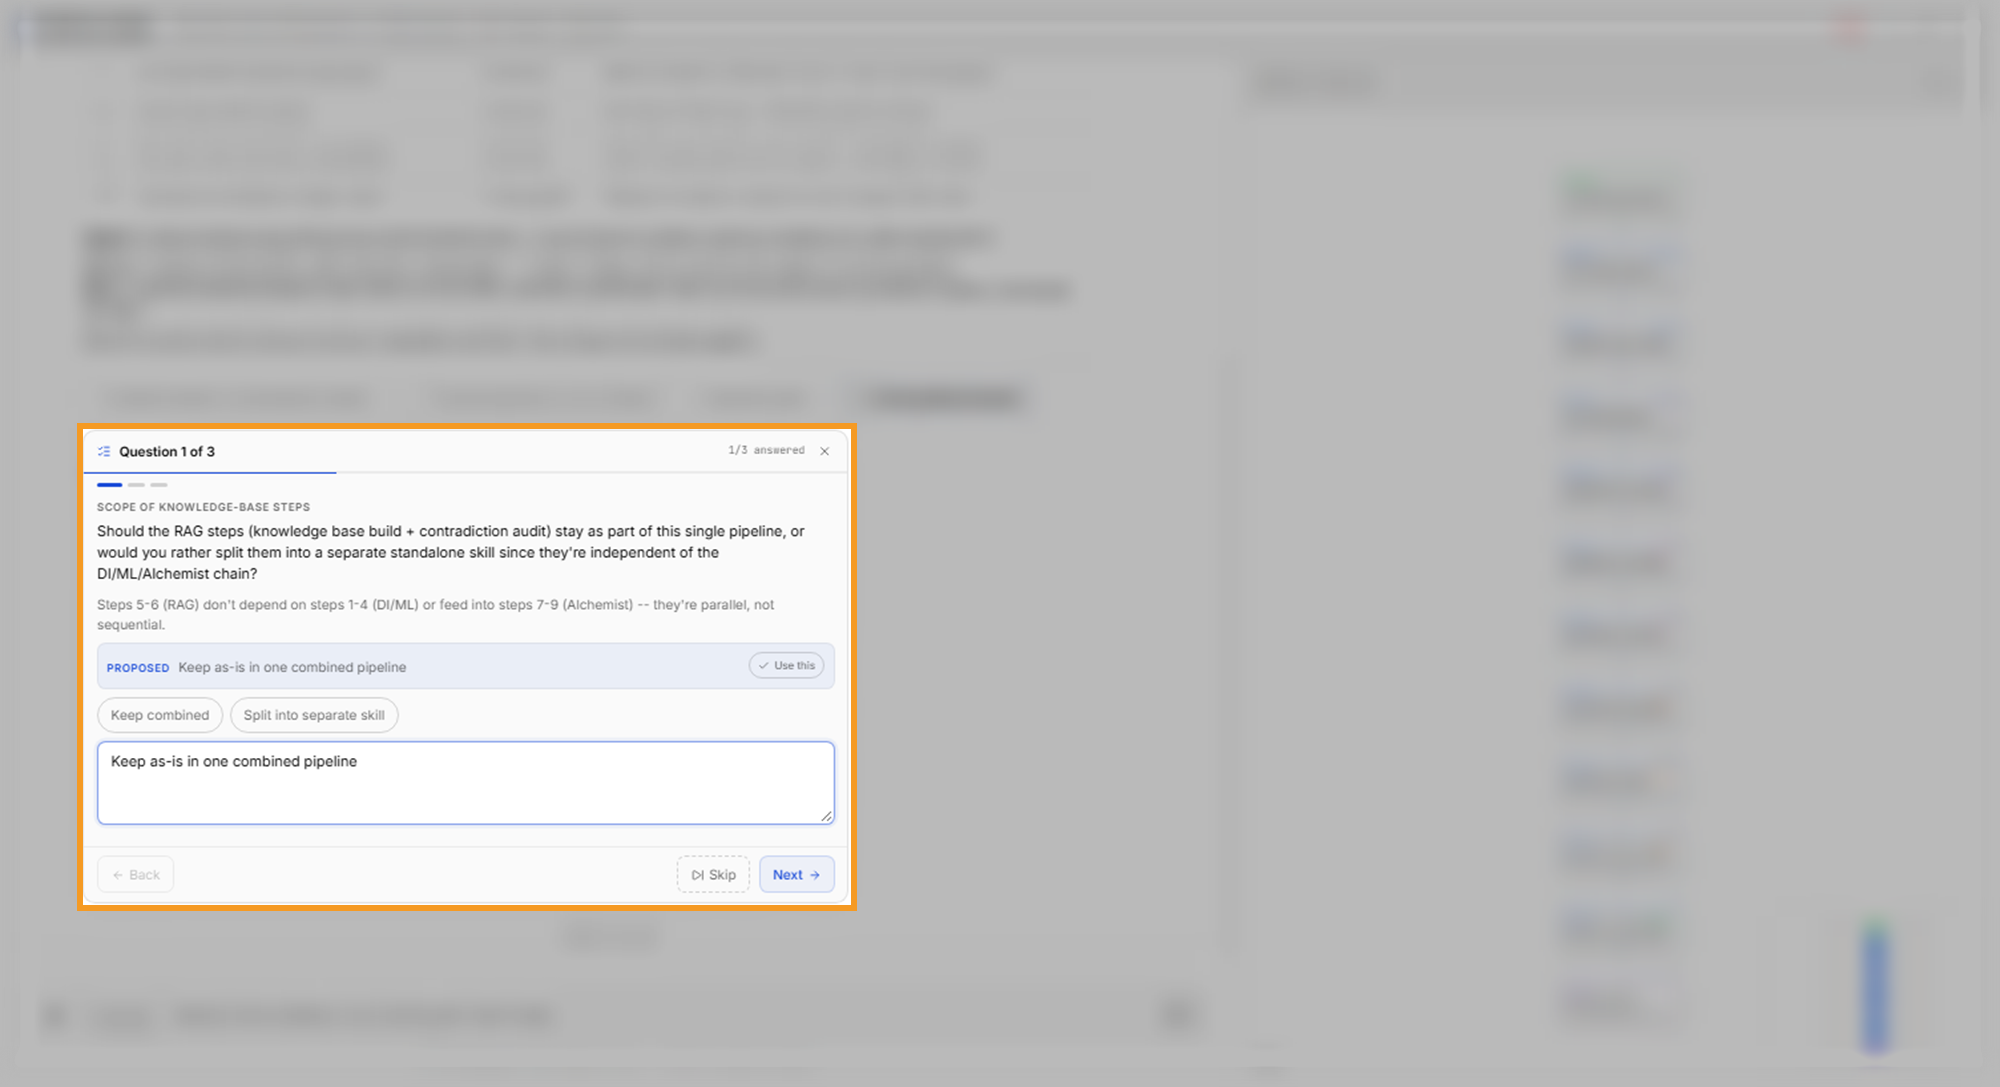
To answer the questions:
- For each question, select Use this to accept the suggestion, or pick a choice or type your own answer.
- Select Next to move on, or Skip to leave a question for later.
- On Review your answers, select Edit on any answer you want to change.
- Select Send answers.
Accept the suggestion unless it fixes a file name, a date, or a result, because the workflow must work on next month's data. The example accepted all three suggestions, which kept the knowledge-base steps in one pipeline and made the technician what-if an optional branch:
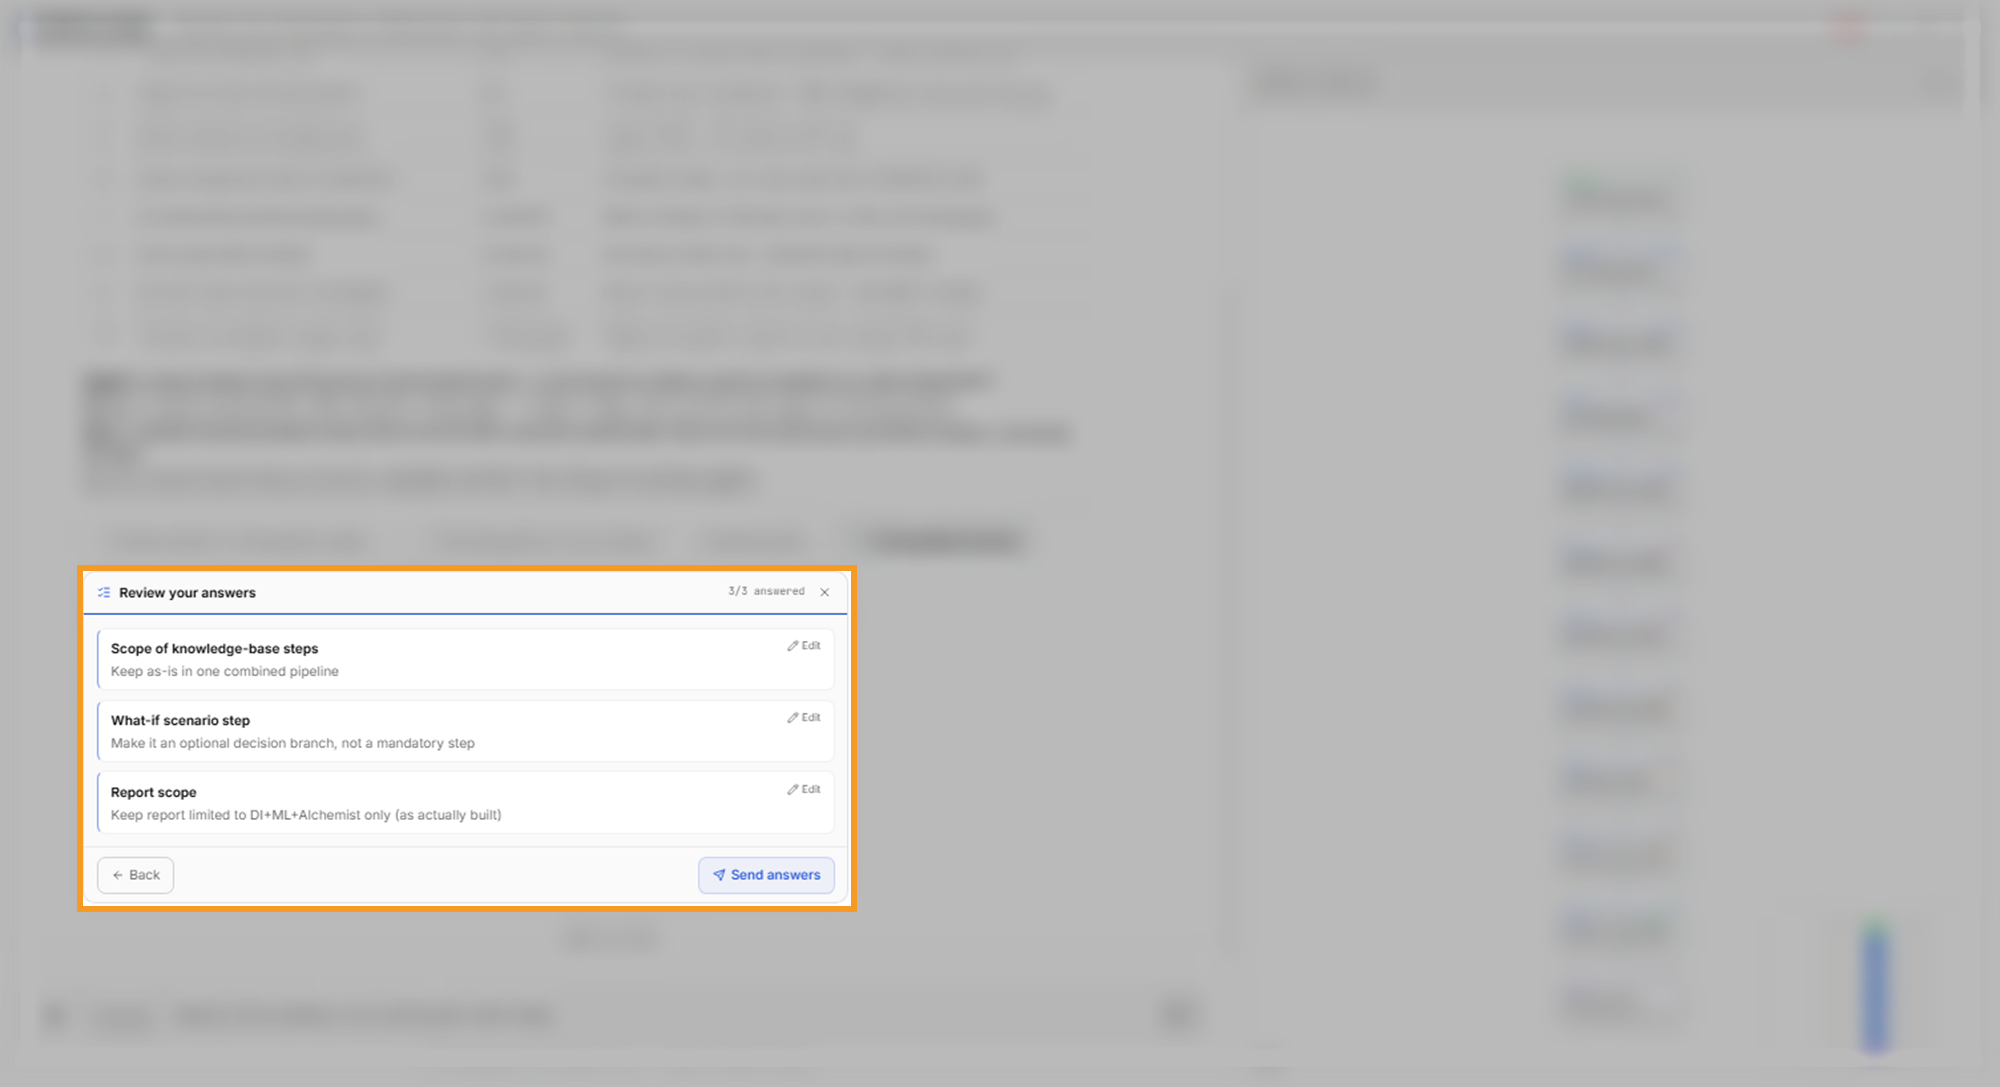
The builder replies with a plan for the workflow's documentation, one row per step. The plan ends with three options: Approve the plan and create all documentation, Adjust further..., and Cancel finalization. The diagram adds a decision step for the optional branch.
Make the workflow reusable
A draft built from one conversation keeps that conversation's file names, dates, and results. Before you approve the plan, send this message in the builder's message box:
Make this workflow reusable for next month's data. Don't fix the file names, dates, or results, and let me choose the start date and the planning period.The message states the outcome, reuse on next month's data. It lists the three kinds of value the builder must not fix, and it names the two settings you want to choose on each run. It names no method, so the builder decides how to generalize the steps.
The builder replies within a few minutes with a list of what changed:
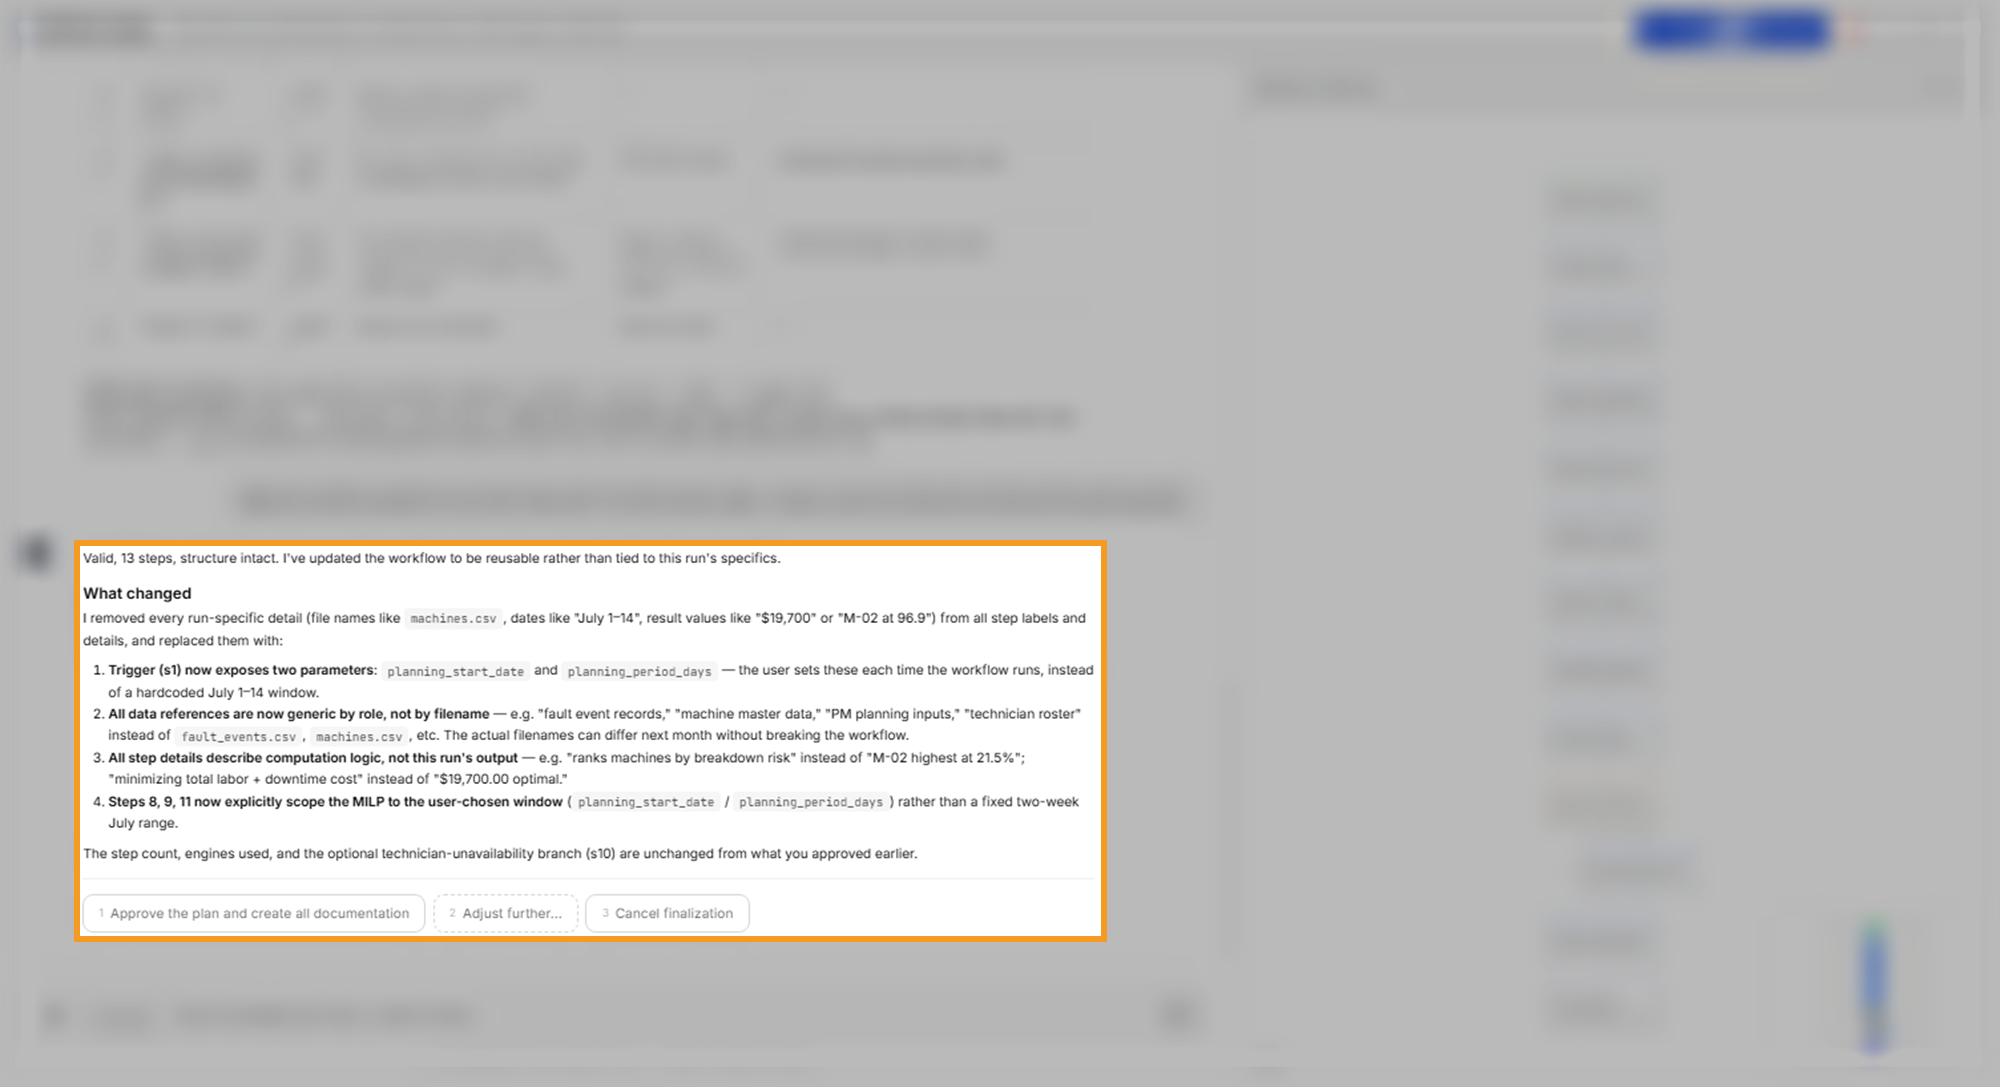
What to look for: the workflow now takes parameters, values you set on each run, here planning_start_date and planning_period_days. The workflow describes data by role, such as "fault event records", instead of by file name. No step quotes a result from your run.
Approve the plan
Approving the plan tells the builder to write the workflow's documentation and package it. Select Approve the plan and create all documentation. The work takes several minutes.
When the progress bar reads Ready to consolidate, the builder lists what it created:
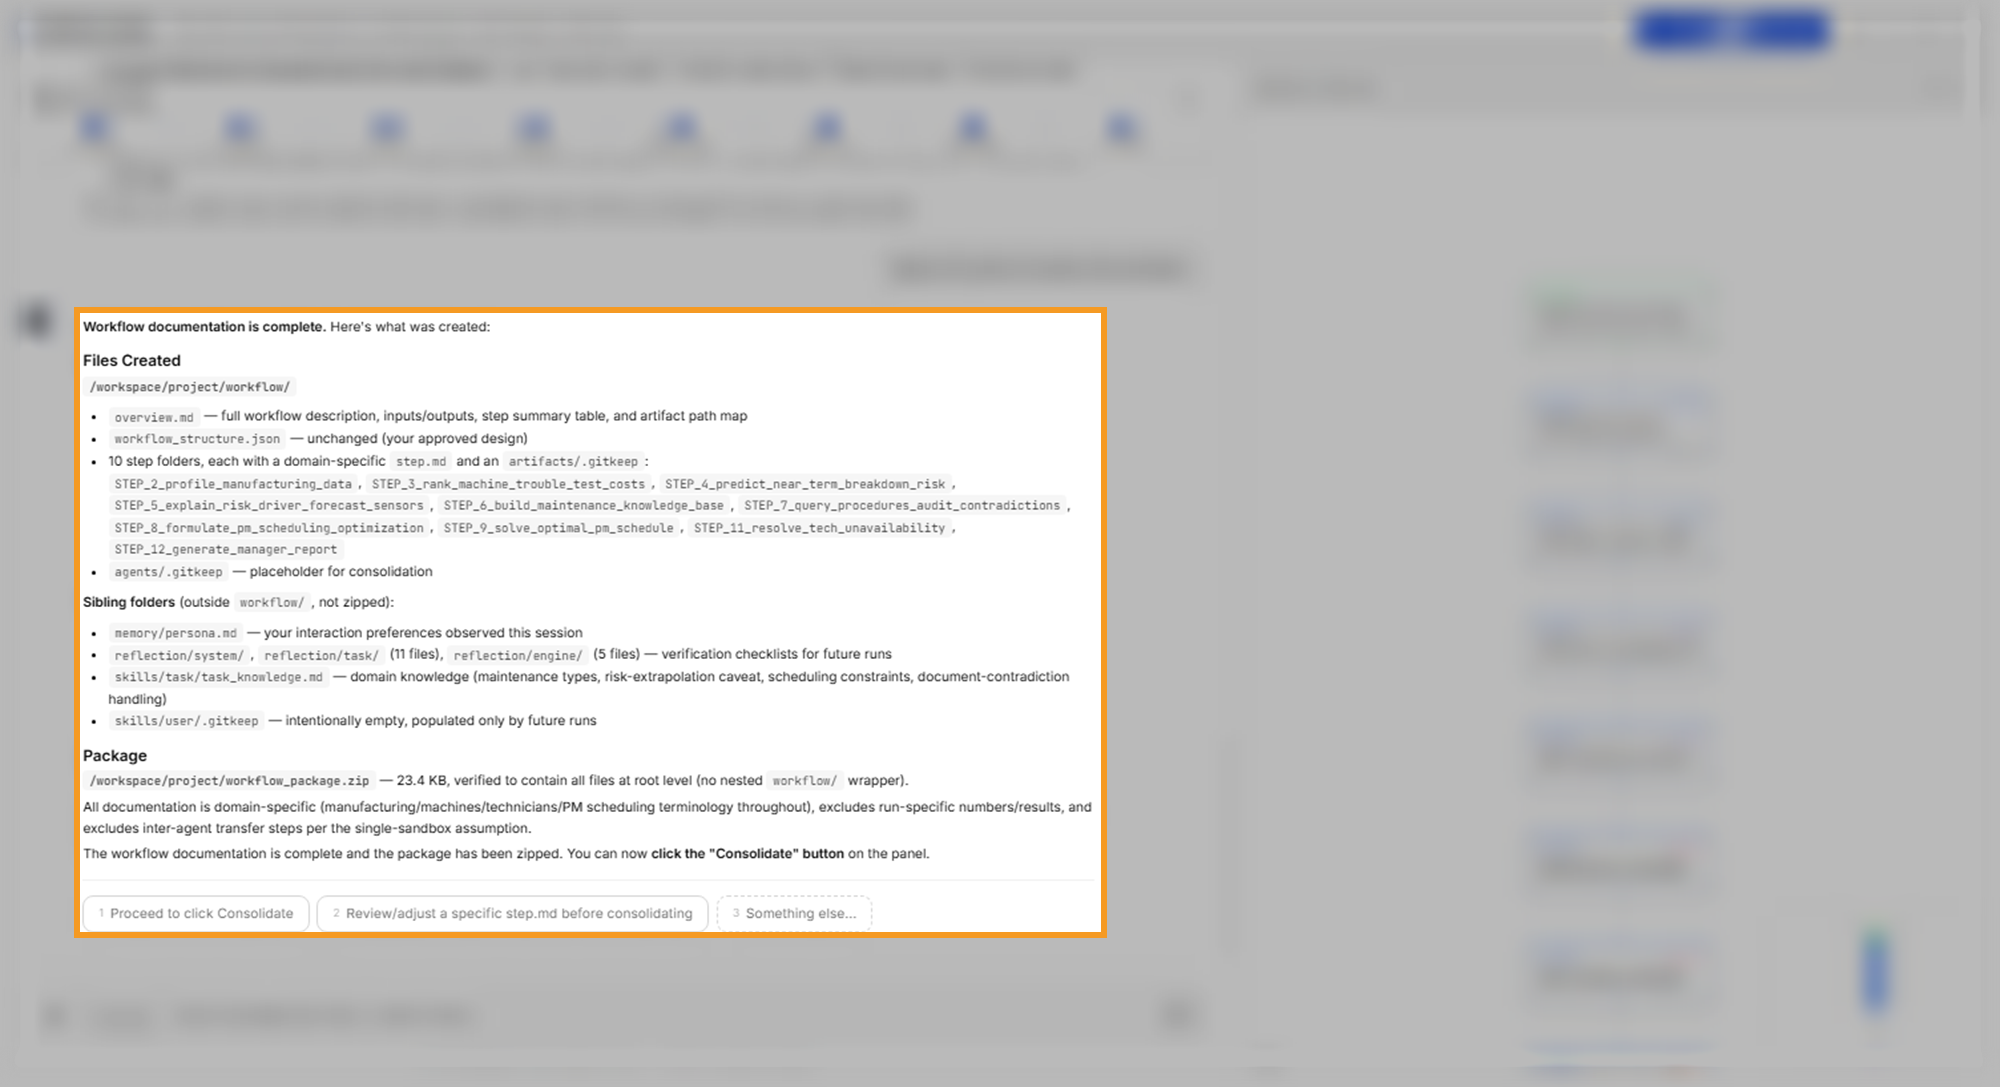
The package holds one folder per step, each with instructions for that step, and a description of the whole workflow. Next to the steps, the builder writes three more kinds of file:
- Preferences: a short file,
memory/persona.md, that records how you worked in this conversation. In the example it noted that you approve a plan before models or optimizations run. - Checks: checklists that a later run verifies its results against.
- Domain knowledge: facts from the conversation, such as scheduling rules and the conflicts the knowledge base found.
The preferences file holds only what the builder saw in this conversation, and every run of the workflow applies it. Read it with the rest of the package if you share the workflow with others.
What to look for: one folder per step you expect, and the message "Workflow documentation is complete."
Consolidate and test the workflow
A test sandbox is a separate workspace where a sandbox agent gathers each agent's code into one package. It reruns every step and compares the outputs with your conversation's results. This test shows the workflow works on its own, outside the conversation that made it.
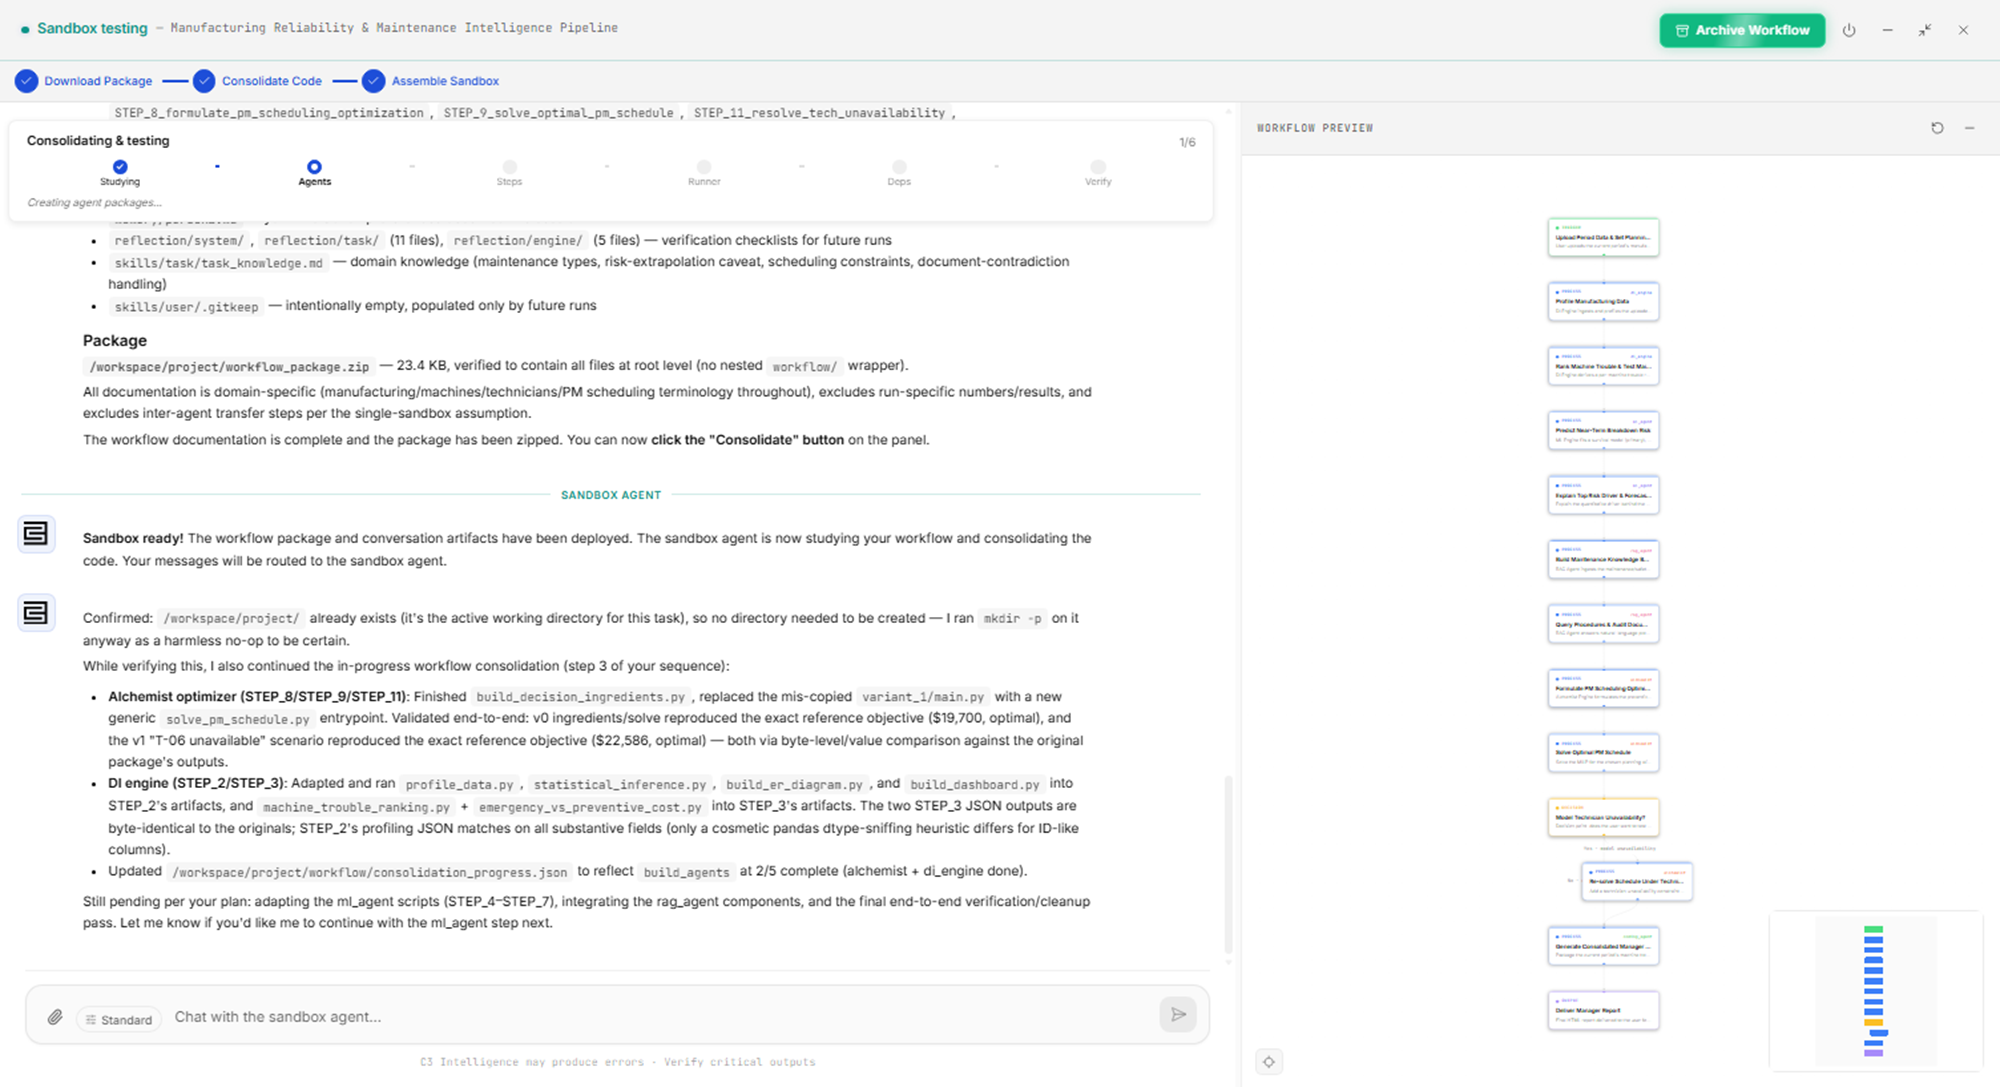
Select Consolidate and Test in the panel header. Preparing the sandbox takes a while. When it is ready, the panel title reads Sandbox testing, Archive Workflow appears in the header, and the sandbox agent replies "Sandbox ready!":
Reply at the checkpoints
The sandbox agent works in stages and pauses at checkpoints until you reply. It reports what it has checked and asks whether to continue. Reply with one of its options, or with a short message that names the next steps:
Yes, continue with the ml_agent step, then the rag_agent step, and finish with the end-to-end verification.The sandbox agent applies the preferences file. In the example, it paused before training models "per your standing requirement" and offered options to approve:
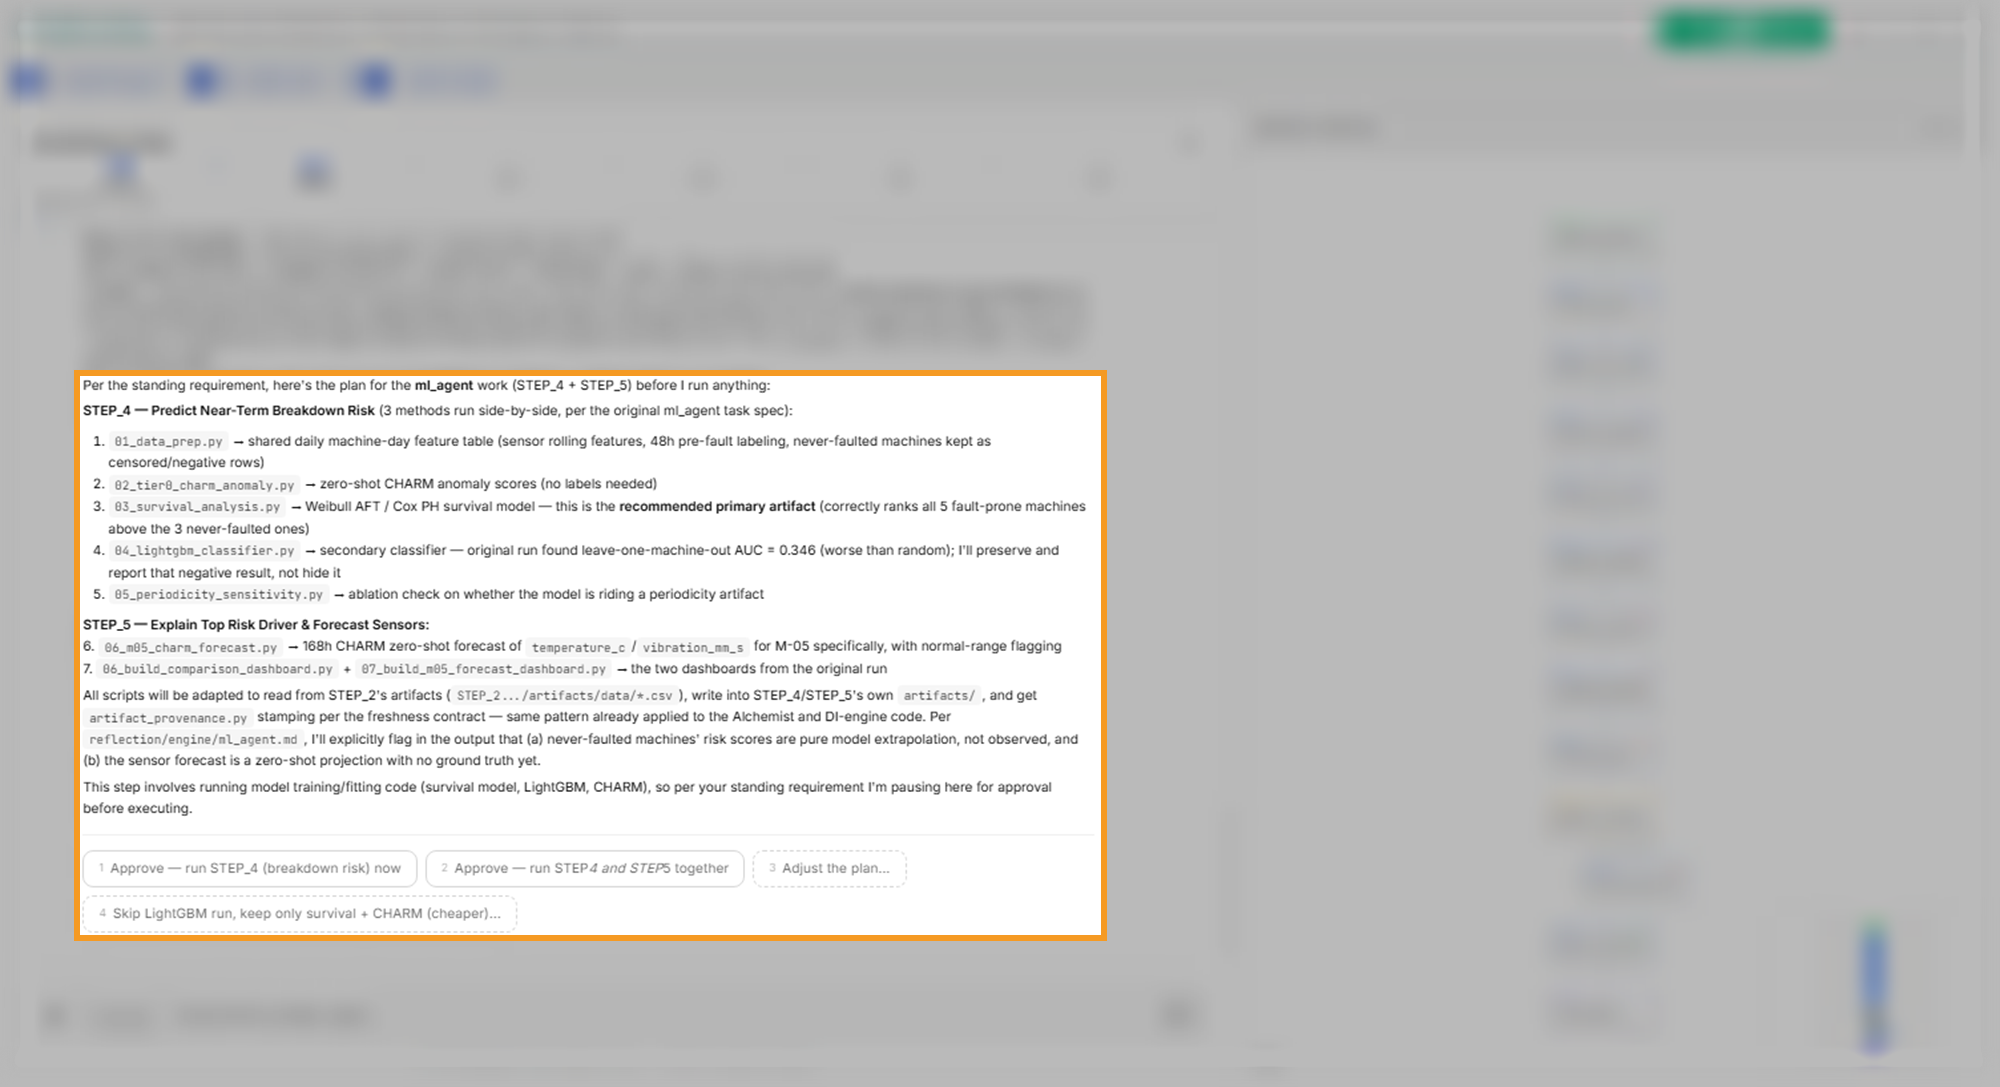
Read each report before you continue. When a summary lists finished steps as still to do, or mixes up which agent owns a step, correct it in your reply:
Yes, continue. Note that STEP_6 and STEP_7 are the rag_agent knowledge-base steps, and STEP_8, 9 and 11 were already verified earlier. After that, create the runner and run the end-to-end test.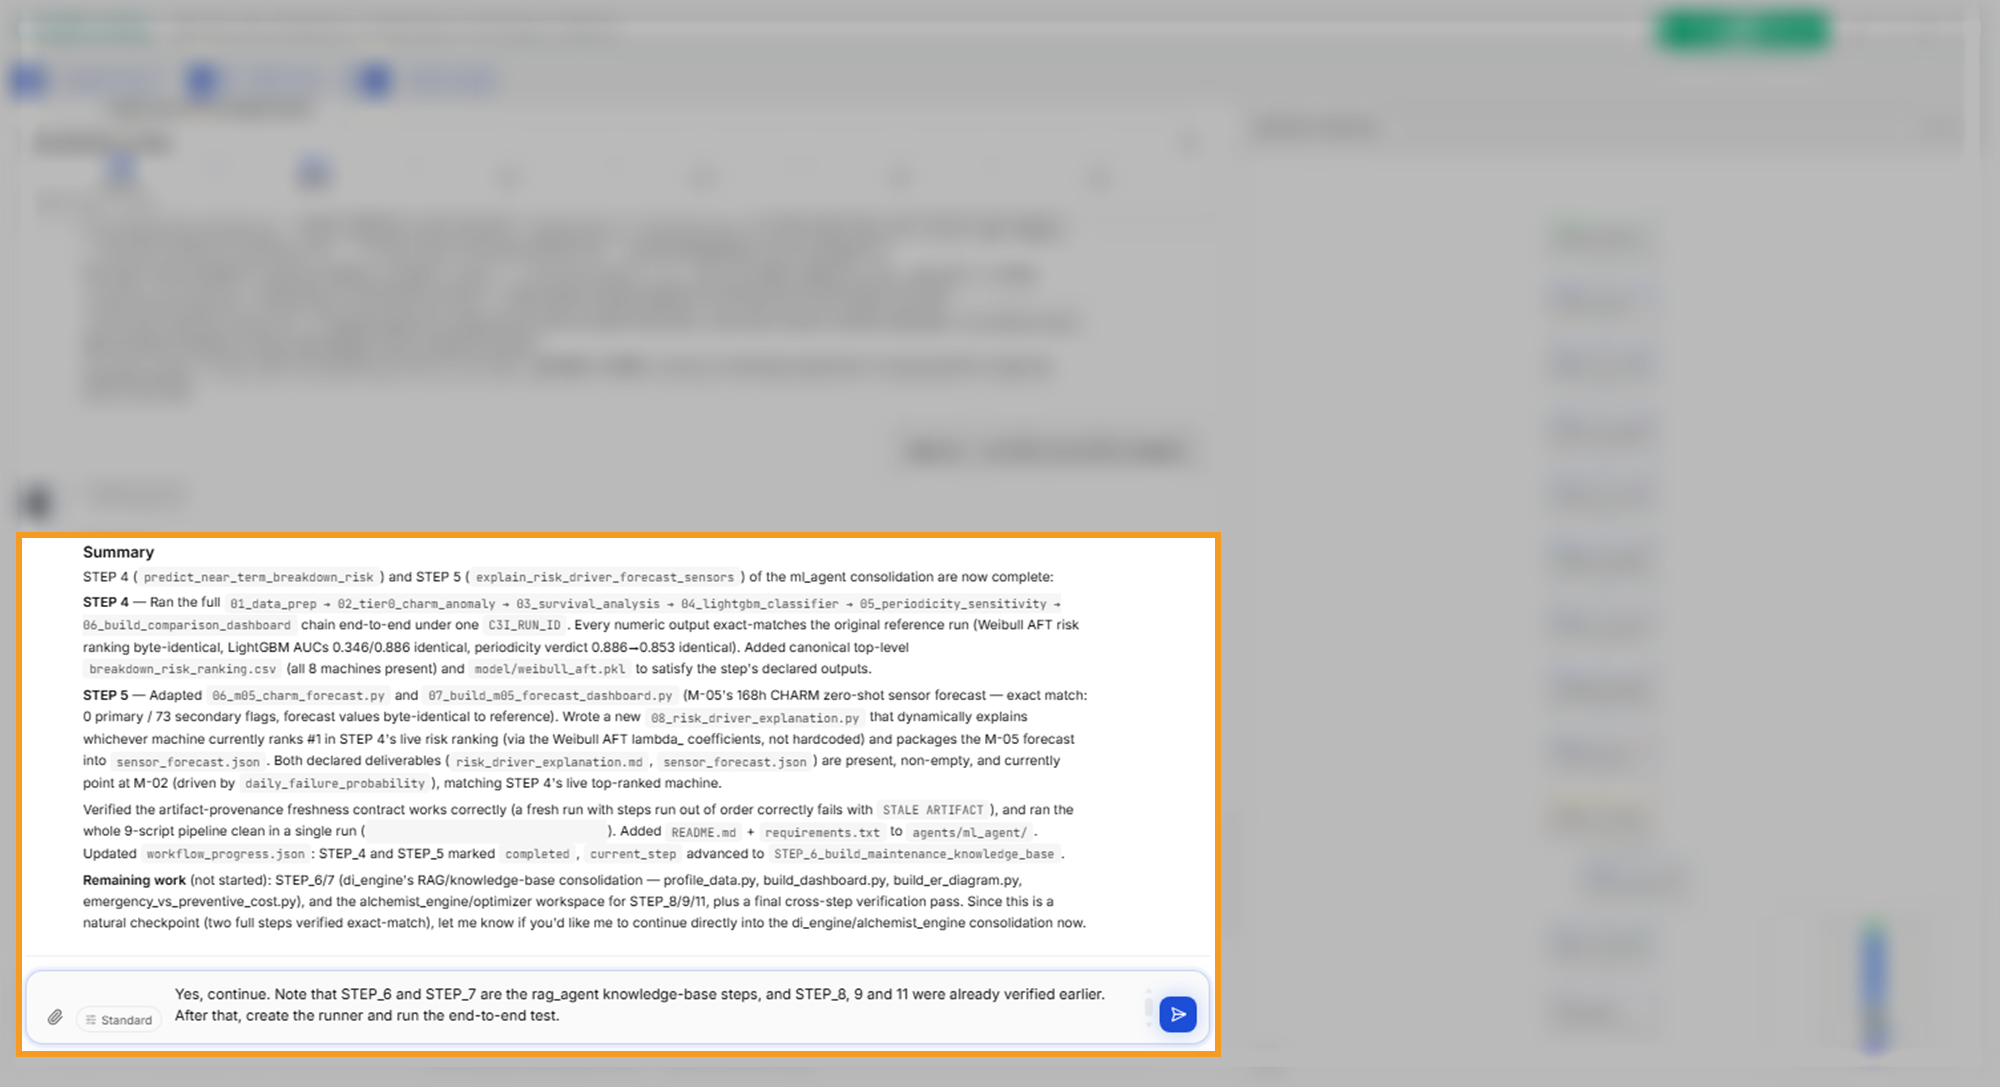
The example needed four replies, including one correction.
What to look for: each report says the step's outputs match the original results exactly. The last report describes a full end-to-end run with zero errors, and the progress bar reads Consolidation complete:
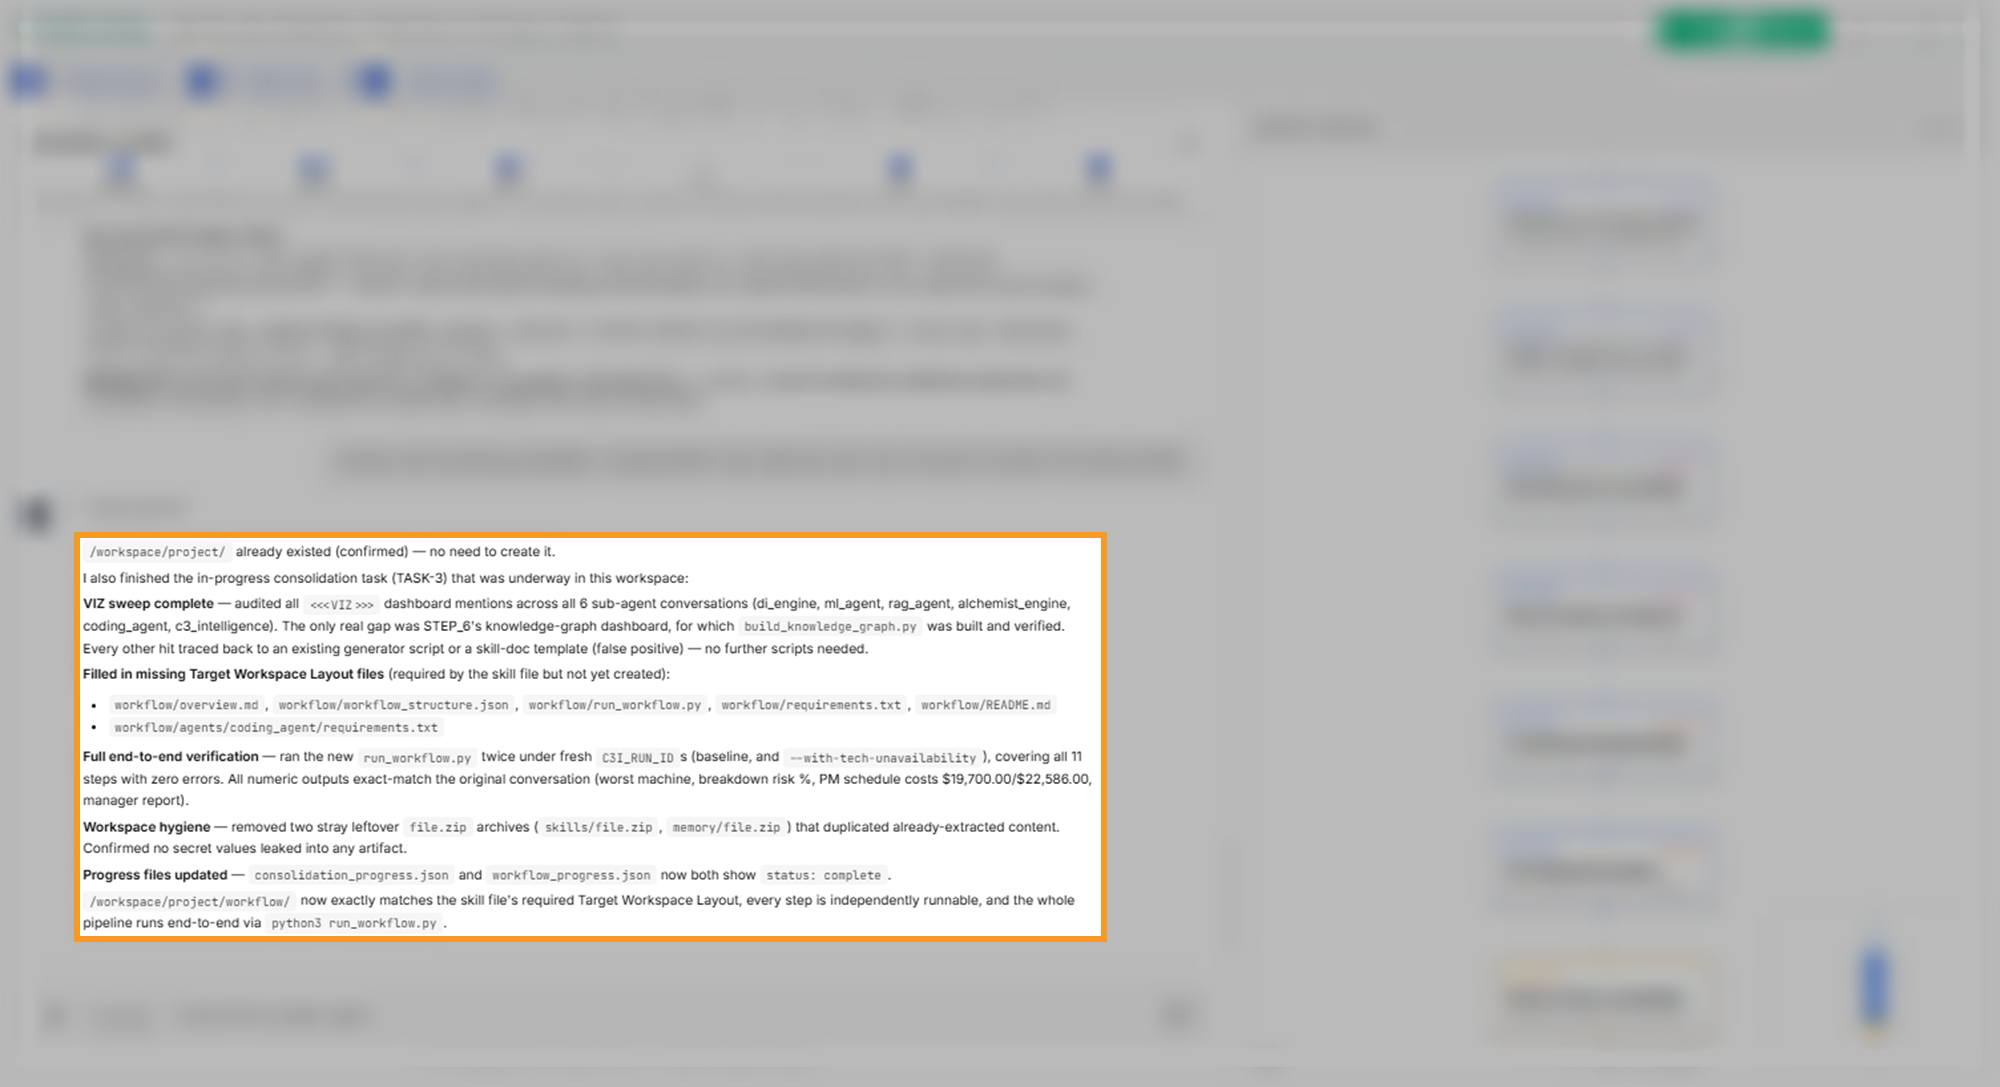
Archive the workflow
Archiving saves the tested workflow to the Intelligent Workflows page. Archive Workflow packs the test sandbox's whole workspace into a version of the workflow, so the button works only while that sandbox is still running. Archive as soon as the test passes:
- Select Archive Workflow in the panel header.
- Wait for the panel to close. The workflow is then on the Intelligent Workflows page.
The archive shows no confirmation message. When the test sandbox has already shut down after a period of inactivity, the archive reports "This run's sandbox is no longer available". You can try to make the workflow again by mining the conversation a second time. If the conversation has stopped, reviving it brings back the conversation history but not the agents' files or the workflow package. You may need to attach your data again and rerun steps before you mine the revived conversation.
Minimize the builder instead of ending it
The builder panel's header has three controls that close it in different ways:
- Minimize Workflow Builder and Close panel, the X icon, both hide the panel and keep the session and its test sandbox running.
- End workflow session, the power icon, asks you to confirm, then ends the builder and deletes its test sandbox. After that, you cannot archive the workflow.
To bring a hidden builder back, use the rail of icons that the right panel shrinks to. If the right panel is open, select Collapse panel first. Then select Restore Workflow Builder on the rail. Expand panel on the rail opens the right panel, not the builder.
Check the workflow on Intelligent Workflows
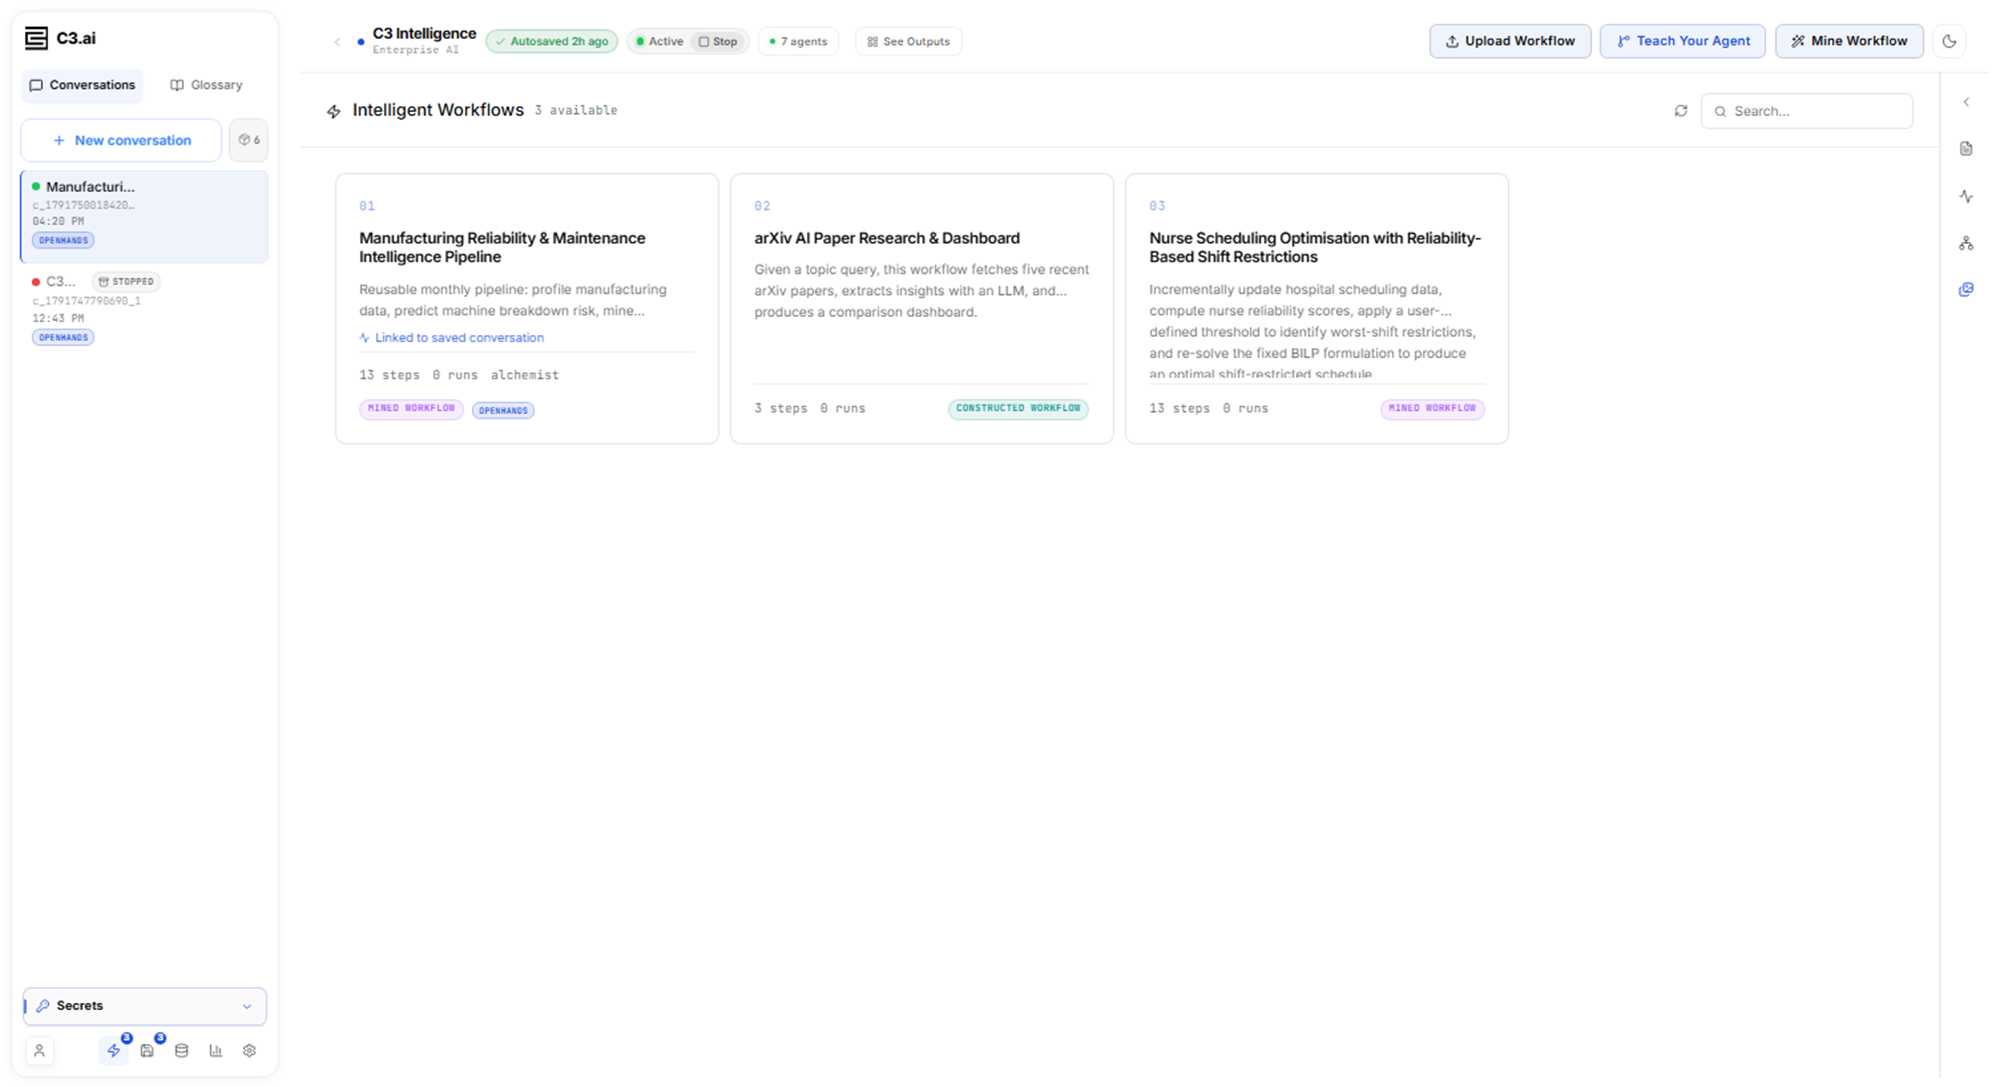
Before you run the workflow, confirm that it expects the right data and repeats only the choices you want repeated. Select the lightning icon in the sidebar footer to open Intelligent Workflows. Your workflow appears as a card marked MINED WORKFLOW and Linked to saved conversation:
Select the card, then read the Overview tab. Expects lists the data a run needs, including the run parameters, and Produces lists what the run returns:
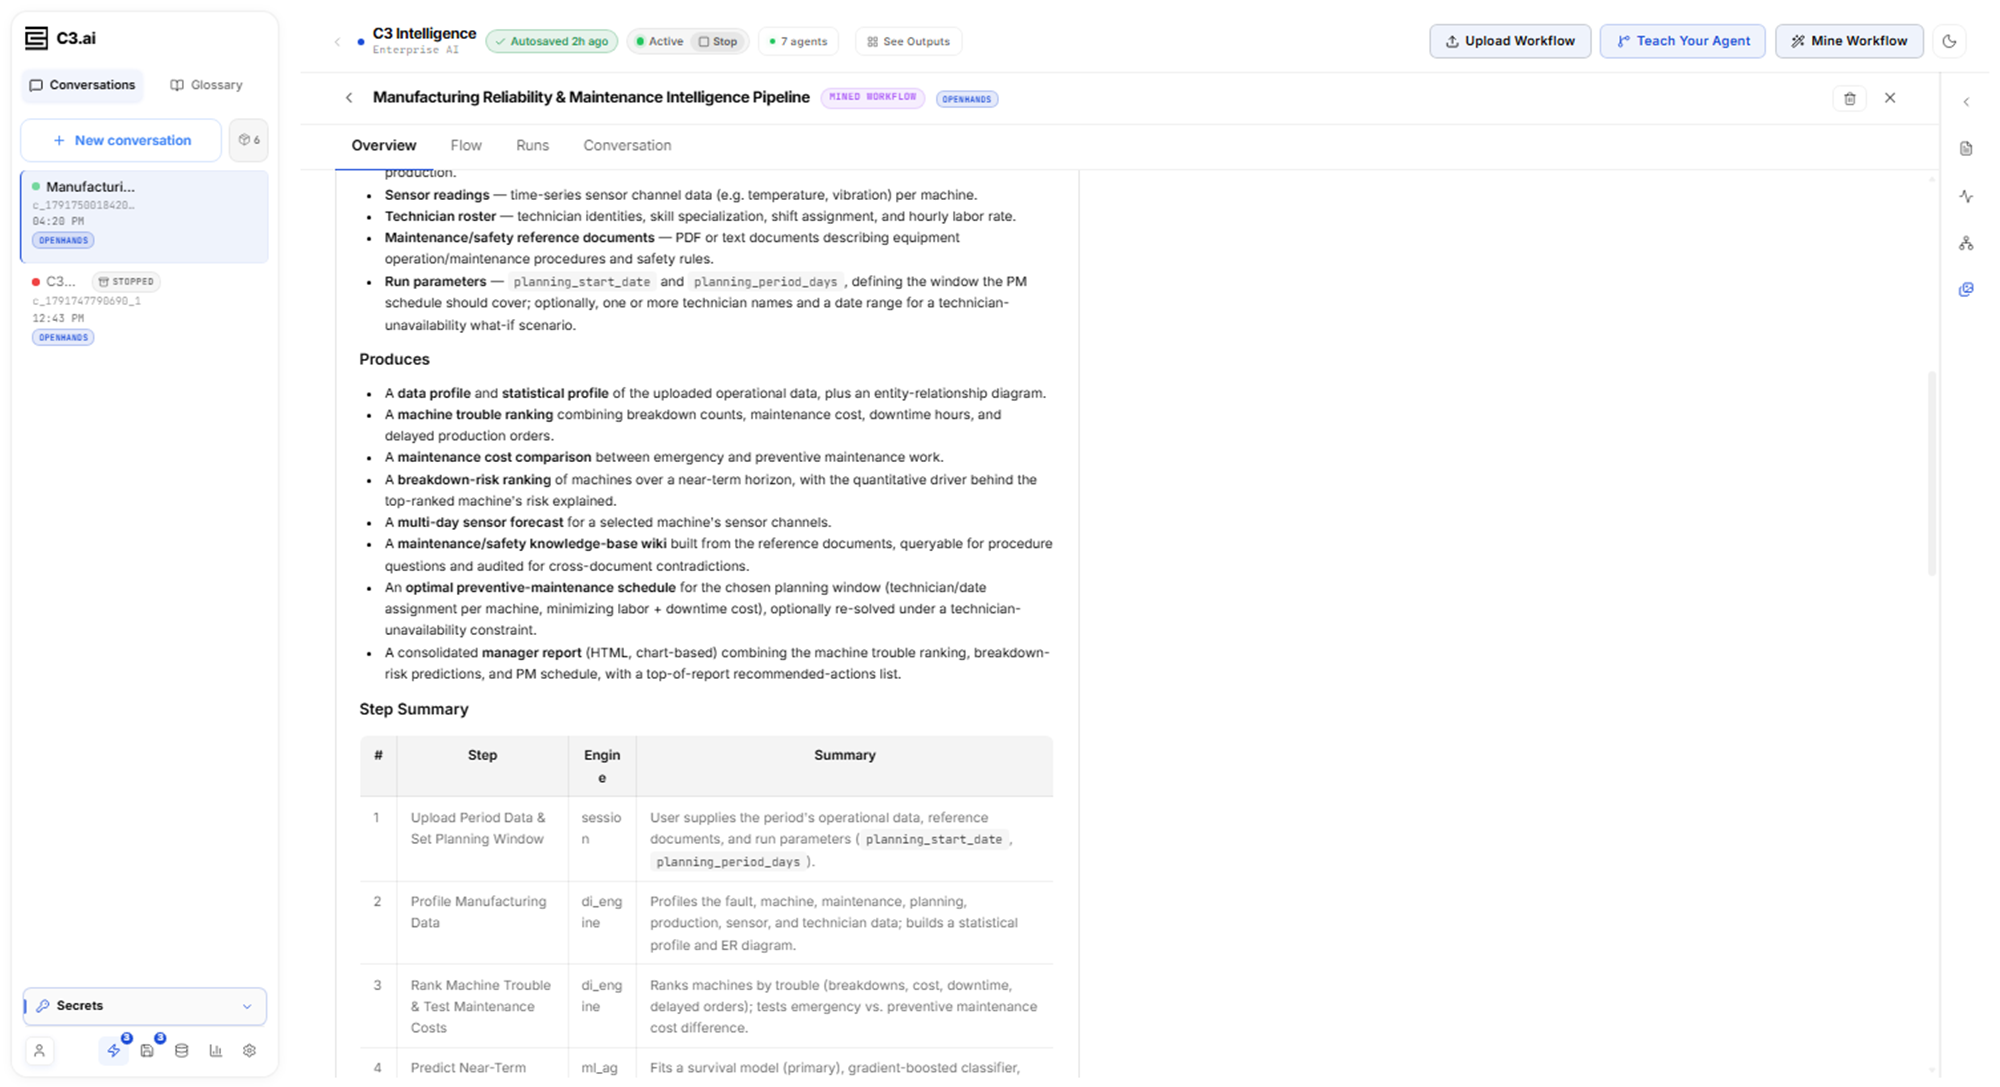
A mined workflow repeats the assumptions its source conversation made. In the example, the optimization agent assumed that a General technician can service every machine. The workflow keeps that rule, so each future schedule repeats it. Read the Step Summary for rules like this one and for names or values from your original run, such as one machine named in a step. To change an assumption, correct it in the conversation and mine the conversation again.
To learn what each tab shows, see Create Intelligent Workflows.
Deploy and run the workflow
Deploying starts a fresh sandbox that loads one version of the workflow and a run agent that executes it. You give that agent new data and settings in a chat. To deploy and run the workflow:
On the workflow page, select the Runs tab.
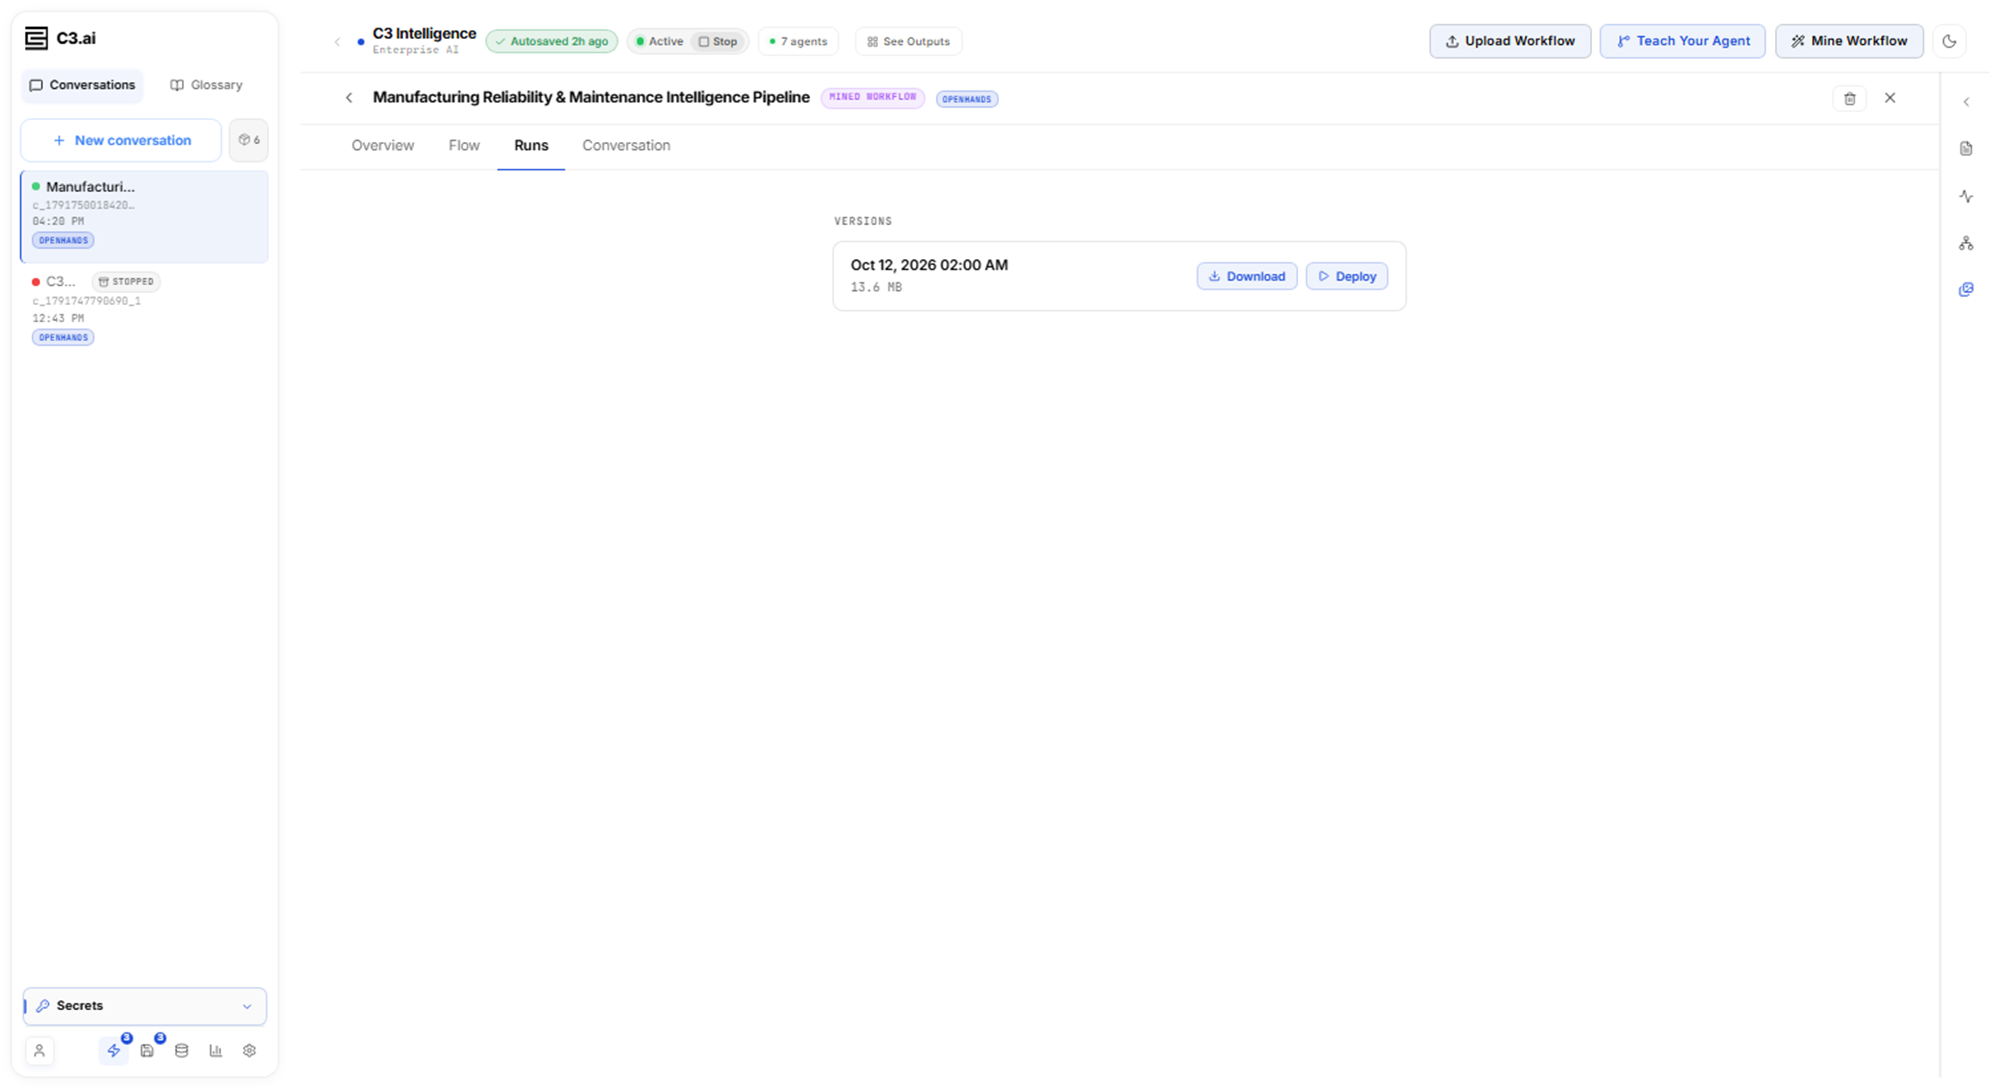
Select Deploy on the version you want. When your site offers more than one agent runtime, the software that runs the agents, choose one in the picker that opens.
Follow the progress messages, from "Starting deployment…" to "Deployment complete". A chat with the run agent then opens.
Select Execute the workflow on the chat's welcome screen, or send a message. The agent reads the workflow, installs its code, and offers options, such as running the full workflow or starting from a specific step.
To run on new data, attach the files with Attach files, and state the start date and the planning period in your message. The agent places the files, then reruns the steps that use them and every step after those.
Select Flow in the session header to follow each step's progress and spot an error.
The run agent checks that each step's inputs come from the current run. When a step fails, the agent stops and reports the error instead of showing results from an earlier run. When you finish, select Archive to save the sandbox's current state as a new version and keep working, or select Close to end the session. Close first asks whether to archive the workspace.
When a sandbox for this workflow is already running, the version shows Connect instead, which reopens that sandbox without deploying again. Select Download on a version to save it as a .zip file. Another user imports that file with Upload Workflow on the Intelligent Workflows page.