Configure the Load Destination
When you save an Entity Extractor in an Unstructured Data Integration (UDI) pipeline, the platform adds a Load node to the canvas. The platform also adds one entity node for each entity you defined. The Load node decides where the extracted records go: into your application data model as records, or into file storage as CSV files.
Before you begin
Make sure you have a UDI pipeline with a saved Entity Extractor. For the Entity Extractor, see Configure Entity Extraction.
Choose a load destination
The Configure Load dialog offers two destinations. The default is Load to External Source:
- Choose Load to Application Data Model when your application, its UI, or other pipelines read the extracted entities as records. The platform creates an entity Type, the definition of that kind of record, for each new entity.
- Choose Load to External Source when another system or team reads the extracted entities as files. The platform writes CSV files to a folder in the application's file storage.
Open the Load configuration
Open the dialog and name the node:
- In C3 AI Studio, select Data > Data Fusion and find your pipeline on the canvas.
- Select the Load node. The Configure Load dialog opens with one tab for each destination: Load to External Source and Load to Application Data Model. The tab you save from sets the destination.
- In Name, keep the default
<collection name> Loador enter another name. The canvas node shows this name.
Load to the application data model
Write the extracted entities as records of entity Types in your application:
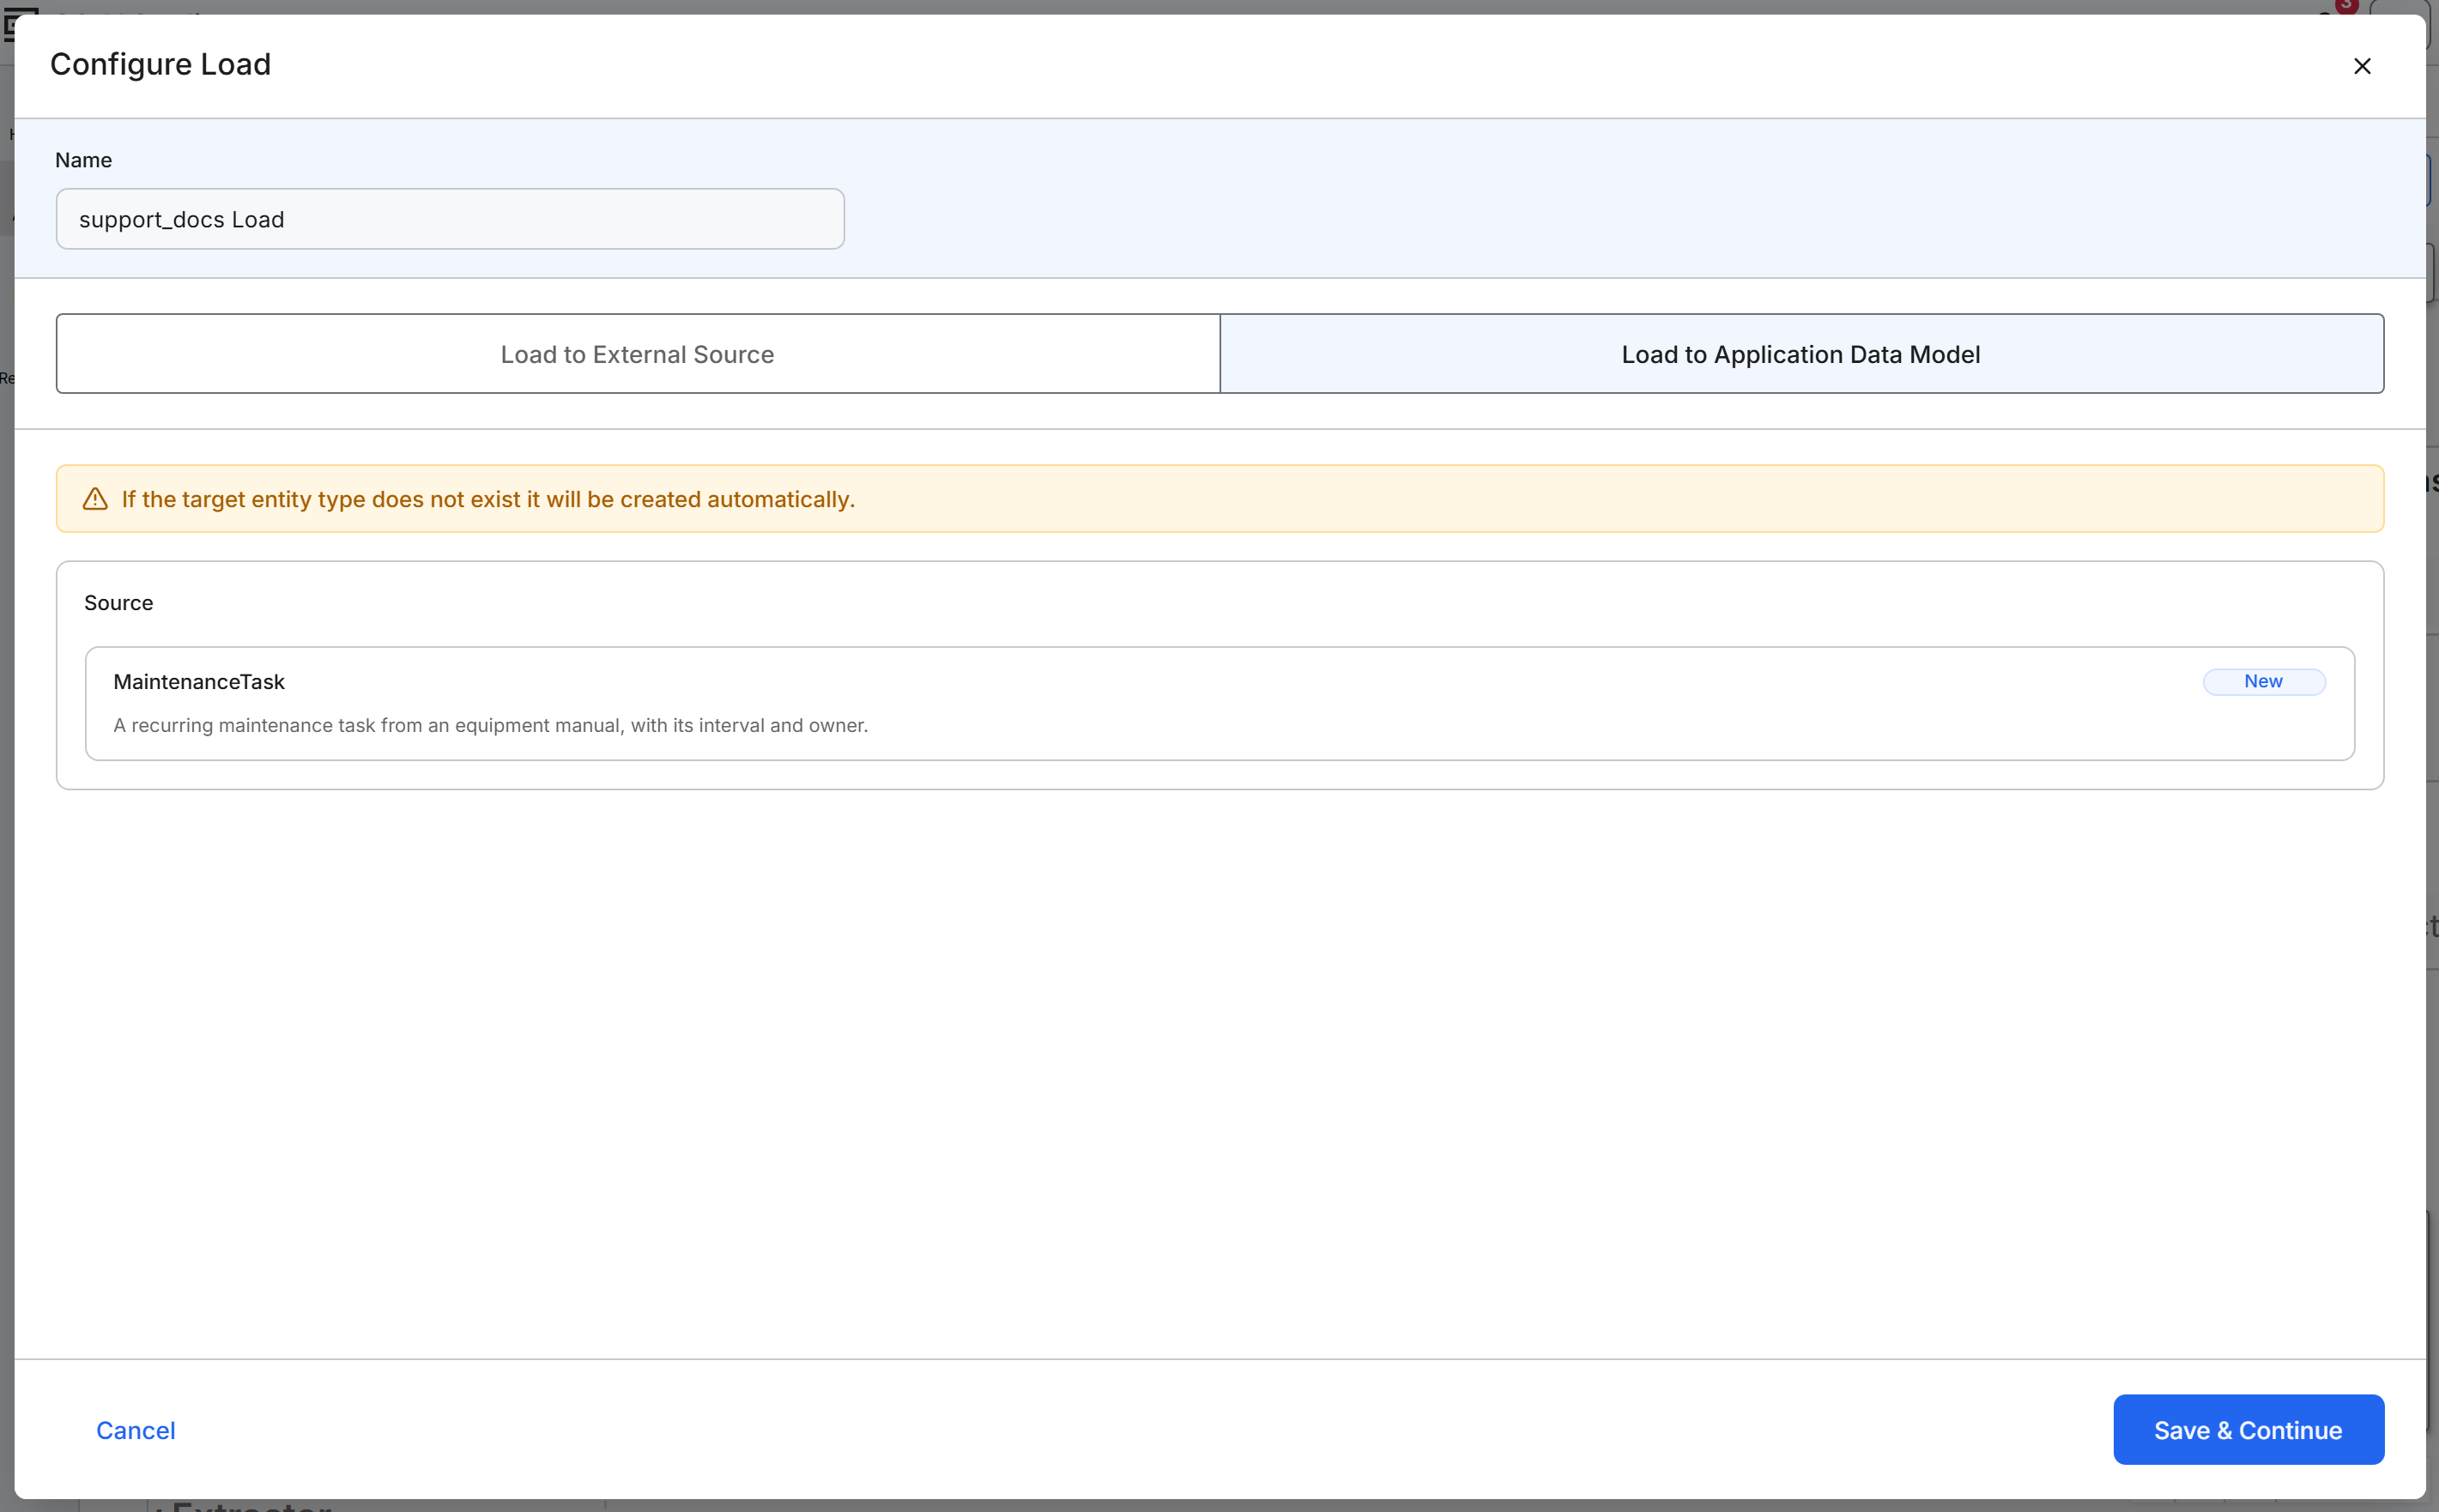
- Select the Load to Application Data Model tab.
- Review the Source list. The list shows one card for each entity, with a status:
- New: No entity Type with this name exists, or this pipeline's entity has fields that differ from its Type. Saving creates or updates the Type.
- Existing: An entity Type with this name exists, and the records go into it.
- Not Entity: A Type with this name exists but is not an entity Type. Save & Continue stays unavailable while any entity has this status. The tooltip on Save & Continue reads "One or more types already exist but are not entity types. Remove or replace them to continue."
- Select Save & Continue. The platform creates or updates the entity Type for each New entity. Each entity node on the canvas now offers Edit properties, View Data, and Delete.
The platform creates these entity Types in this environment only, not in your GitHub repository. An application redeployed from the repository does not have them, so push your changes to GitHub. For the steps, see Promote and Version a Data Fusion Pipeline.
Load to an external source
Write the extracted entities as CSV files to the application's file storage:
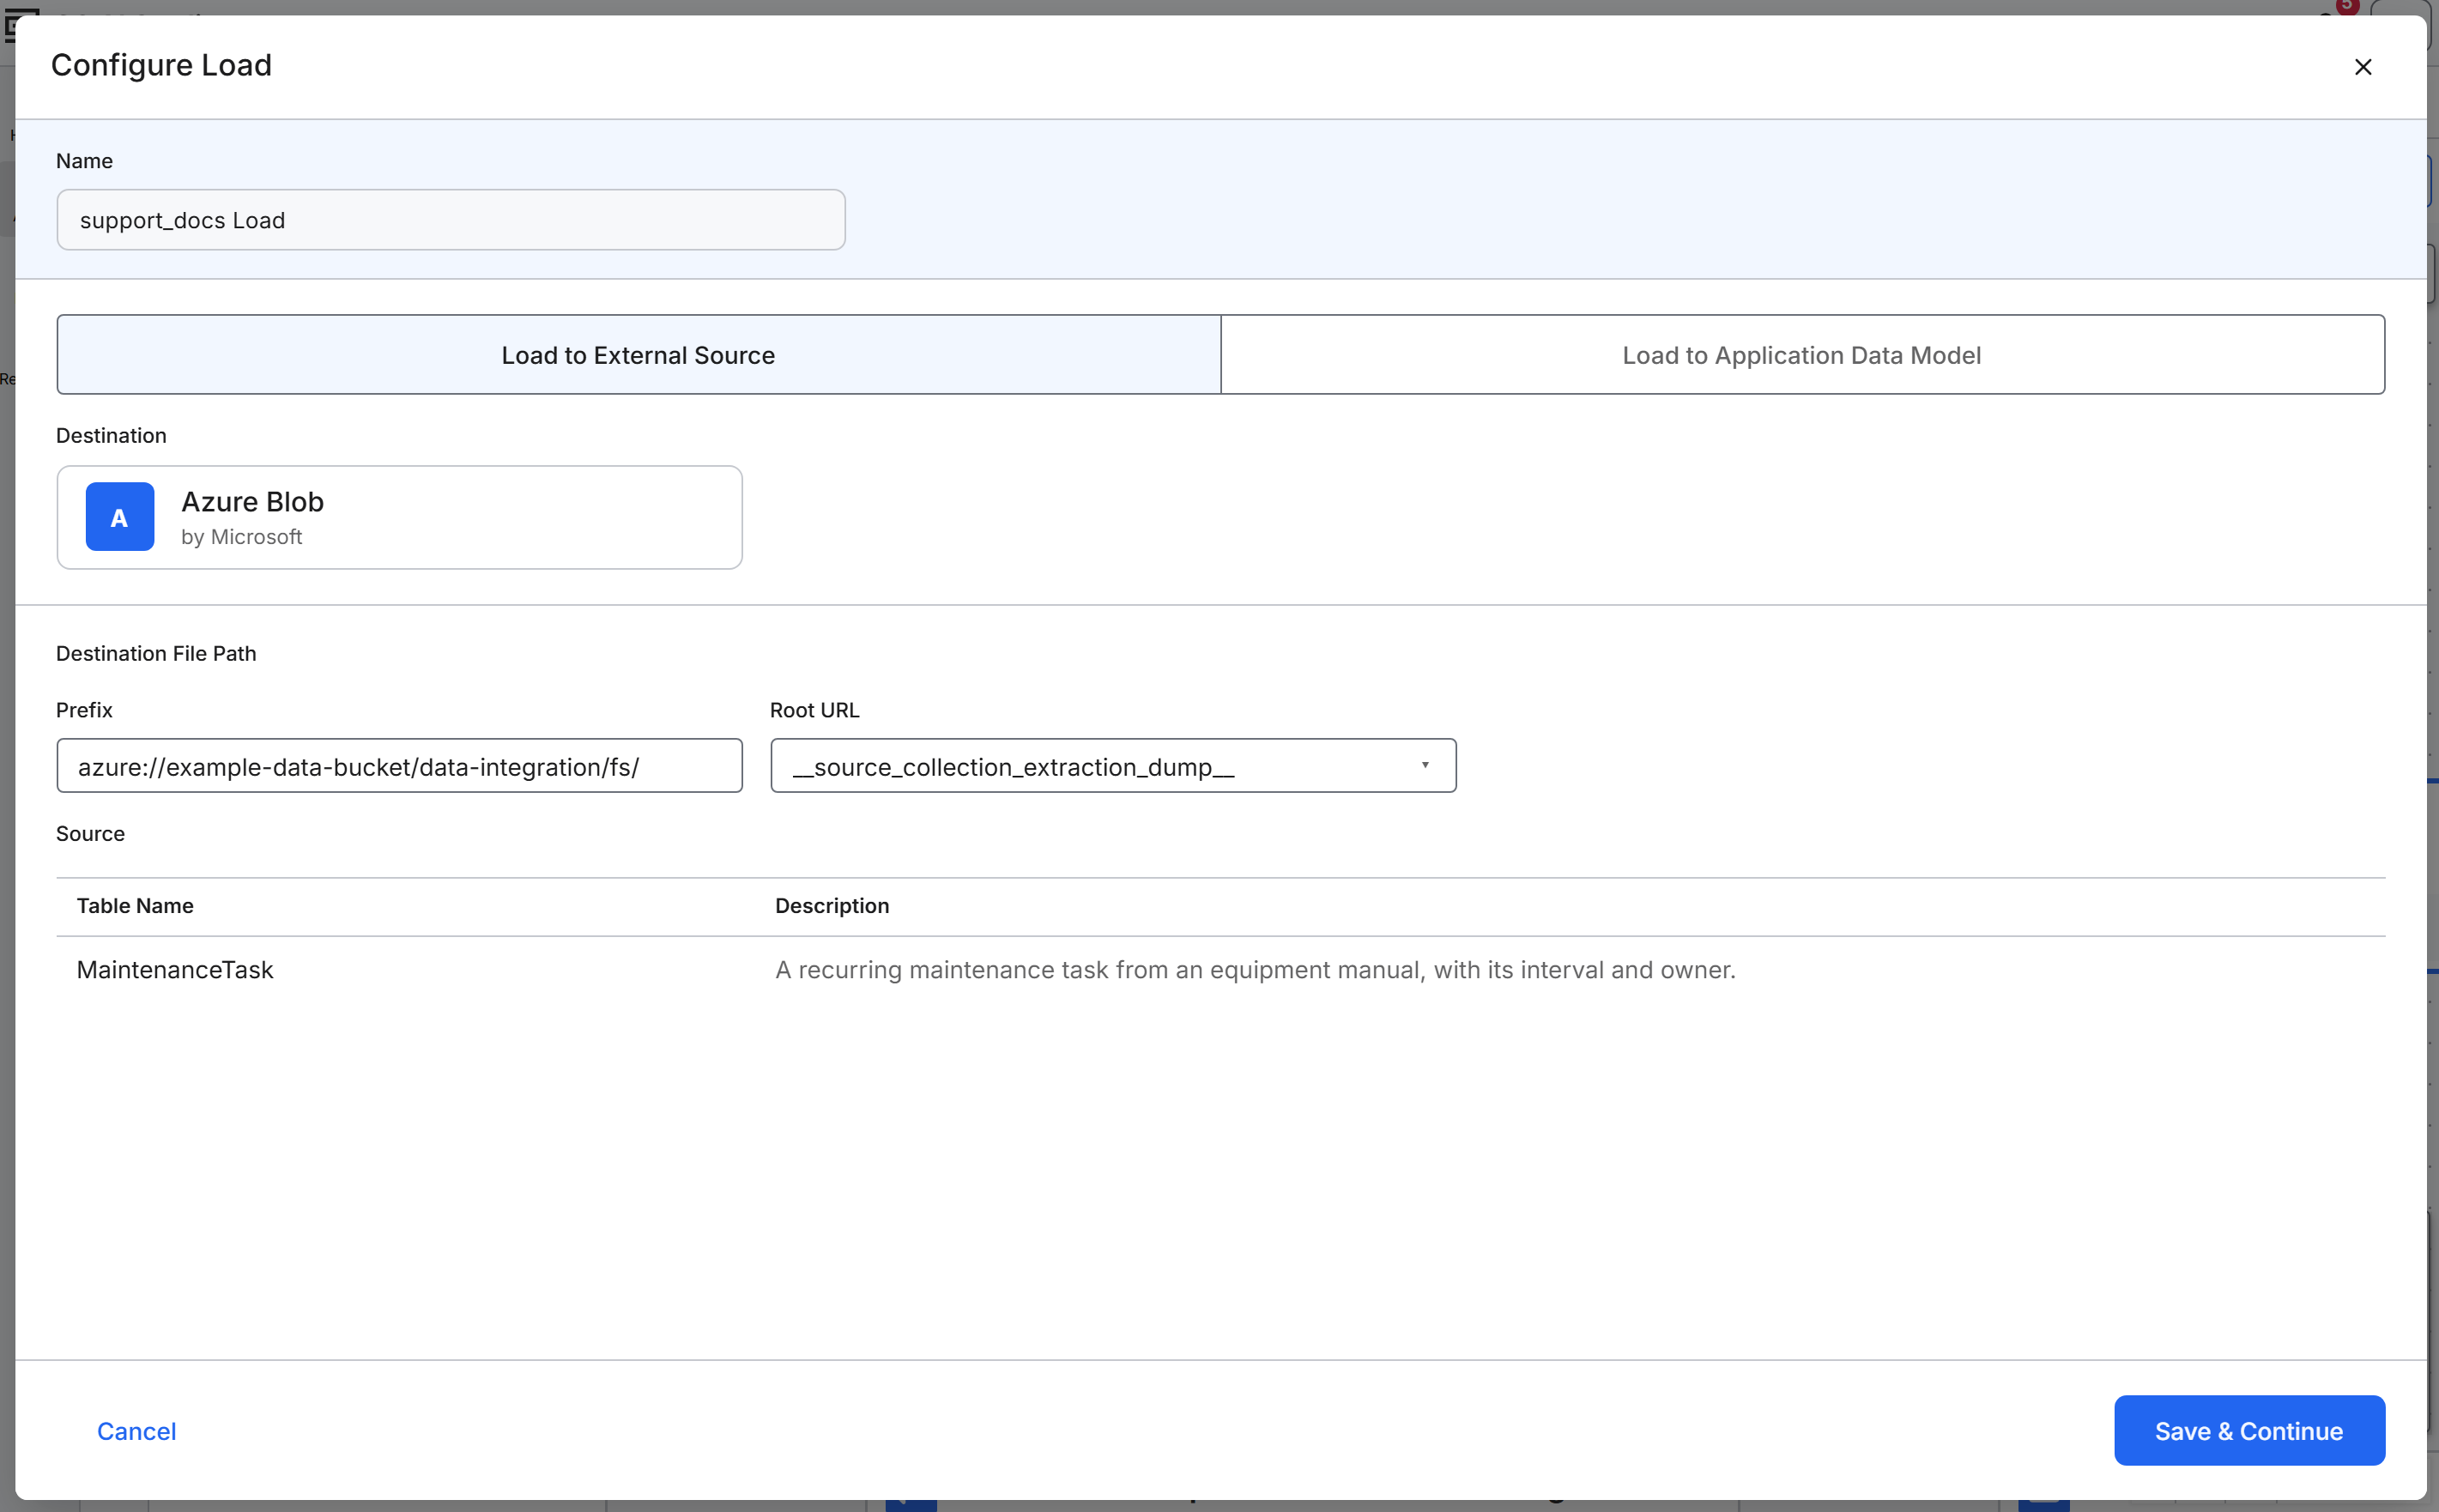
- Select the Load to External Source tab.
- Under Destination File Path, review Prefix, the read-only address of the application's file storage.
- Optional: Select Root URL to choose the folder for the files. The Select Root URL browser opens. Select a folder, then select Select. The default folder is
__source_collection_extraction_dump__. - Review the Source table, which lists each entity with its Table Name and Description.
- Select Save & Continue. Each entity node on the canvas now offers Browse Files.
For each entity, a run writes the extracted records as CSV files to an entities/ folder. The run writes the links between records and their source files to a maps/ folder. Both folders are inside the entity's folder under Root URL. Each run adds new CSV files, and the files from earlier runs stay.
Manage each entity node
After you save the Load node, open an entity node's menu (the three-dot button) to work with that entity. The menu depends on the destination:
- With Load to External Source, select Browse Files to open the entity's folder in the file browser.
- With Load to Application Data Model, select Edit properties, View Data, or Delete.
Set how records are stored
Choose how a run writes records that already exist:
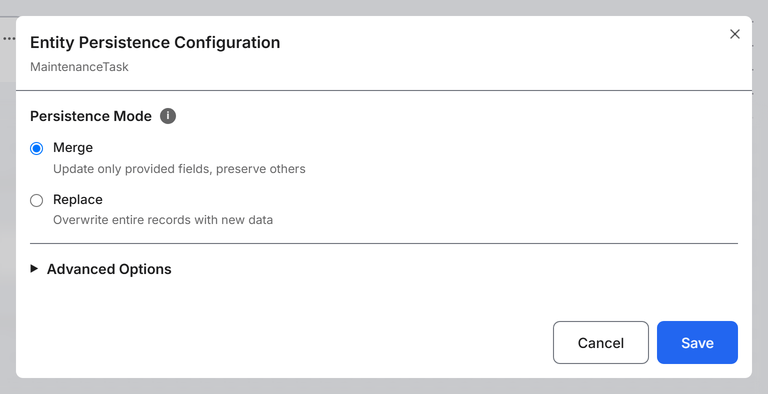
- Open the entity node's menu (the three-dot button) and select Edit properties. The Entity Persistence Configuration dialog opens.
- Under Persistence Mode, select one option:
- Merge: Updates only the fields the run provides and keeps the other fields. Merge is the default. Keep Merge to preserve fields that the run does not provide.
- Replace: Overwrites each whole record with the new data. Choose Replace to make each record match the run's data.
- Optional: Expand Advanced Options to set Preserve metadata timestamps, Commit size, and, with Merge, Merge include.
- Select Save.
View the loaded records
To check what a run wrote:
- Open the entity node's menu (the three-dot button) and select View Data. The grid lists the records, one column per field. Before the first run that extracts records, the grid shows "No records to display."
- Optional: To narrow the list, enter a Filter, choose fields in Include, and set Order by and a sort direction.
- Select Apply.
Delete an entity
Deleting an entity removes it from the pipeline and deletes its entity Type from the application. To delete one:
- Open the entity node's menu (the three-dot button) and select Delete. A dialog asks you to confirm.
- Type the entity name in the confirmation box. Delete becomes available.
- Select Delete.
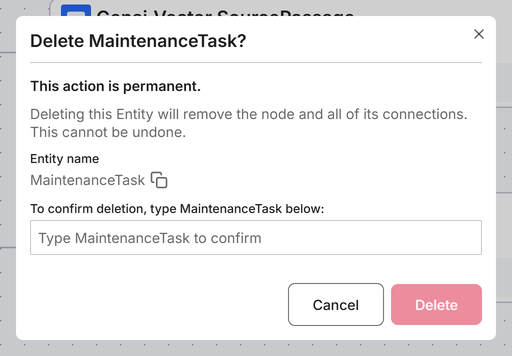
Deleting the entity also changes the nodes around it:
- The canvas removes the entity node.
- If the Load node had no other entity, the canvas also removes the Load node.
- If the Entity Extractor no longer has any entities, it returns to a placeholder.
If Delete is unavailable in the menu, the application runs in production mode or the pipeline comes from a dependency package.
Edit entity fields from the Load node
You can also edit an entity's fields from the Load side of the pipeline. The Entity Extractor and the entity node share the same fields, so a change you save in one appears in the other. To edit the fields:
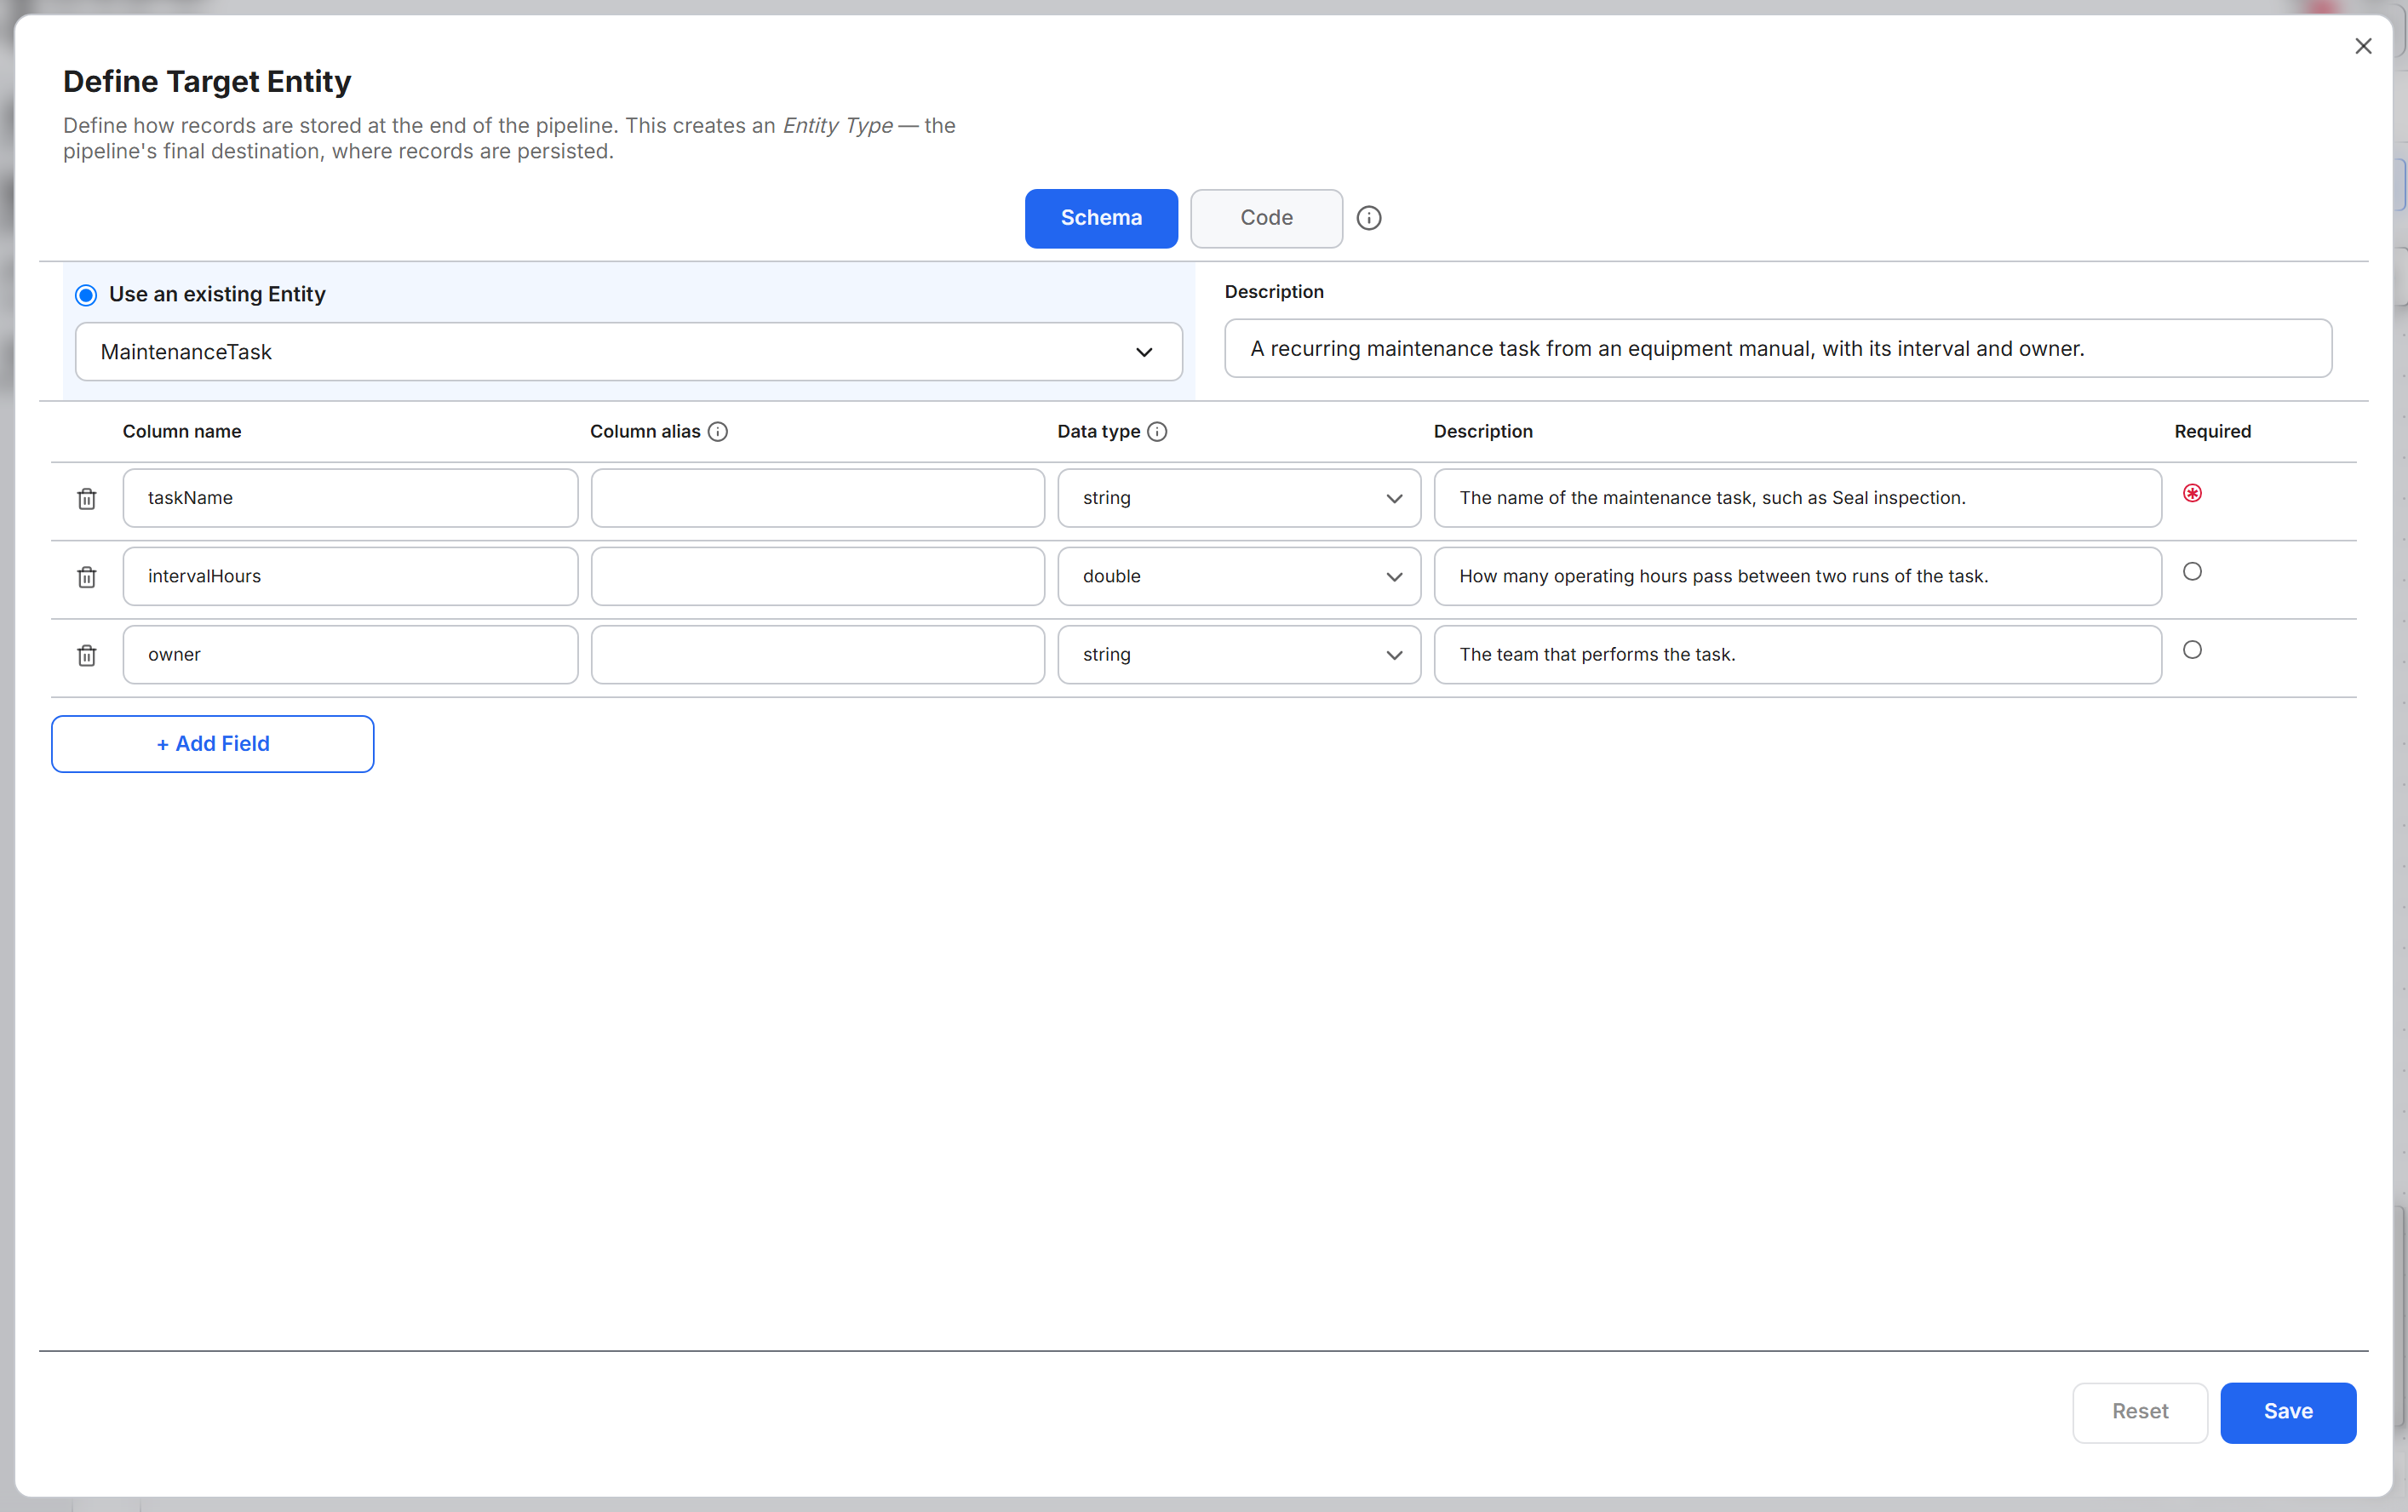
- Select the body of an entity node. The Define Target Entity dialog opens in a Schema or Code view. The dialog lists each field with its Column name, Column alias, Data type, Description, and Required setting.
- Edit the fields, or select Add Field to add a field.
- Select Save.