Input Connectors
You can upload data you have in cloud storage, SQL sources, NoSQL sources, and business applications to Visual Notebooks. Visual Notebooks supports data ingestion from the following sources:
- Azure Data Lake Storage (ADLS)
- Amazon S3
- Google Cloud Storage
- Delta Lake
- SAP HANA
- Snowflake
- Greenplum Database
- Oracle Database
- Apache Spark (can be used to input data from Databricks)
- PostgreSQL
- MySQL
- Microsoft SQL Server
- Splunk
- BigQuery
- Salesforce
In addition, you can import data using a REST API.
Select a node
Data can only be uploaded inside a visual notebook. To upload data, first create a new visual notebook or open an existing one. Once inside the visual notebook canvas, find the node that corresponds to the source you want to upload from. Relevant nodes are in the Input Data section, then one of the following subsections: Cloud Storage, SQL Sources, NoSQL Sources, Business Applications, or APIs.
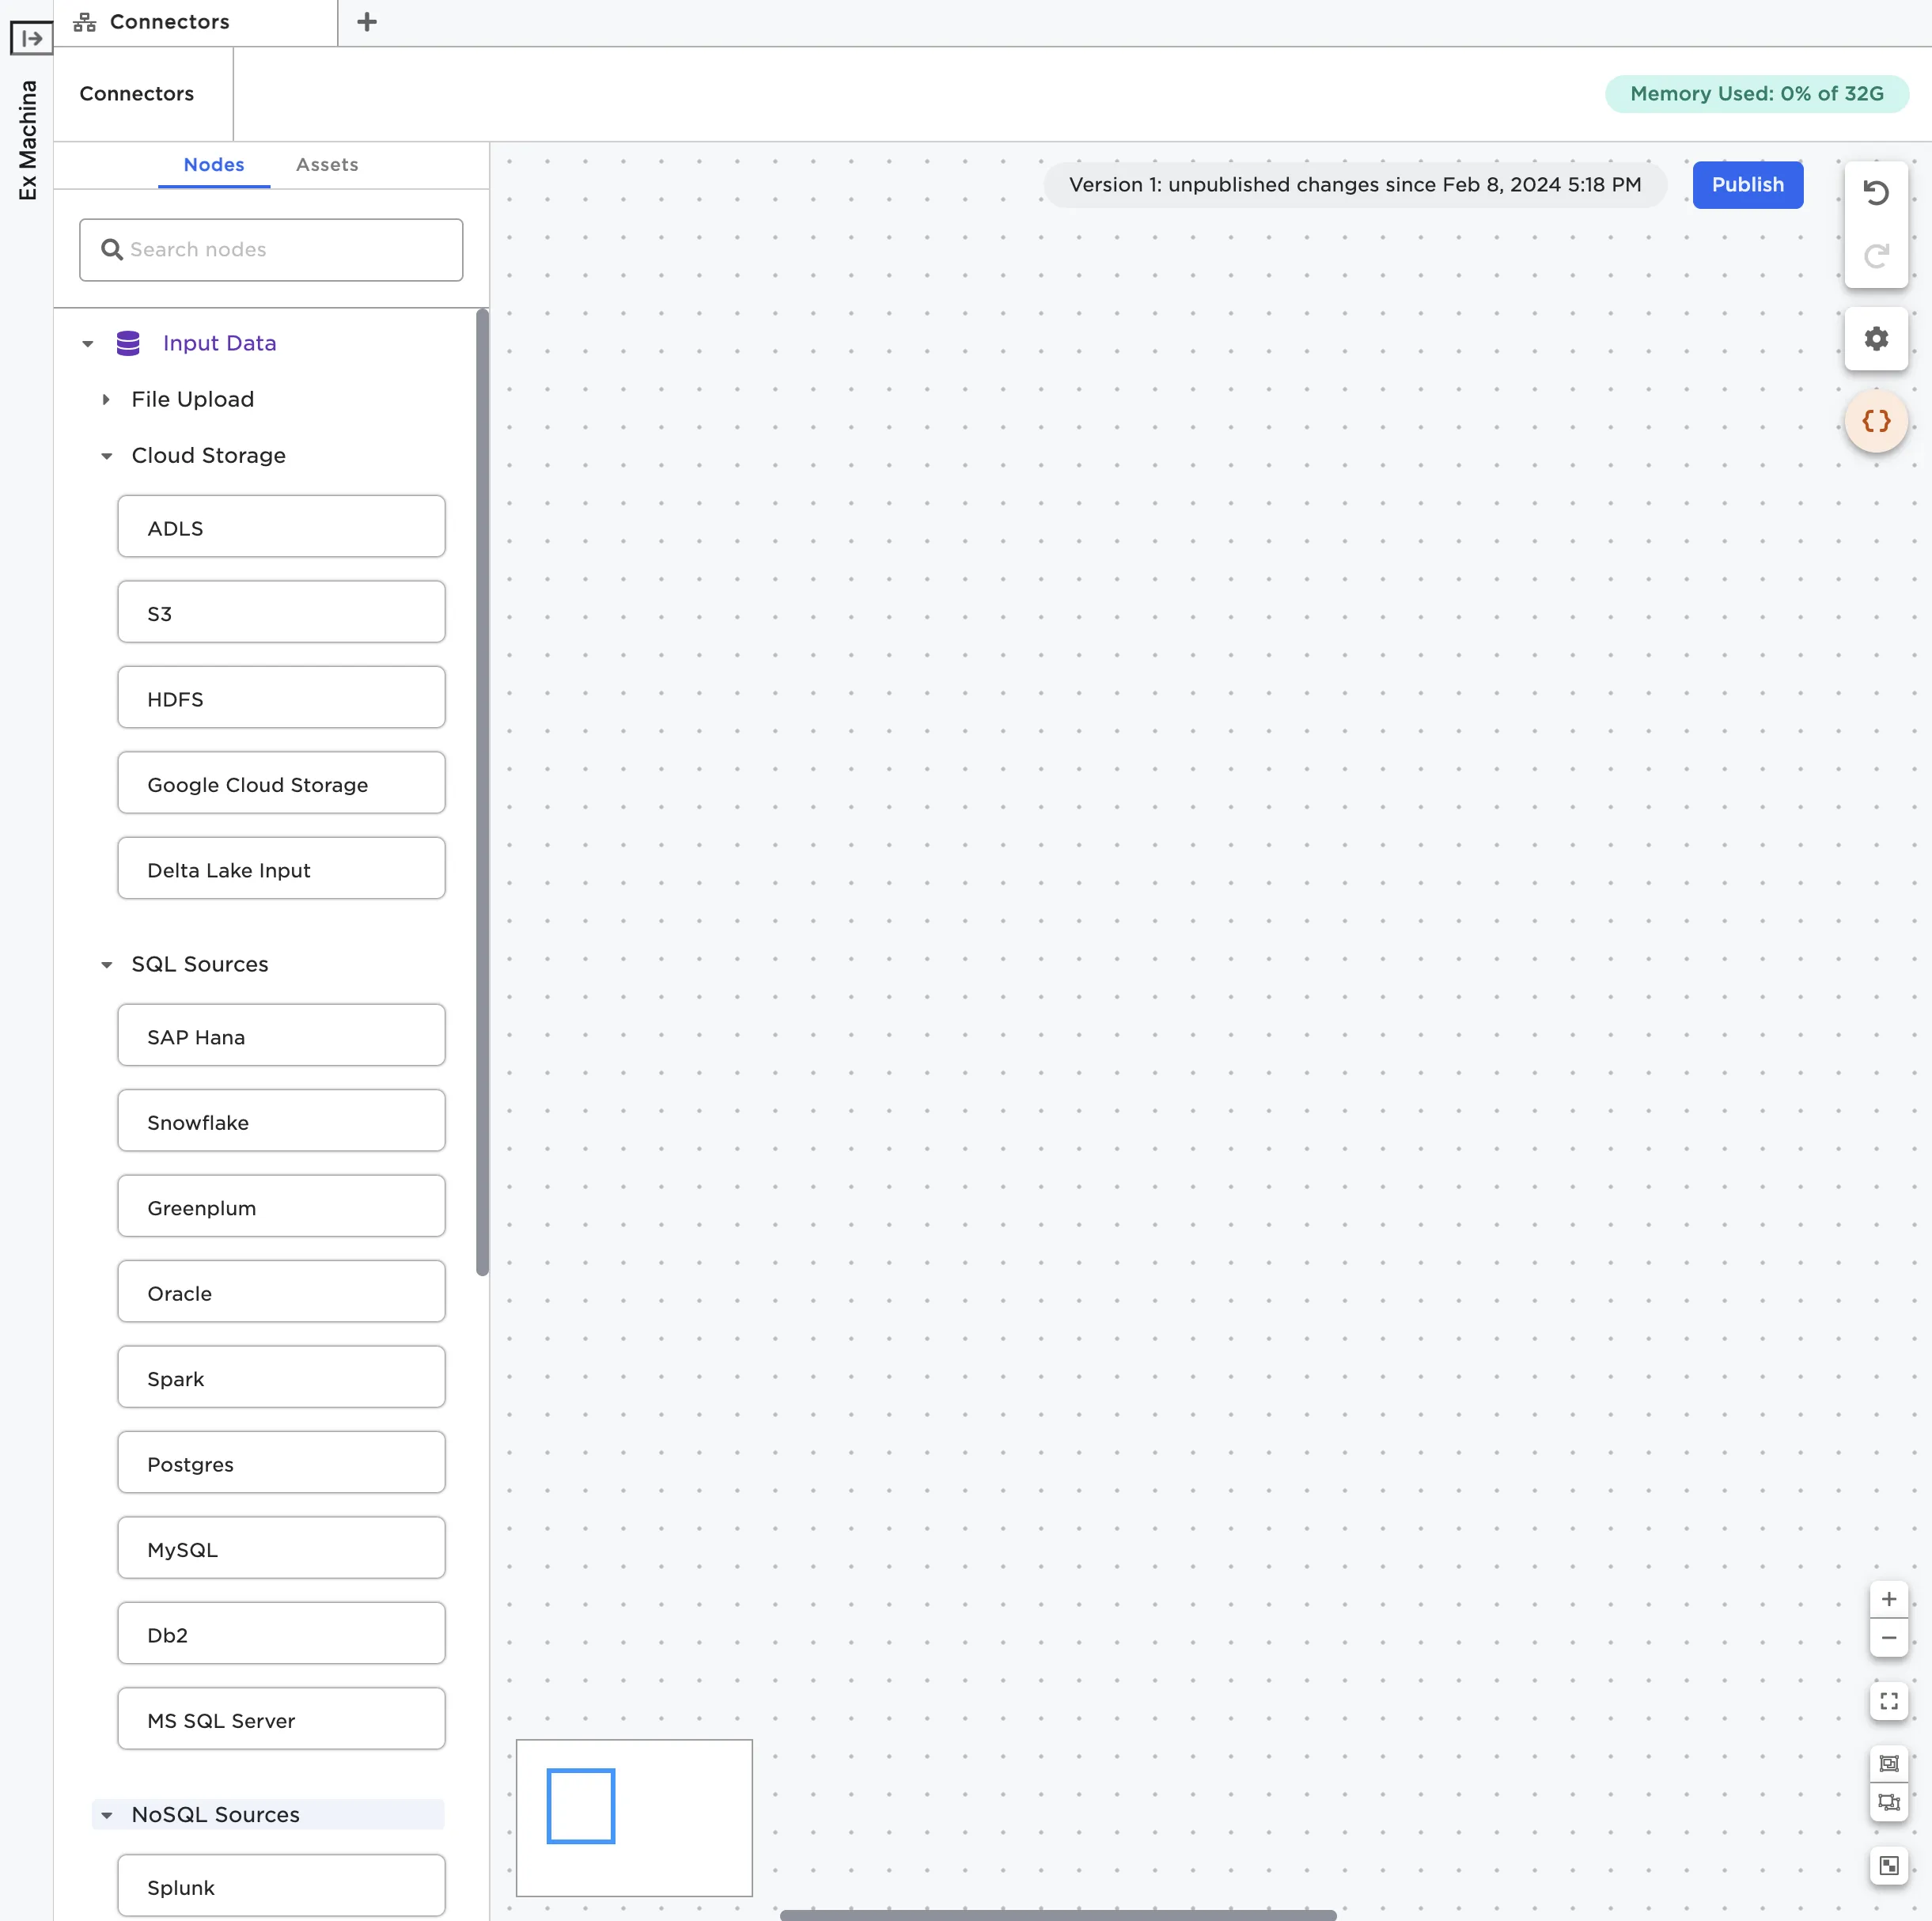
Figure 1: Relevant Input Data nodes
Once you've identified the node that corresponds to the source you'd like to upload from, drag it onto the canvas. For example, if you wanted to upload data from Snowflake, drag a Snowflake node onto the canvas. From there, you can either configure the node using the sidebar or double click on the node to open it in a full-screen view.
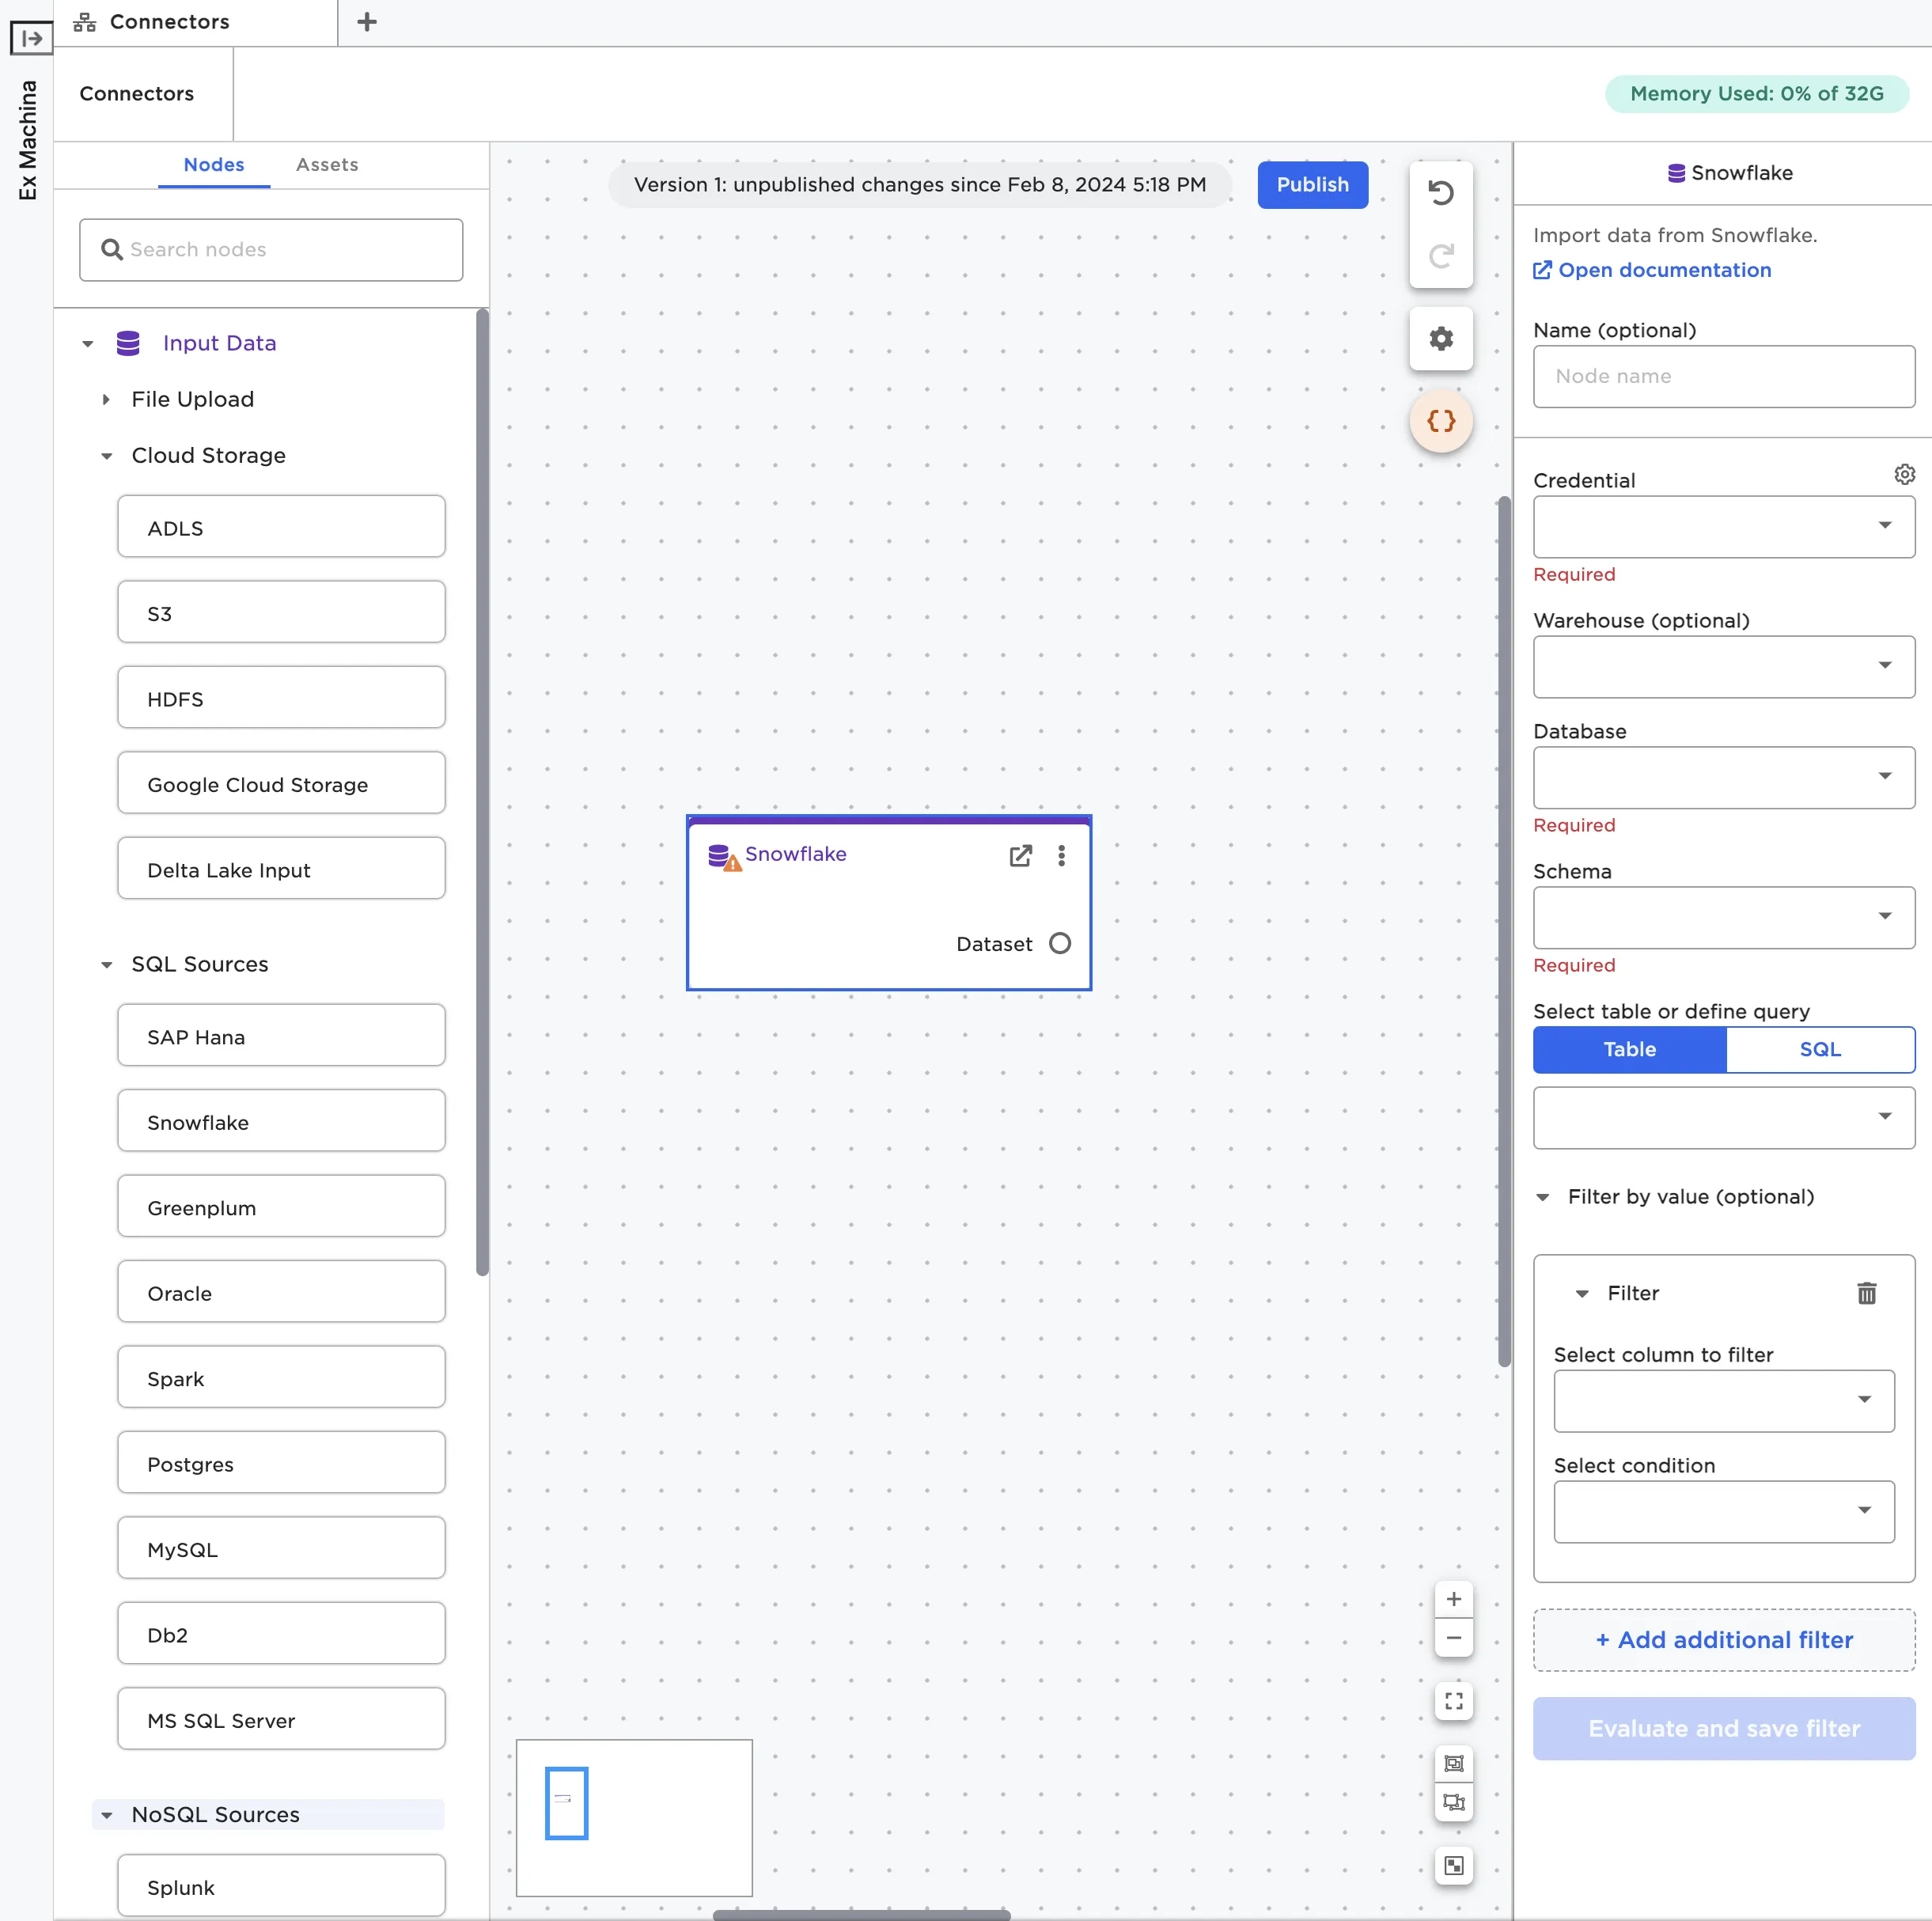
Figure 2: A Snowflake node on the canvas
Enter credentials
In order to establish a connection to the source system, you have to provide credentials within Visual Notebooks. From the node configuration panel, select the gear icon beside the Credential field. When the popup modal appears, select the plus sign to add a new credential.
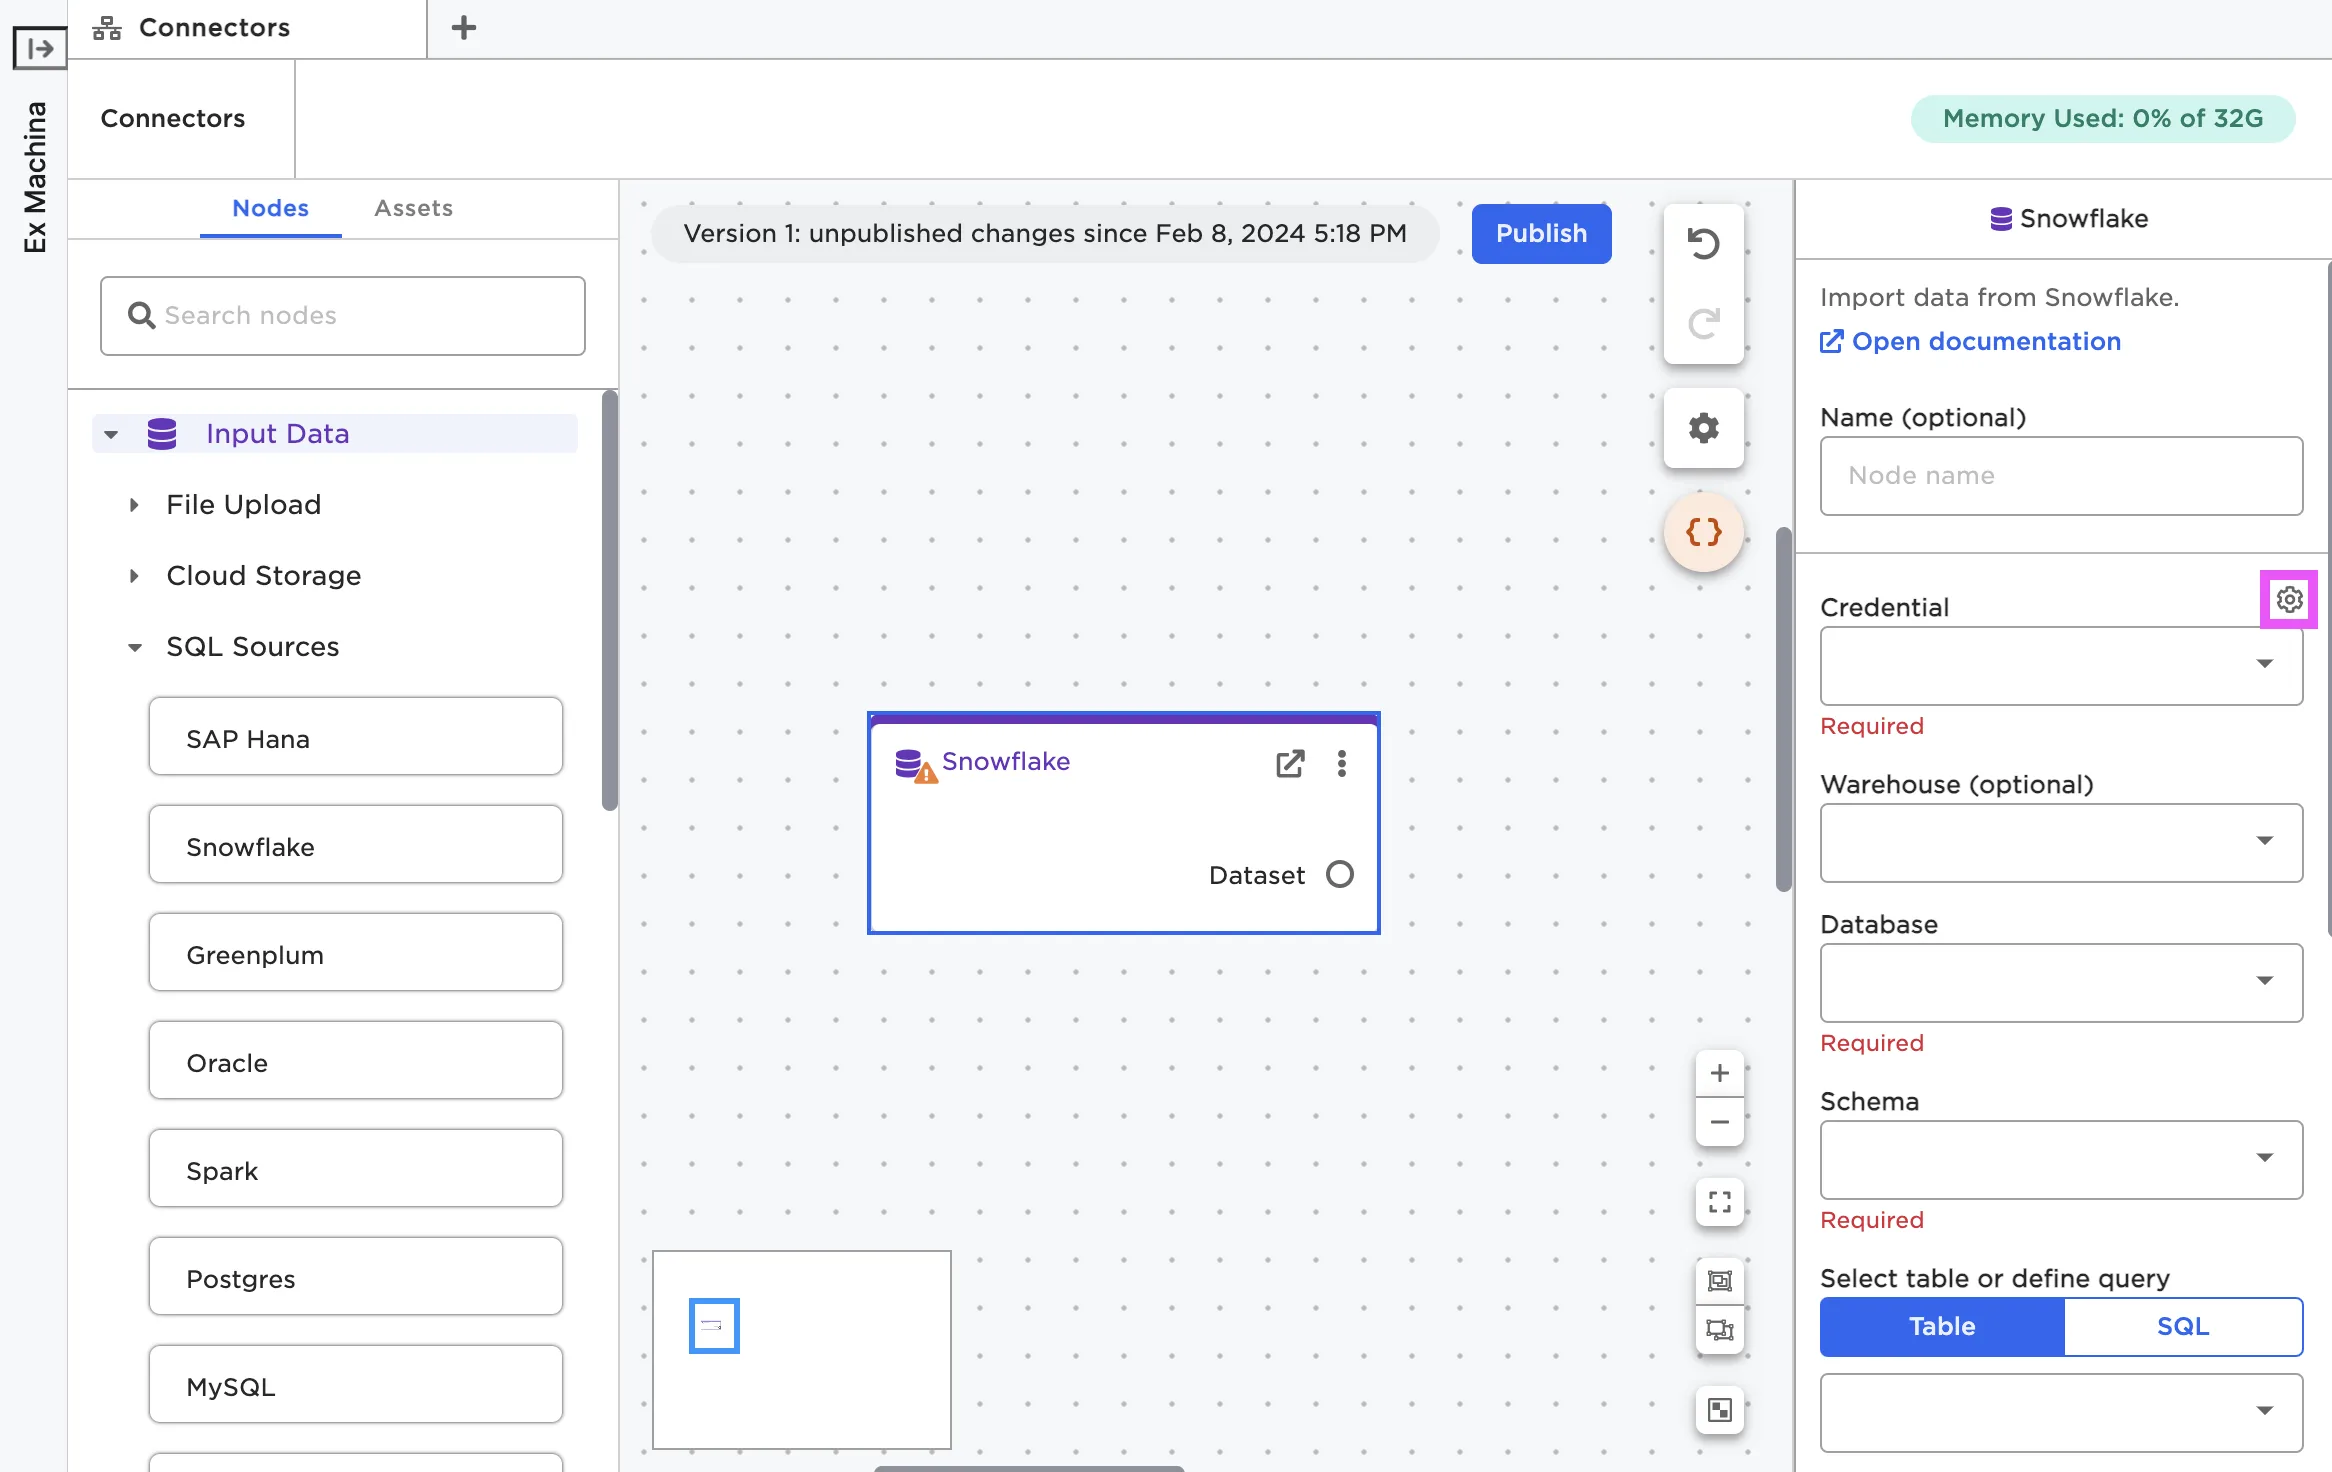
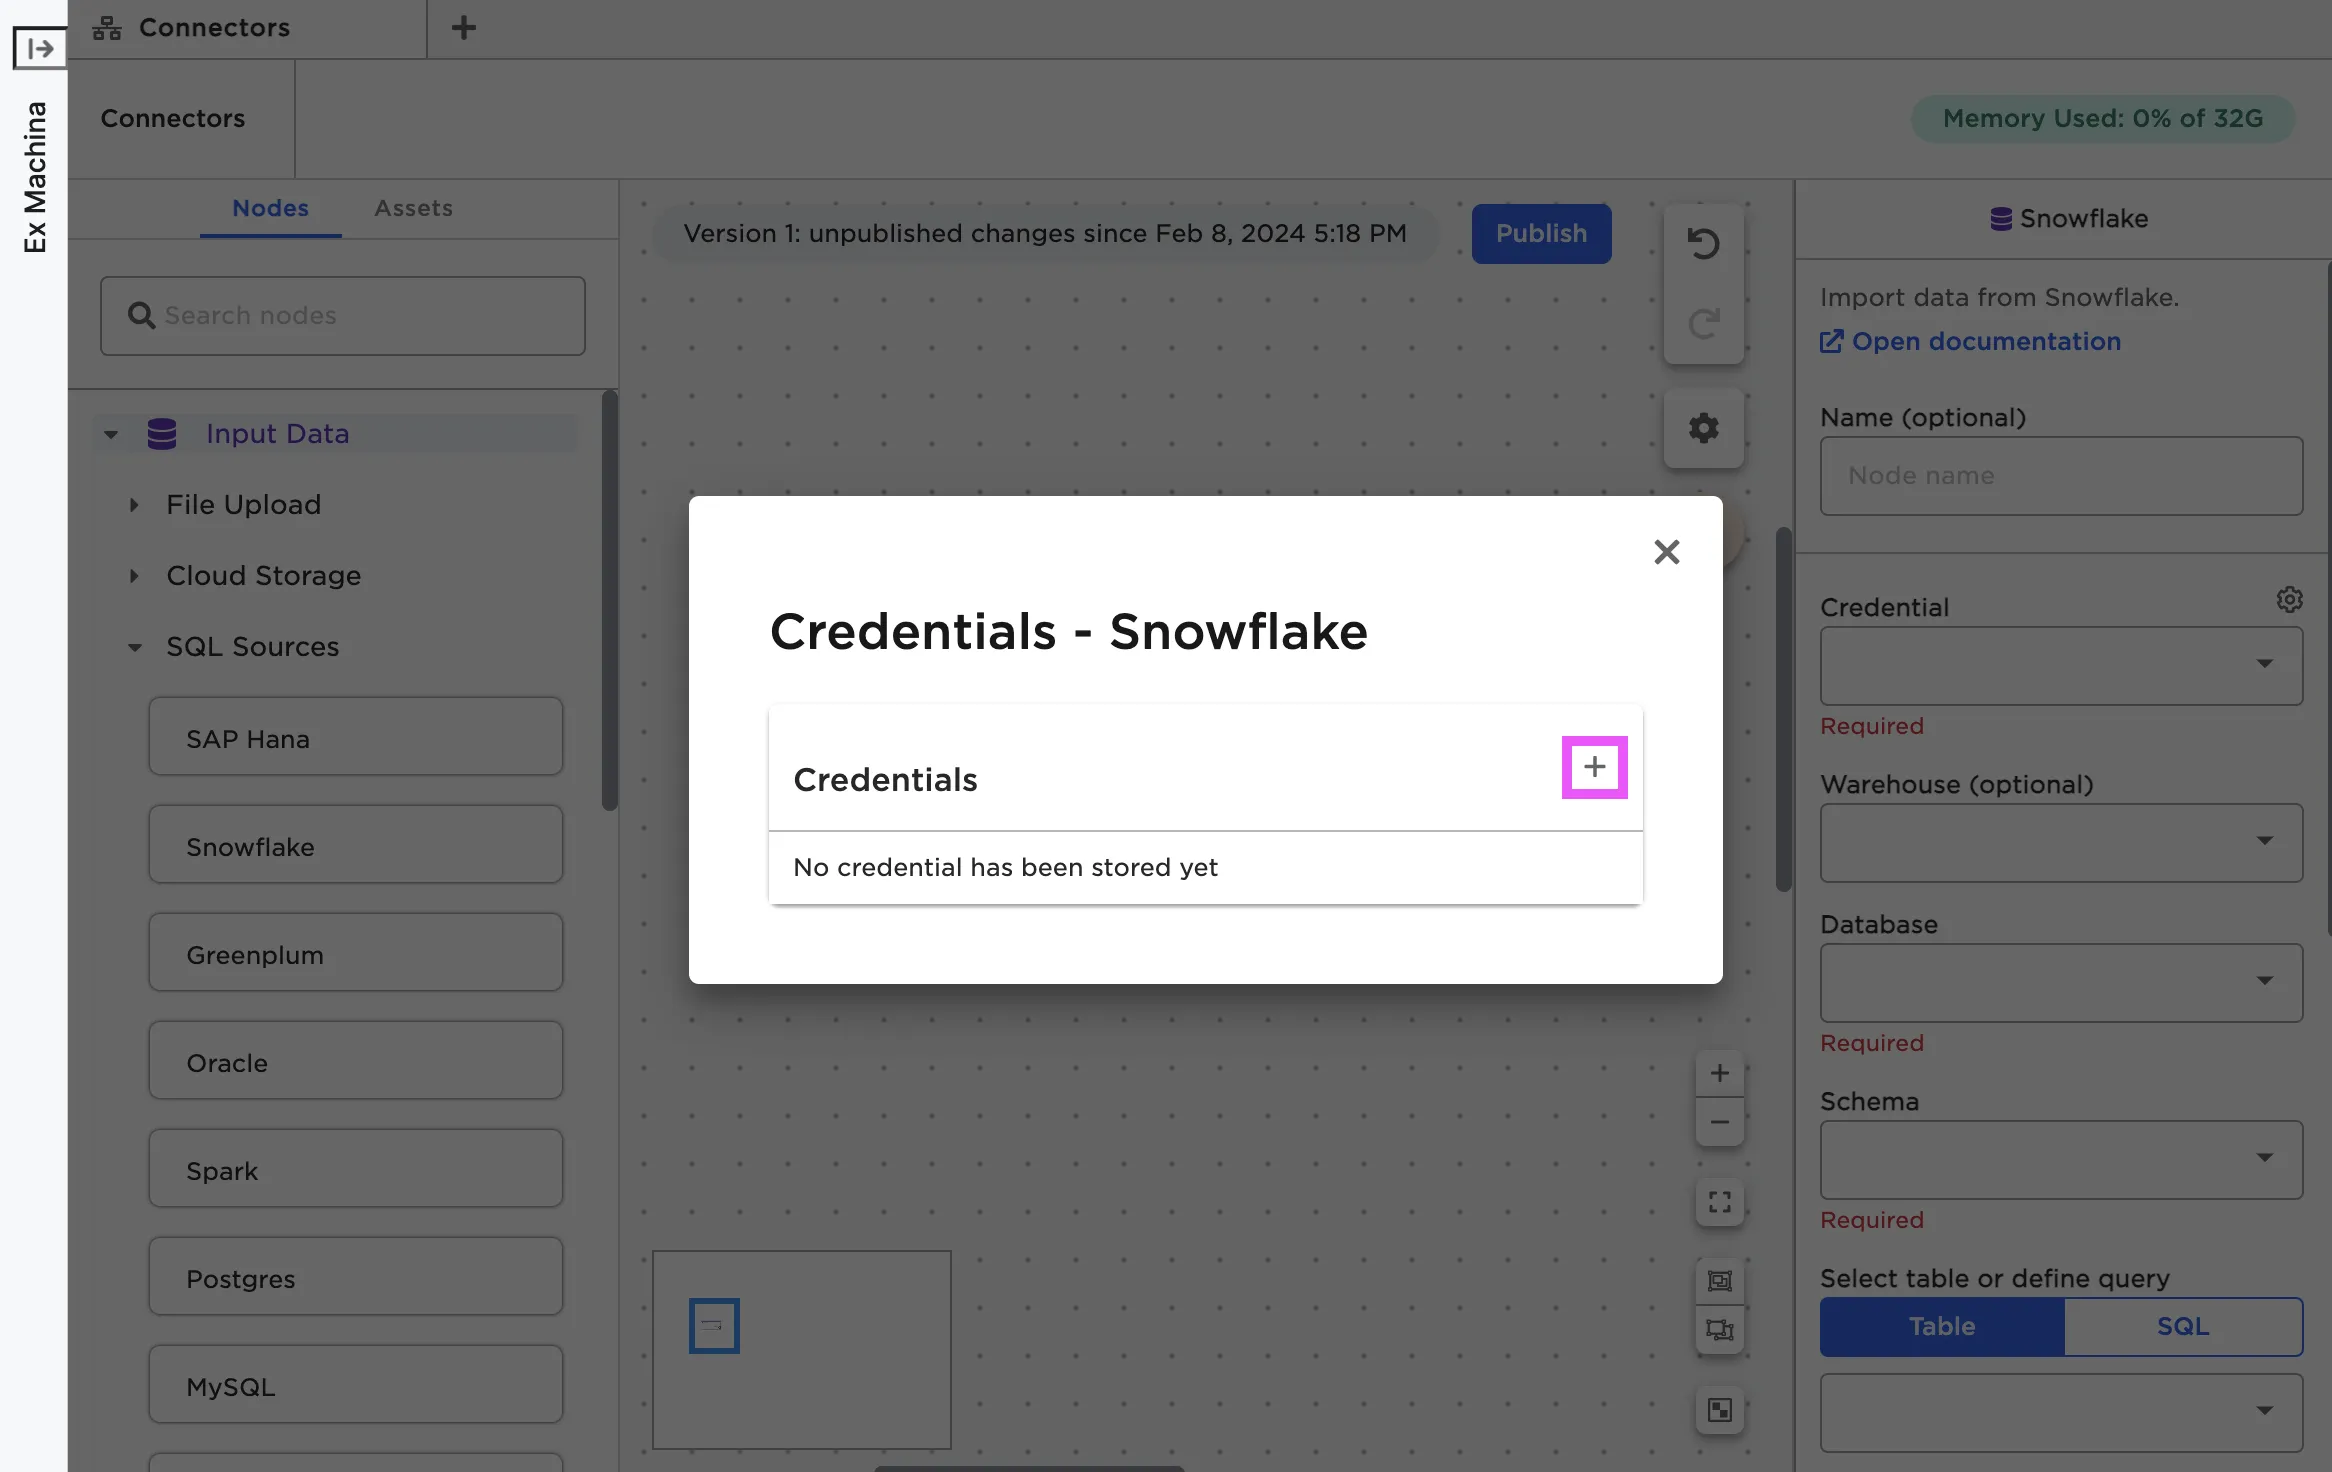
Figure 3: Open the modal to enter new credentials
Each node requires slightly different information. For details about the fields required for the specific node you're using, see the documentation for that node.
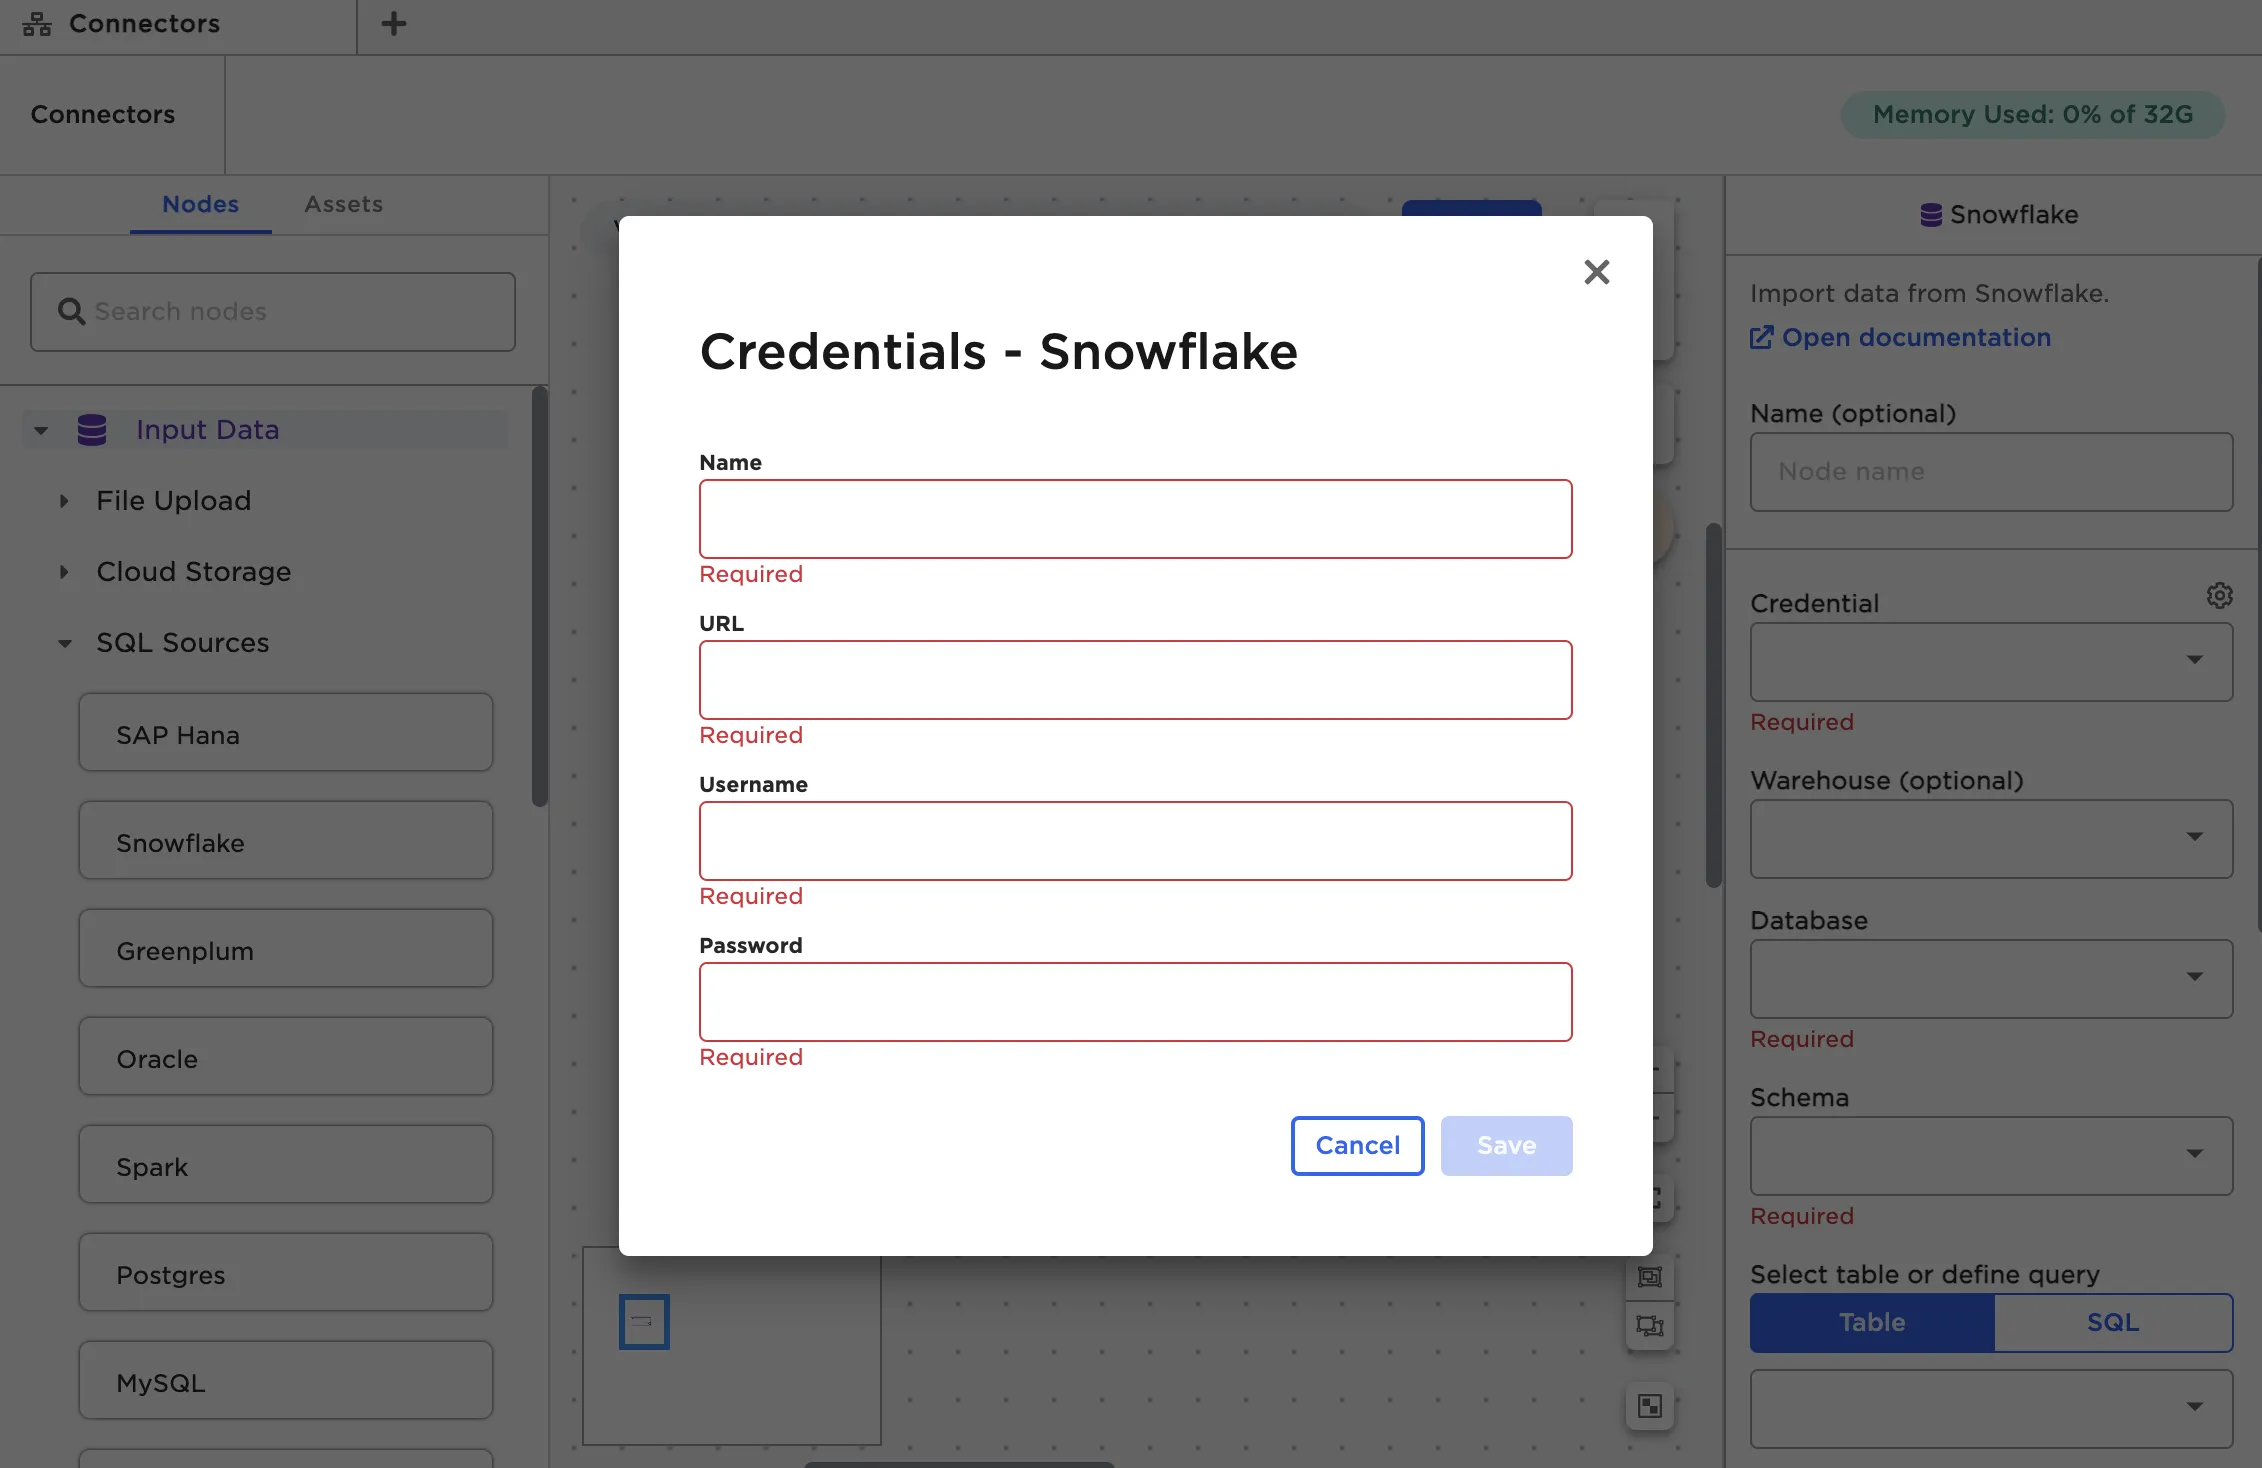
Figure 4: The fields required to establish a connection with Snowflake
Once you've entered credentials, select Test connection to make sure Visual Notebooks can establish a connection to the source system using the given credentials. Once you've verified the credentials work, select Save.
The REST node does not require credentials. To use the REST node, enter the URL of the REST API endpoint you'd like to access.
Upload data
Once you've entered credentials and saved them, you can import data from the source system. Different nodes have different ways of specifying the data to upload. Cloud Storage nodes have a Path field that opens a modal where you can explore the data in the source system and select the data you'd like to upload. Other nodes require you to specify a specific database and table within that database to upload, or write a SQL query to return the desired data. For more information about the fields required for a specific node, see that node's documentation.
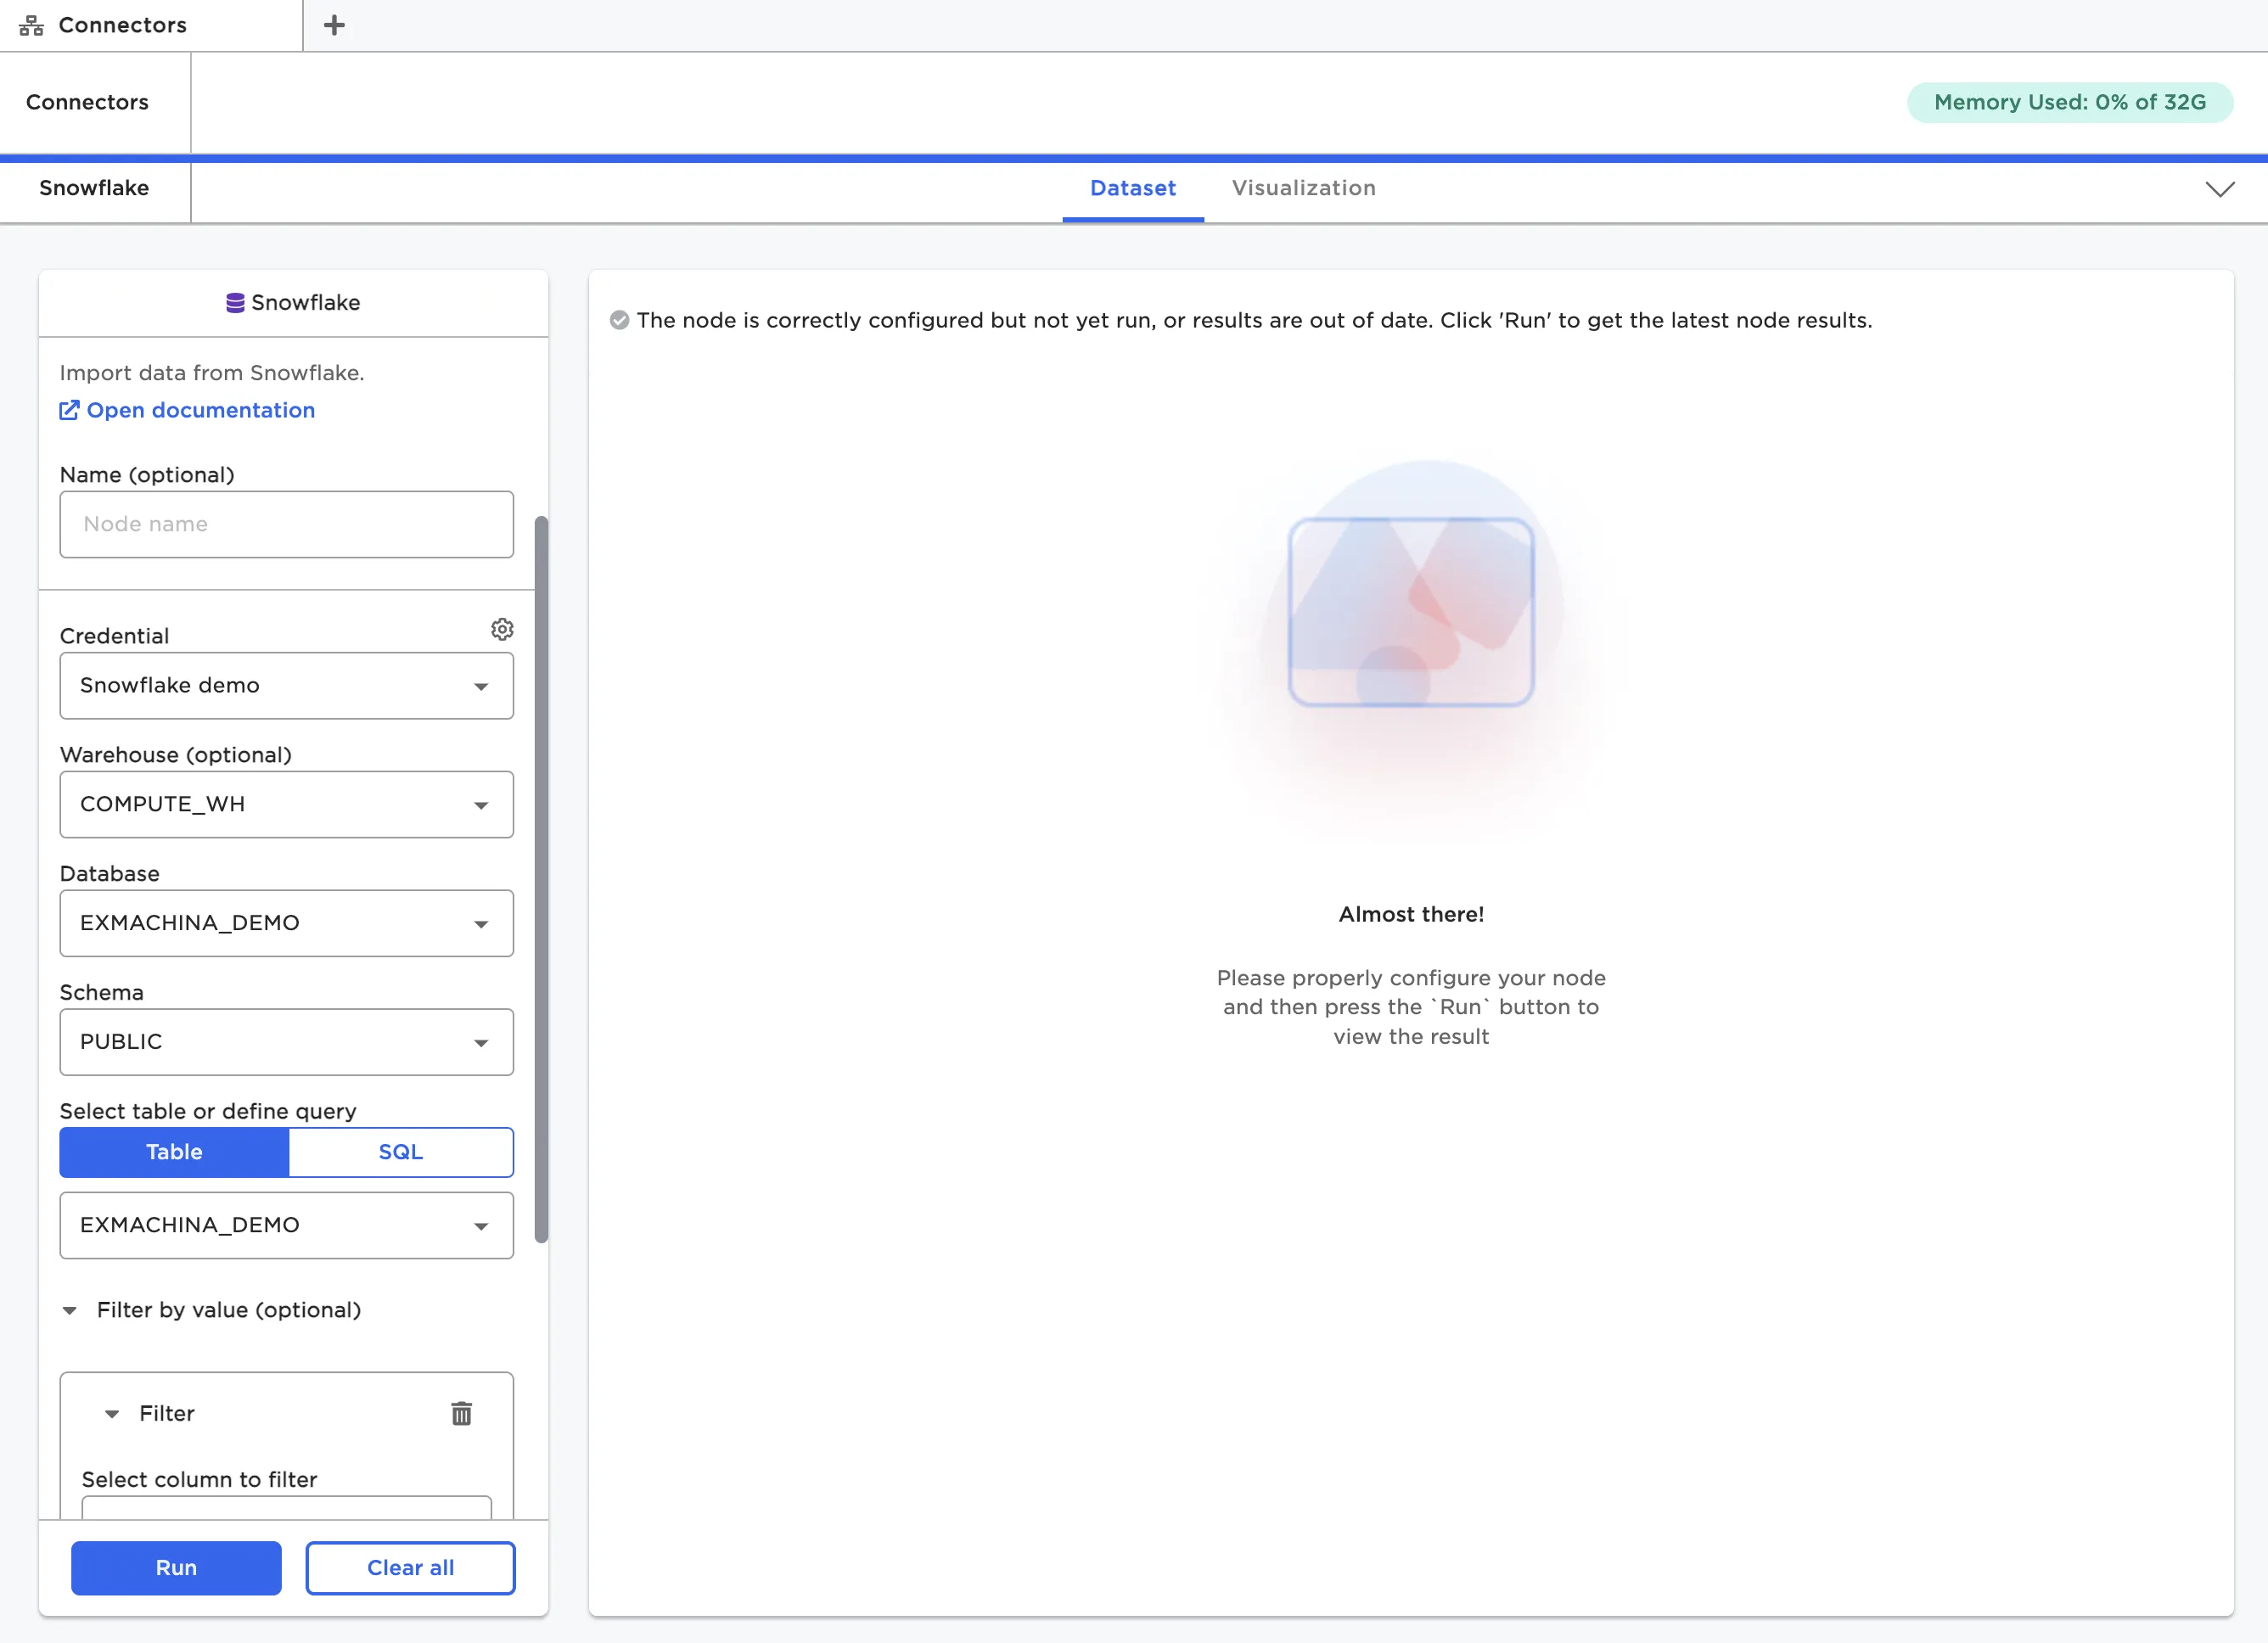
Figure 5: Selecting data to upload from Snowflake
Once you've selected data, you may see other configuration fields appear. Visual Notebooks automatically creates a dataframe for your data based on its structure. If your data has a non-standard structure, you may need to use additional configuration options to ensure that the resulting dataframe matches your data.
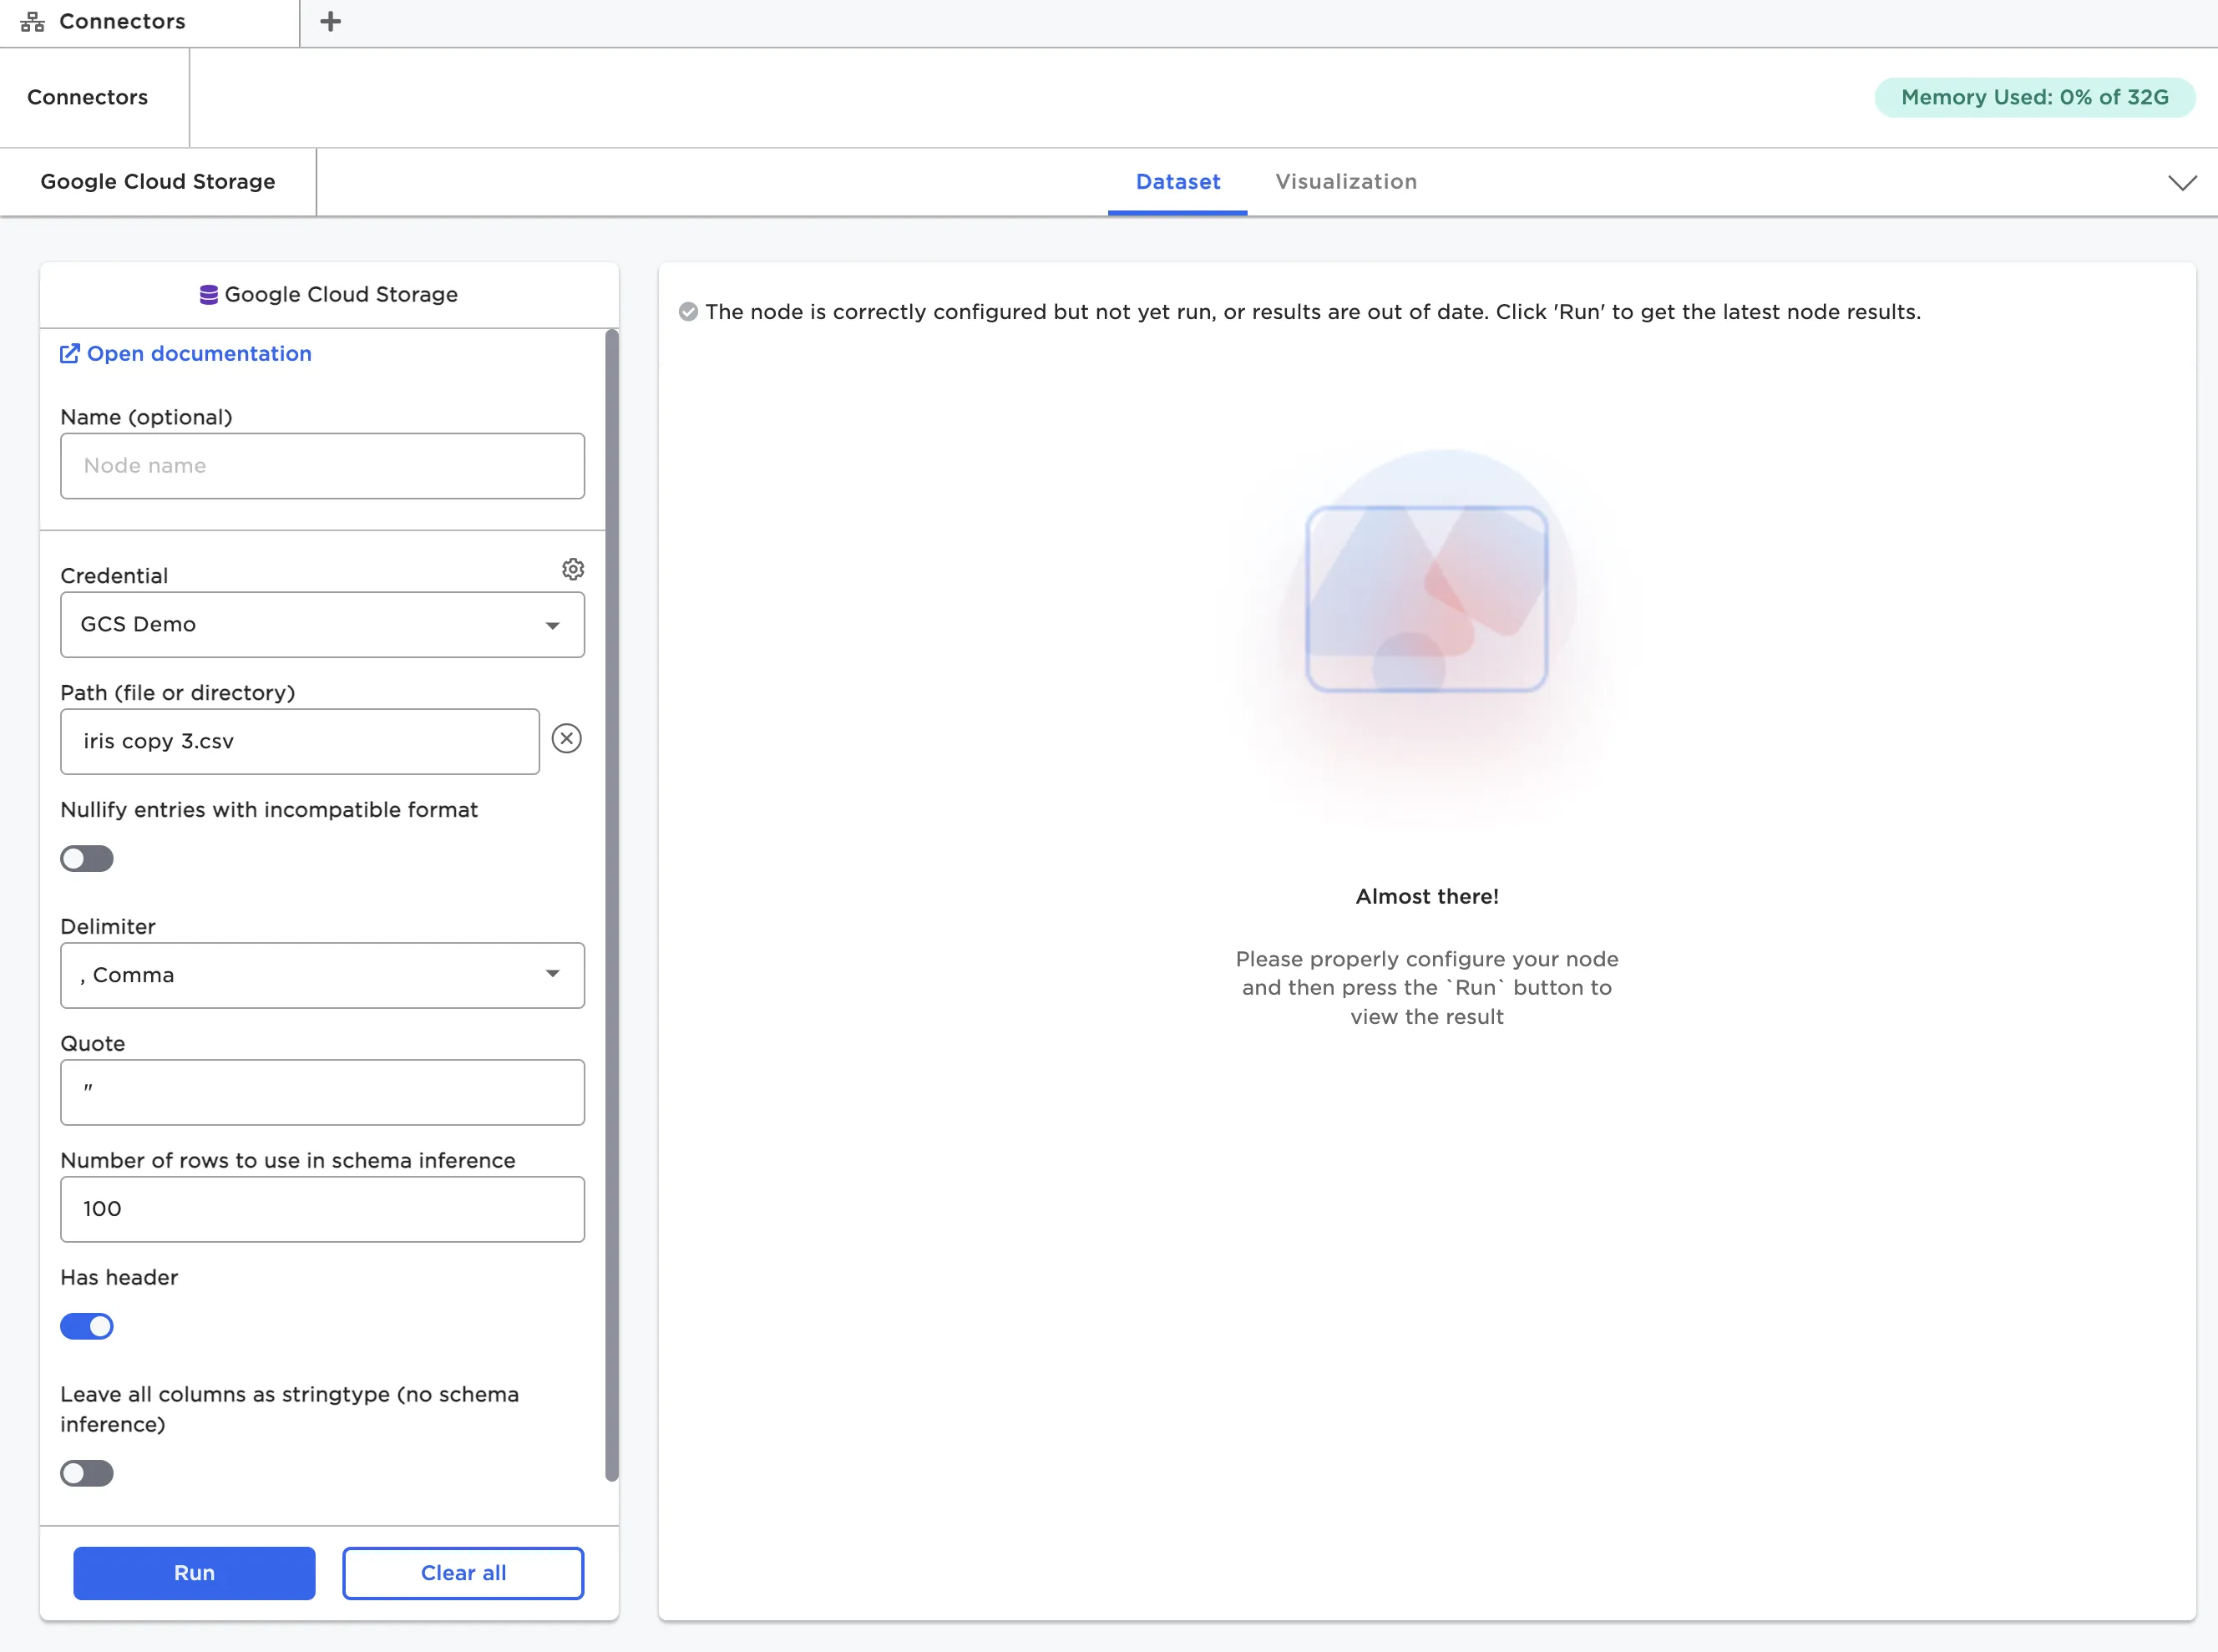
Figure 6: Configuration fields for the Google Cloud Storage node
Most nodes also give you the option to filter the data before importing it. You can filter by a certain value or use a previously created parameter. For more information about parameters, see the Parameters section.
View the dataframe
After you've uploaded files, you can view and interact with the resulting dataframe. To see the dataframe, you must open the node in the full-screen view. You can double click on the node, or select the arrow icon in the right corner of the node.
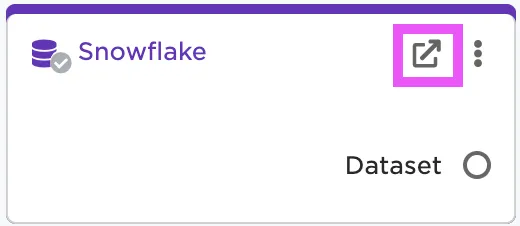
Figure 7: Open the full-screen view of a node
If the data uploaded successfully and the node is correctly configured, you should be able to select the blue Run button at the bottom of the configuration panel. After you select Run, the dataframe appears to the right.
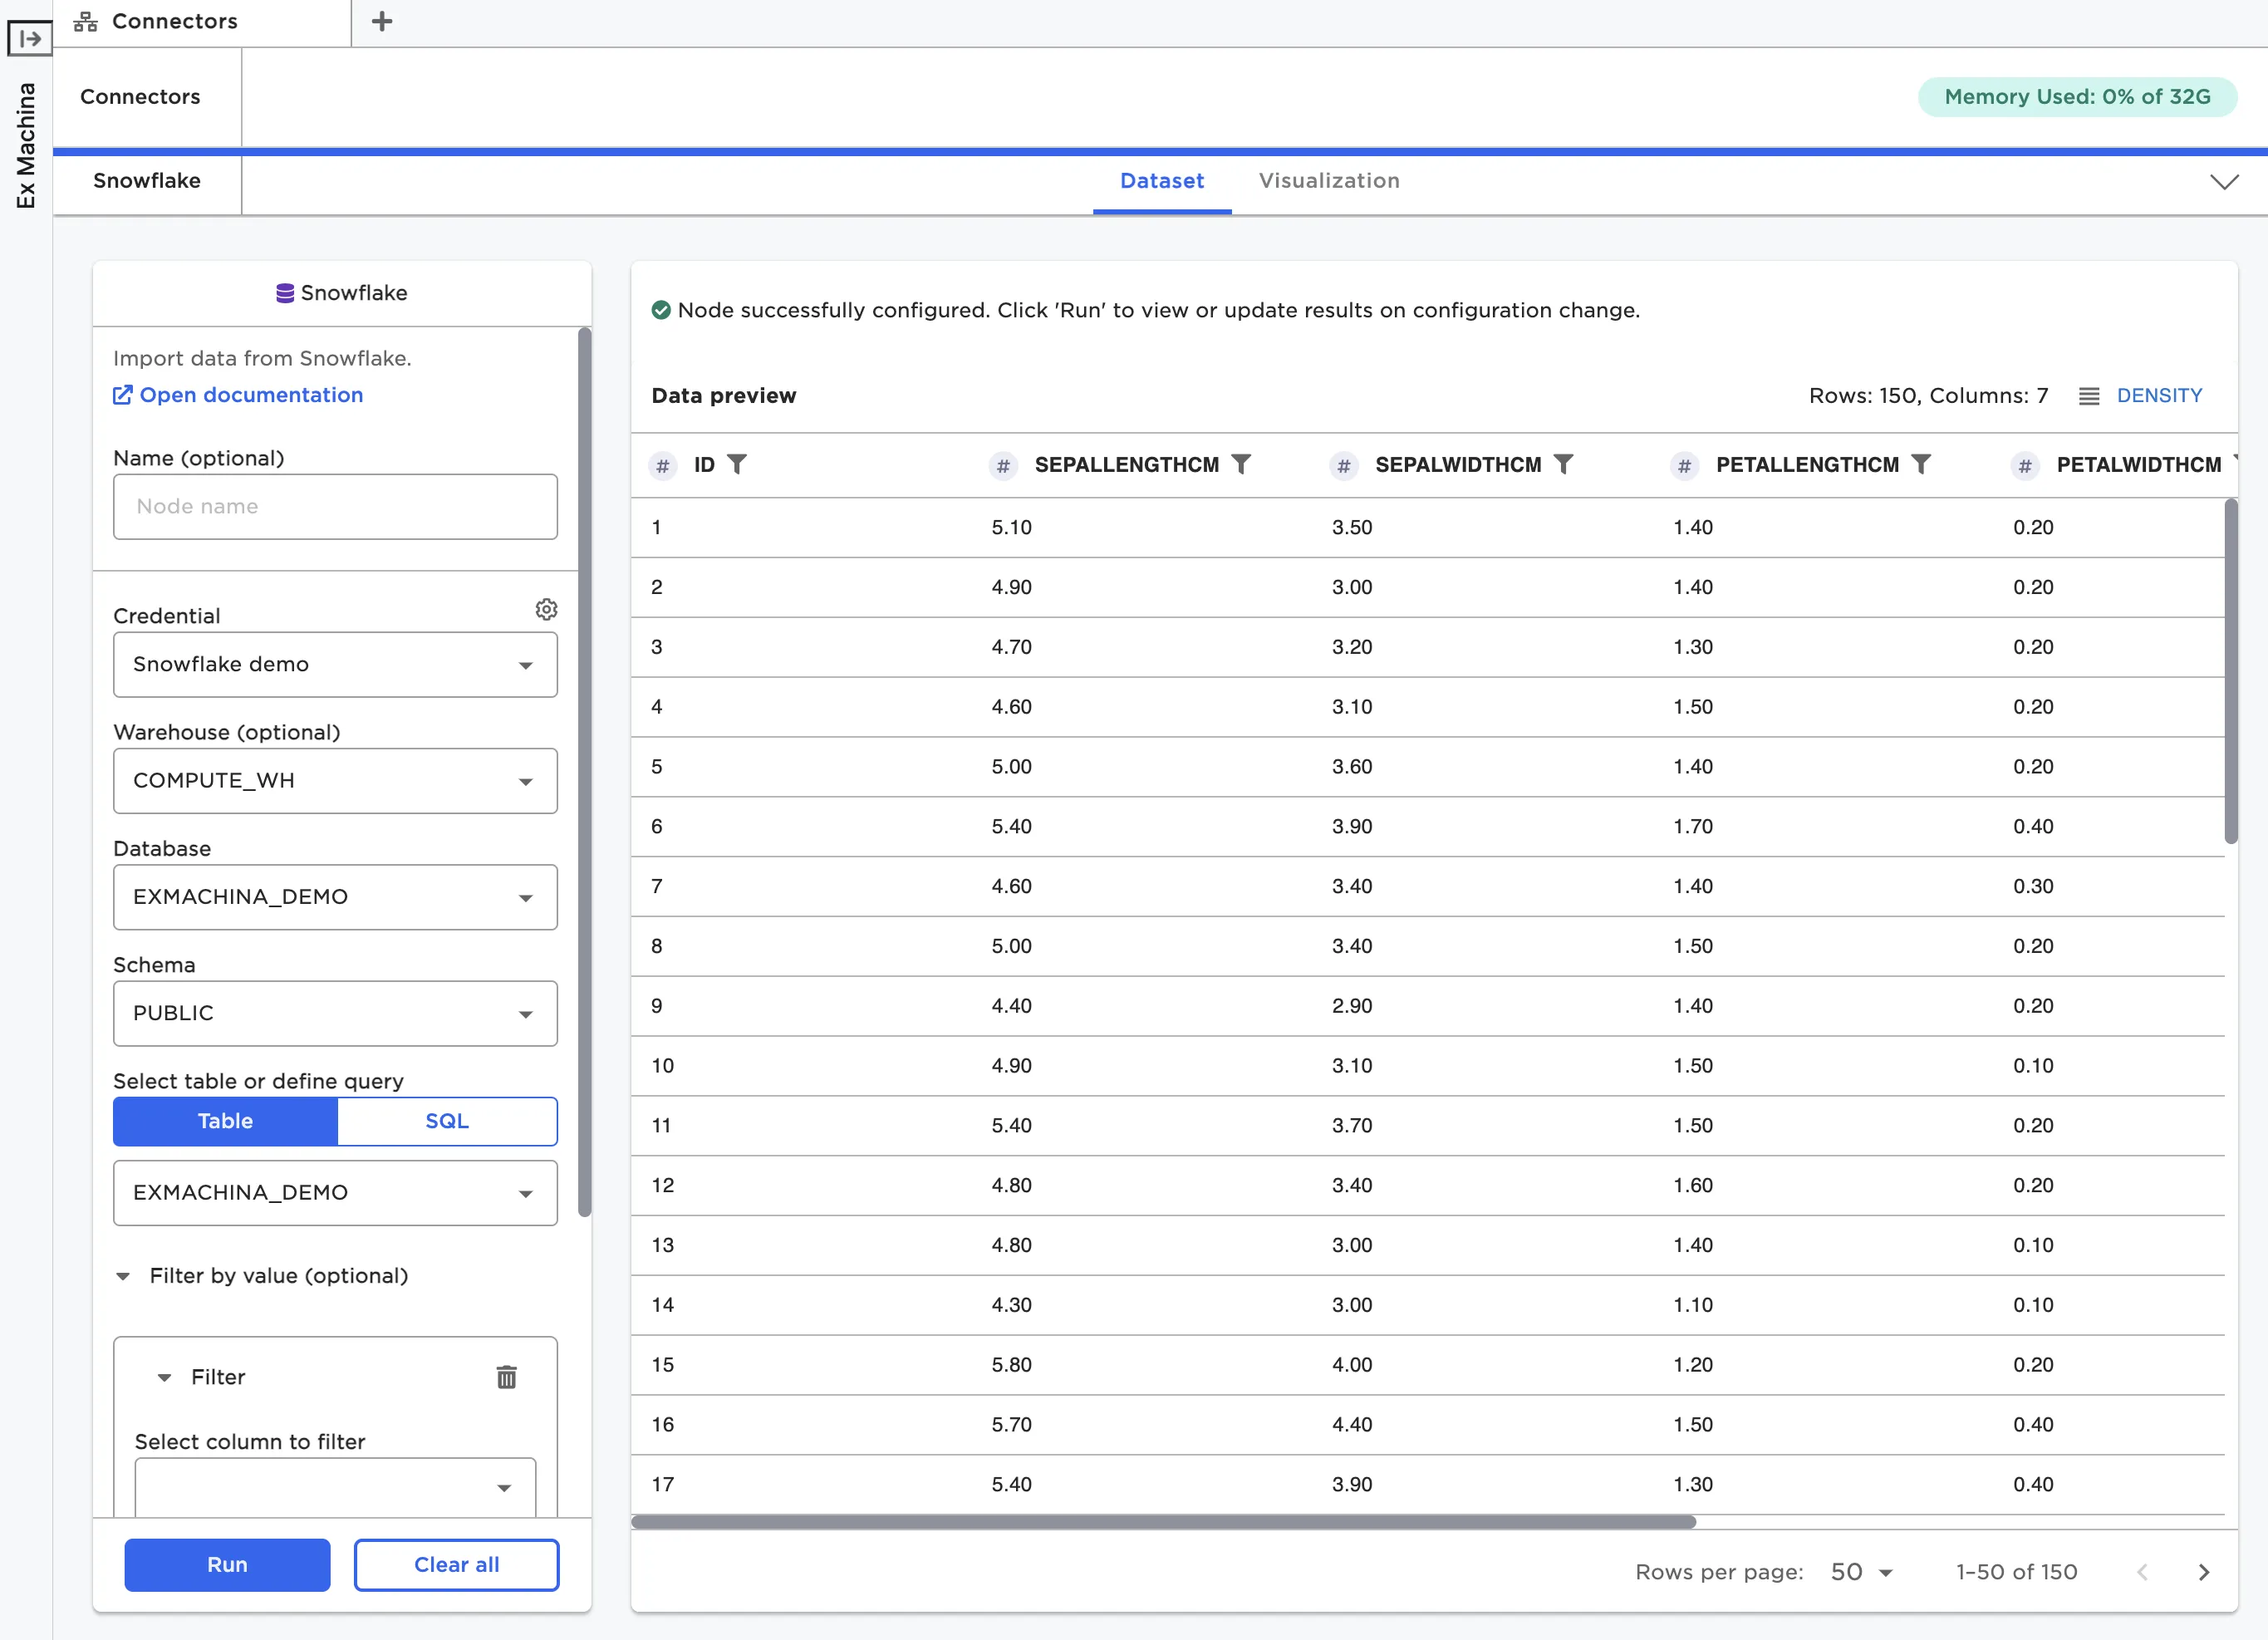
Figure 8: View the dataframe within a node
For more information about interacting with dataframes, see Working with Nodes